Instagram in less than a day using Creo ;)


Our journey in the SelfieApp world is becoming more and more interesting.
Until now, we learned:
- How to take pictures
- How to apply a saturation filter before shooting
- How to browse our photos from the iPhone camera roll
If you missed my previous articles, and you want to start learning Creo from scratch, download the Creo IDE, then go to the Creo by examples blog section and read my previous articles:
- Welcome to Creo by examples
- How to create a selfie app with two lines of code
- How to work with Camera Roll, TabBar and CreoPlayer
- 6 minutes to create a cooler SelfieApp with a slider and squarish pictures.
What we are learning today
Today we want to do a step forward and make our SelfieApp more sophisticated playing with graphic filters. We want to take a picture, let the user add a secondary visual effect choosing from a filter library, then save or selfie to the camera roll. Among hundreds of possible filters available, we want to provide the user with three predefined effects: Comic, Crystallize, and Blur.
Before start reading this new post, be sure you downloaded the Creo project we are going to improve.
This time we'll do some "serious coding" adding something like "twenty-five new lines of code". We are also going to introduce a powerful new Creo class called DataSet, and a new UI control called Carousel. To make the building process as smooth as possible, I want to talk about these two components first.
The Carousel UI Control
The Carousel element can be used to display images in a row that the user can navigate by swiping left and right in the iPhone.
We are going to use this UI control to let the user choose what visual effect to apply to the photo he/she just taken.
The DataSet class
A DataSet is a collection of data organized in rows and columns. DataSets can be linked to real data on a database, or they can be filled up with data programmatically. DataSets are a powerful concept in Creo. Many UI controls can be linked to a DataSet at design time, letting Creo do all the magic. In our case, we are going to use a DataSet to store the three visual effects we want to load in a Carousel control.
Connecting a new window
We are now ready to go.
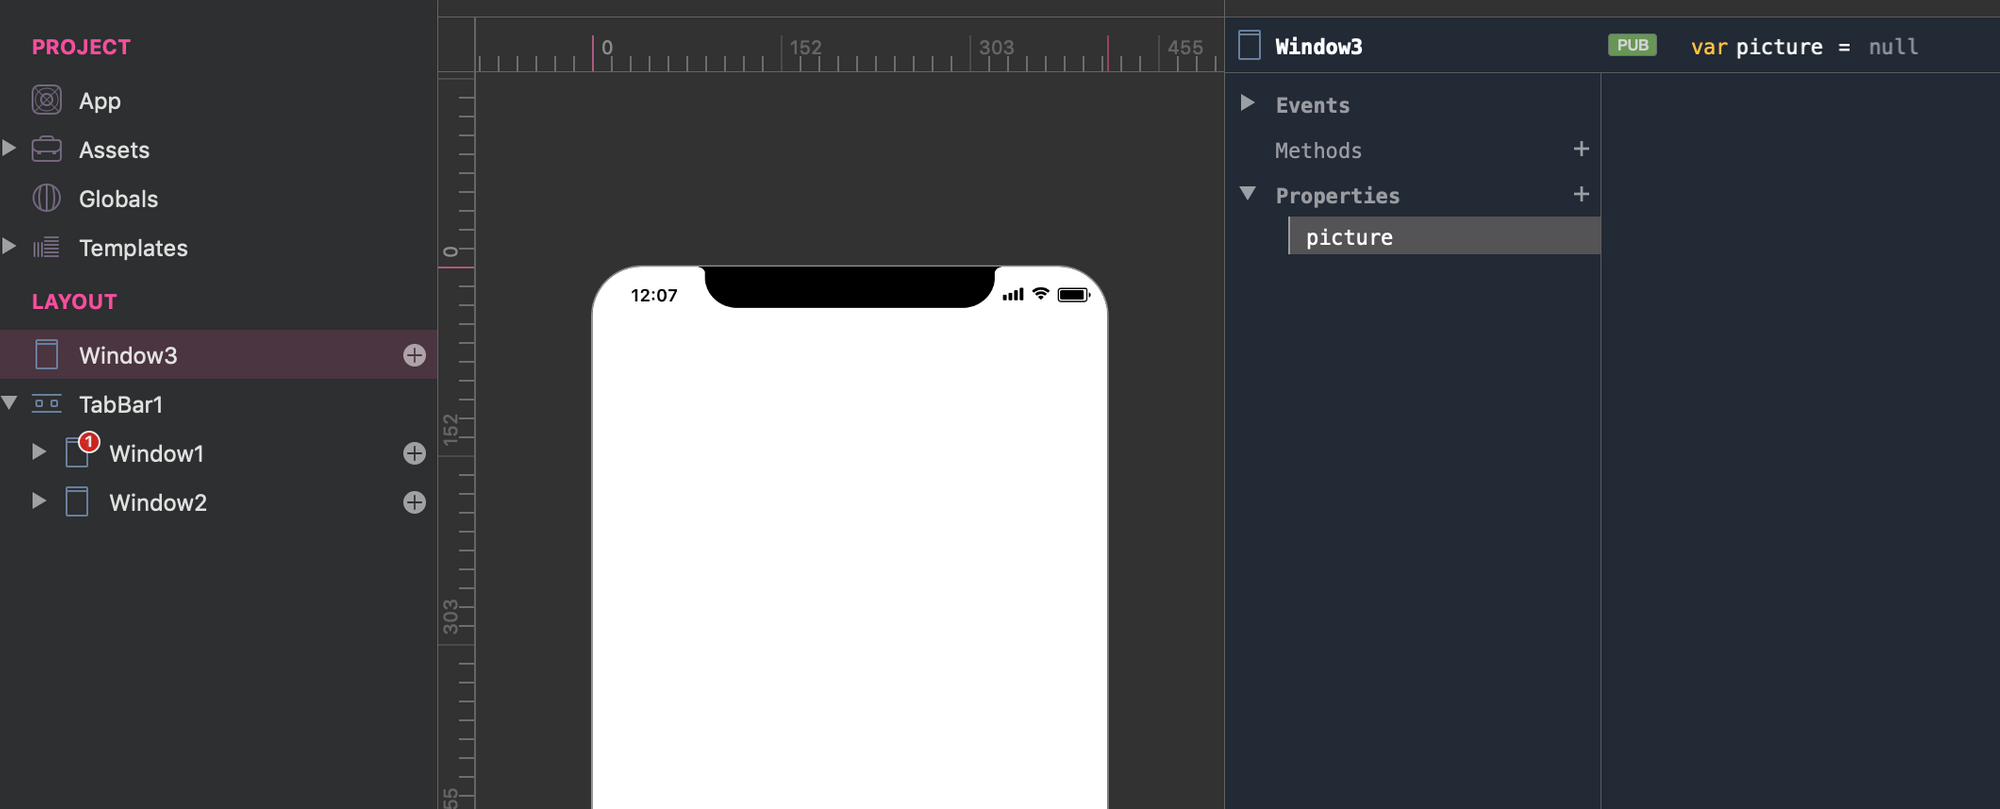
We want to start the SelfieApp, calibrate the Saturation parameter through a slider, take a picture, and then open a new Window. This Window will show the photo and a list of visual effects (in a carousel control) we might apply. Let's drop a new Window container (called Window3) onto the Layout panel at the same hierarchical level of TabBar1. This Window is going to show the picture we took from Window1, so it needs to store the captured image in a property. We learned that UI elements can have properties.
Let's define this property in Window3 and call it picture.
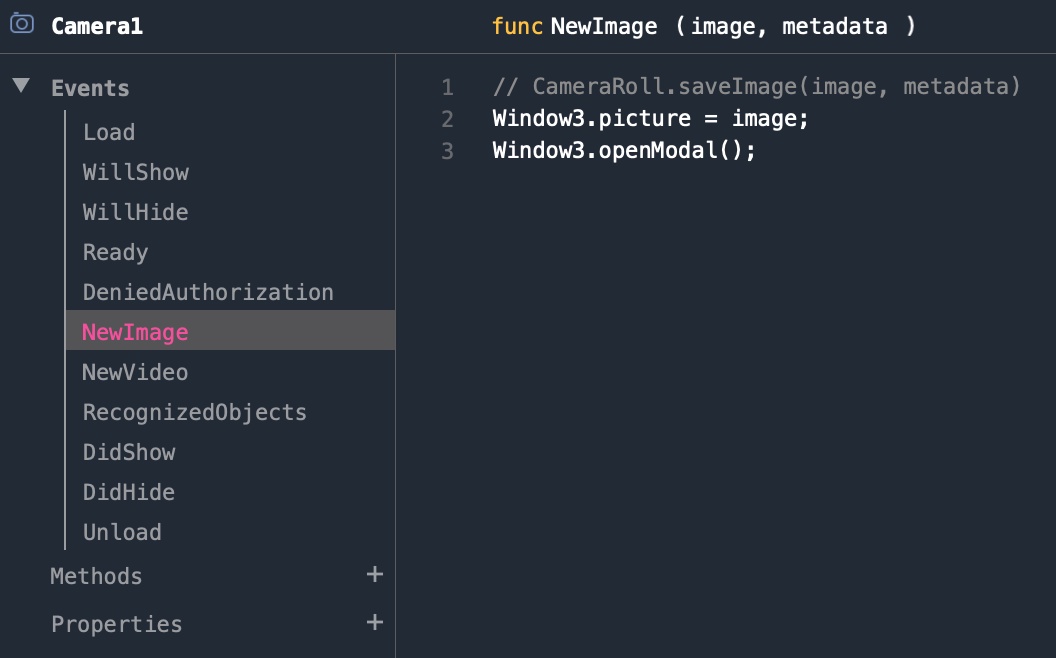
Now get back to Camera1 in Window1, and make some changes to its NewImage event. We don't want to save the picture in the camera roll for now, but we want to pass it to Window3 and open that Window as a modal dialog:
Now run the app in the Creo Simulator and push the shooting button to test that everything works fine (you shoot a picture, and an empty Window3 showed up).
How to fill up a DataSet programmatically
We created Window3 and it's still empty. We now want to show the photo preview on it, and let the user select which graphic effect to apply. Let's start.
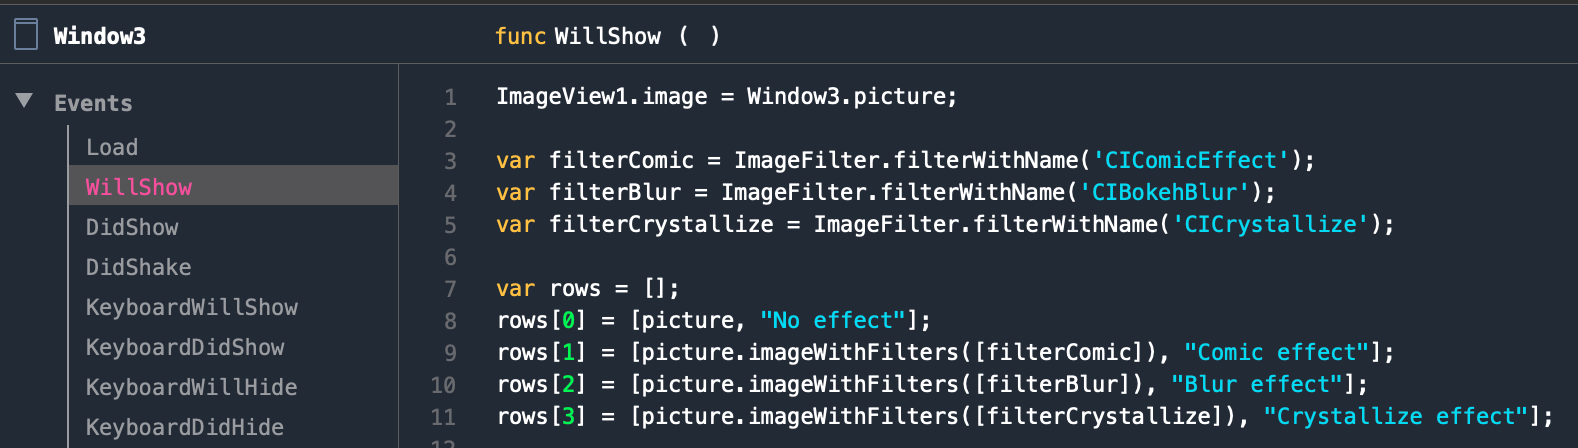
Drop the ImageView control onto Window3 — and create ImageView1. Give ImageView1 the same geometry setting you gave to the Camera1 control (both frame and constraints). Now let's bind ImageView1.image property to our photo in Window1.WillShow event.

Rerun the Simulator to check that everything works as planned, and the picture is displayed correctly on Window3.
Note that, the WillShow event is fired every time the control is displayed on the screen.
Let's retrieve Comic, Blur and Crystallize filters using the ImageFilter class method filterWithName:

A class method is a function available directly from the class itself.
Then, create a variable structured like a data set or table, with rows and columns. Each row represents a record within our data set. Let's say we want to have records structured like this:
- The attribute/column
Picturestores the original picture we took with a specific effect applied - The attribute/column
Namestores the name of the graphical effect we applied to the image.
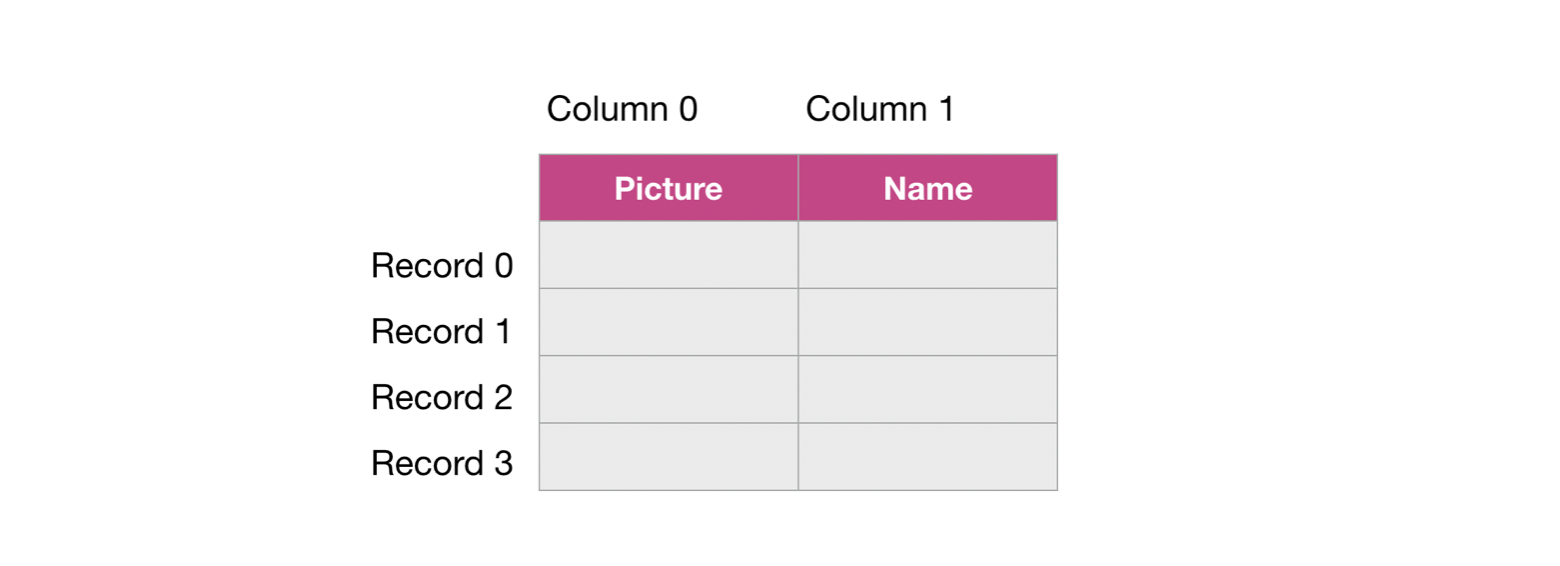
In this case, we're not going to use the column Name, but we added it to the project to help you understand better.
The resulting WillShow event of Window3 looks like this:
We are finally ready to associate a DataSet object to the Window3 hierarchy, and fill it up with the rows data structure defined above.
Drop DataSet on Window3 from then Controls List, and DataSet1 shows up in the Layout panel.
A DataSets can be configured managing some of its events, in particular:
- the event
Rowsi.e., how many rows this data set has - the event
Columnsi.e., how many columns/attributes this data set has - the event
NameForColumni.e., the name of each column in the data set.
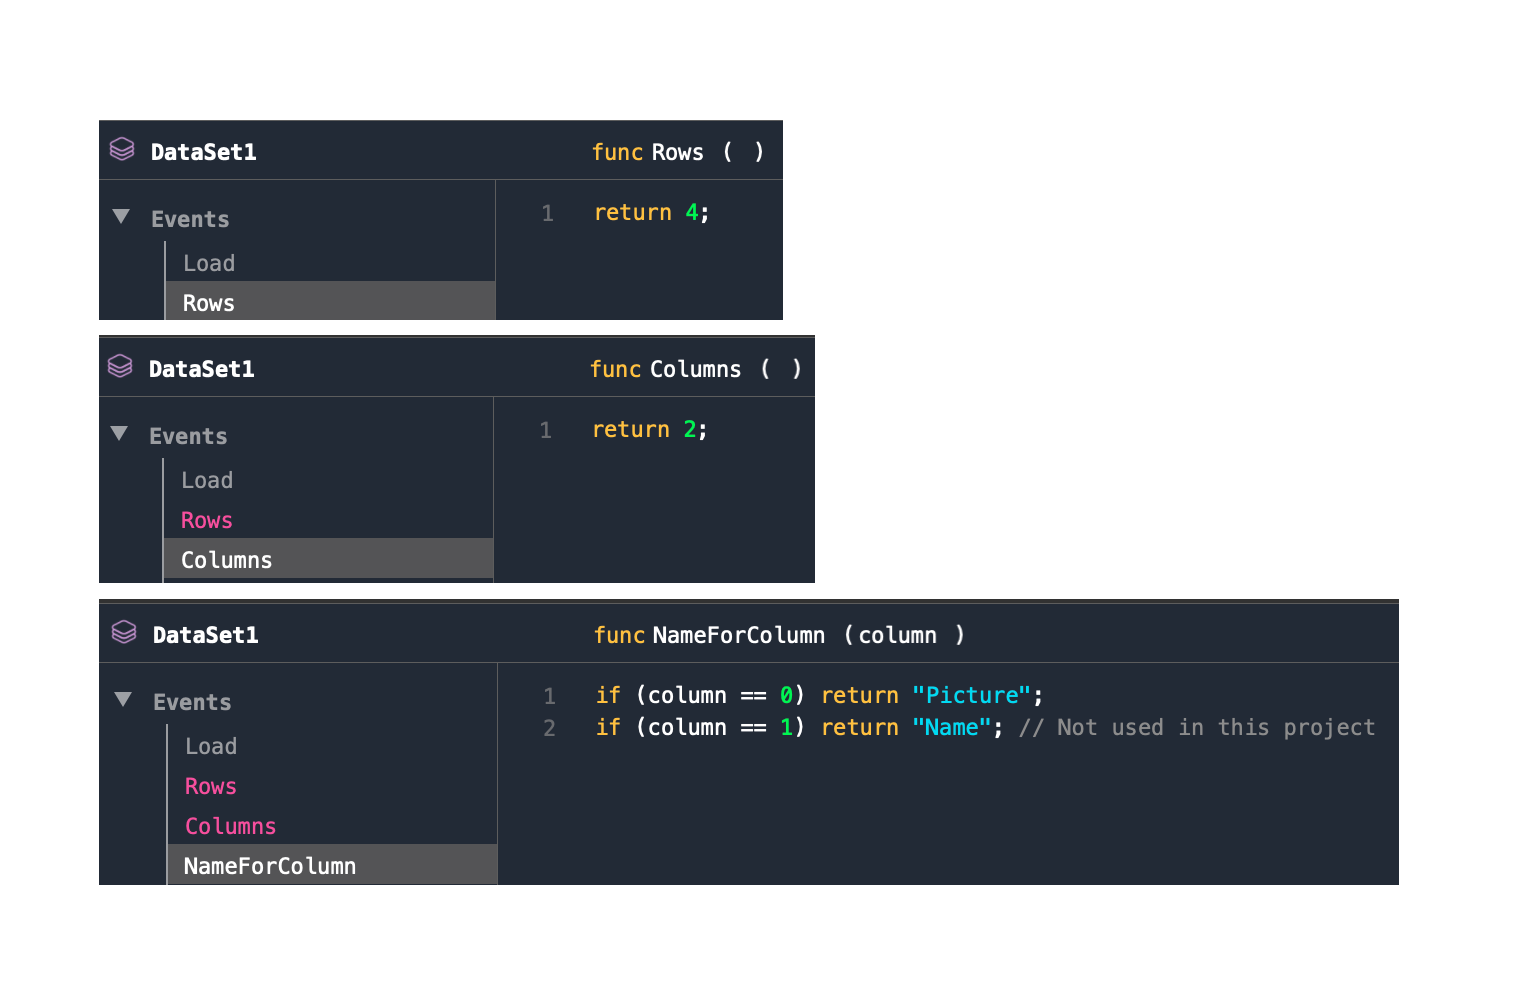
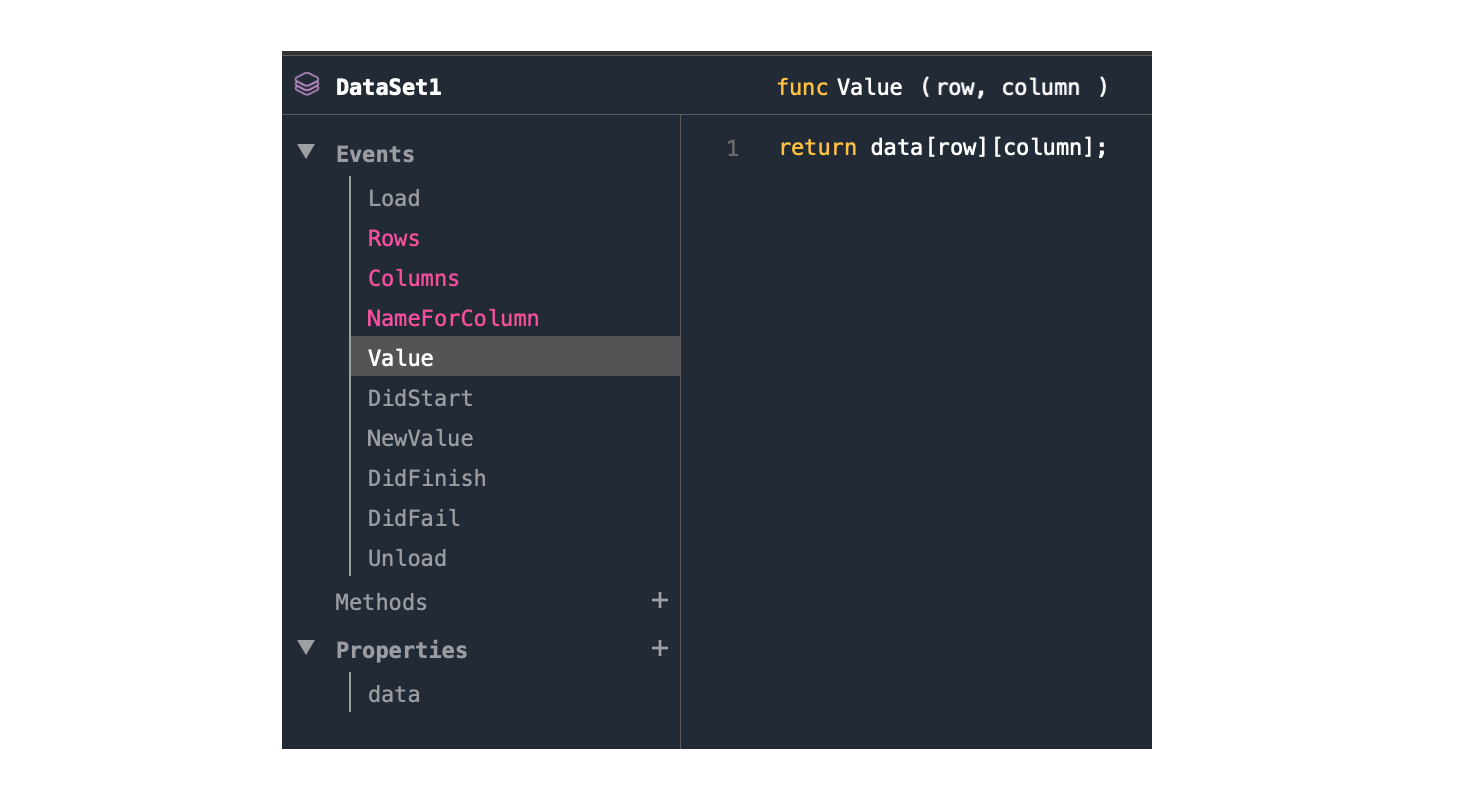
We're not done yet. There's another DataSet1 event we need to manage. It's called Value and it has to return a cell value given its row and column numbers.
Let's define a property in the DataSet1 object to store the rowsdata structure defined in Window3 (our filter list), and call it data.
The Value event in DataSet1 is like this:
Until now, the DataSet has been created and configured to host the filter-modified pictures data structure. We are pretty close to the end, but there are a few things left before we can add a Carousel control:
- We need to pass the
picturesdata structure toDataSet1 - We need to tell
DataSet1to restart itself (so that pictures are loaded).
The best place to do it is in the WillShow event of Window3:

Adding the Carousel control
Everything is ready to add a Carousel control instance to the project. We are going to position it in the second half of Window3. But it won't be alone. In that area, we need to have another control: a "Save" button.
Remember? We want to select a visual effect and press the Save button to save the photo on the camera roll.
In my previous article, we learn something about Views: they help to group together UI controls with a similar context. This behavior is a perfect case for us because we want both the Carousel and the Button have a black background color and get resized consistently with their parent (the View).
So drop a View from the Controls List onto Window3 (View1), then both a Carousel (Carousel1) and a Button (Button1) onto View1. Set the background color of View1 to black and set all its Autosize constraints except the Top one. Then resize Carousel1, change its item size to 300x300. Change a few properties of Button1 (color, font size) too.
Now we need to connect Carousel1 to DataSet1 and that's pretty easy, thanks to the Creo Inspector. Let's look for the DataSet property in the Carousel1 Inspector. Open the DataSet dropdown list and select DataSet1, then set both the Cell properties to Picture (it's the name of the DataSet1 column containing the modified picture), and boom. We can now browse the pictures with different filters applied. Run the application in the Simulator and check the result.
Now:
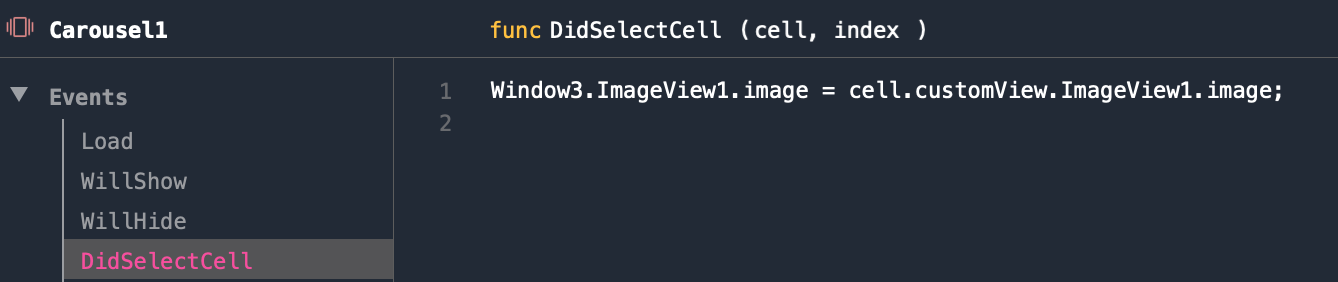
- When the user touches a picture from the
Carousel1, we need to update theWindow3ImageView1.imageproperty. TheDidSelectCellevent is the perfect place to manage that assignment:
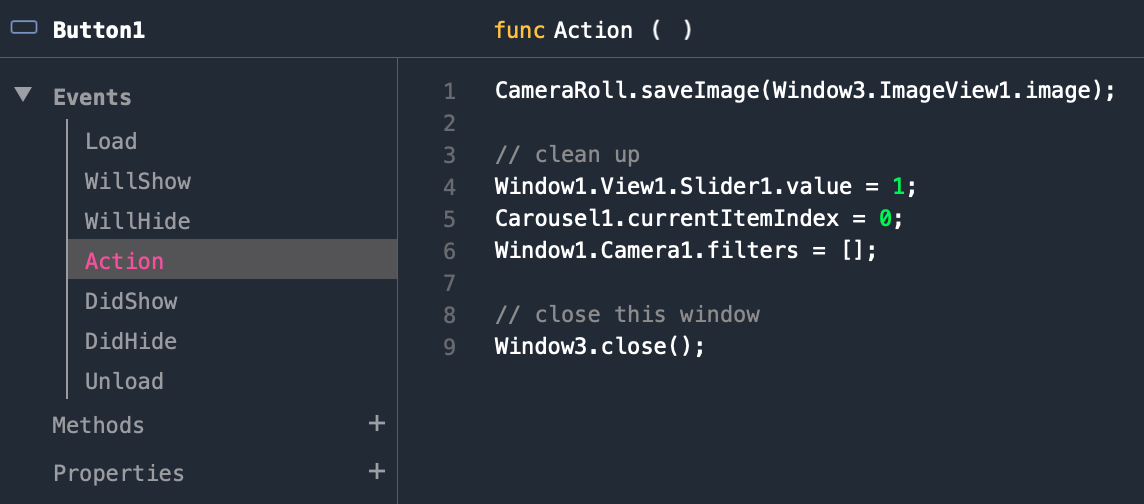
- When the user touches
Button1(Save), we need to save the picture showed inImageView1to the camera roll, do some housekeeping (like repositioning the slider inWindow1, for example), and closeWindow3.
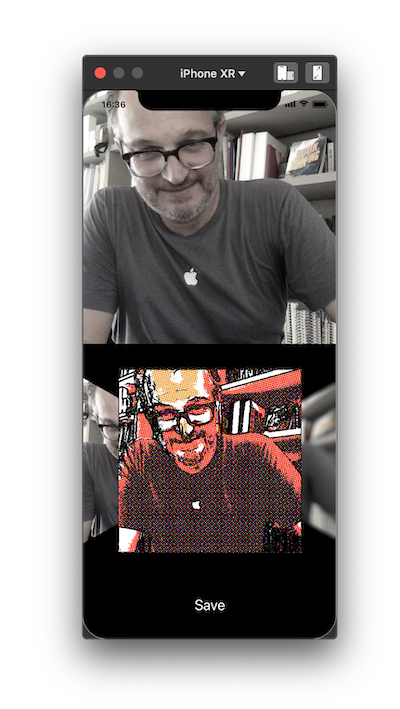
Here you are, The SelfieApp is now completed!
You can take selfies, define a saturation level, select a visual effect, save the image to the iPhone camera roll, and browse your selfies from the app. How cool is that?
You can download the full SelfieApp project here. Leave your comments below and help us to understand better what you'd like to read next.