6 minutes to create a cooler SelfieApp with a slider and squarish pictures


It's amazing what you can learn building a simple Selfie application. Our plan for today article is to move a step forward from our last version of the SelfieApp and learn more about:
- Taking squared pictures and make the Selfie App beautiful
- Learning how to use the View control to isolate controls behavior
- Mastering Autosize Constraints properties from the Geometry Inspector panel to make our application layout perfect on every iOS device
- Learning to use the Slider control to change picture preview color saturation real-time before taking a picture.
If you want to learn step-by-step with me, download my last SelfieApp project here and use it for this article.
This article is the third of a series where you can learn how to build iOS apps from scratch. If you are new to Creo, it's better that you read the previous ones:
- Welcome to Creo by examples
- How to create a selfie app with two lines of code
- How to work with Camera Roll, TabBar and CreoPlayer (SelfieApp Part 2).
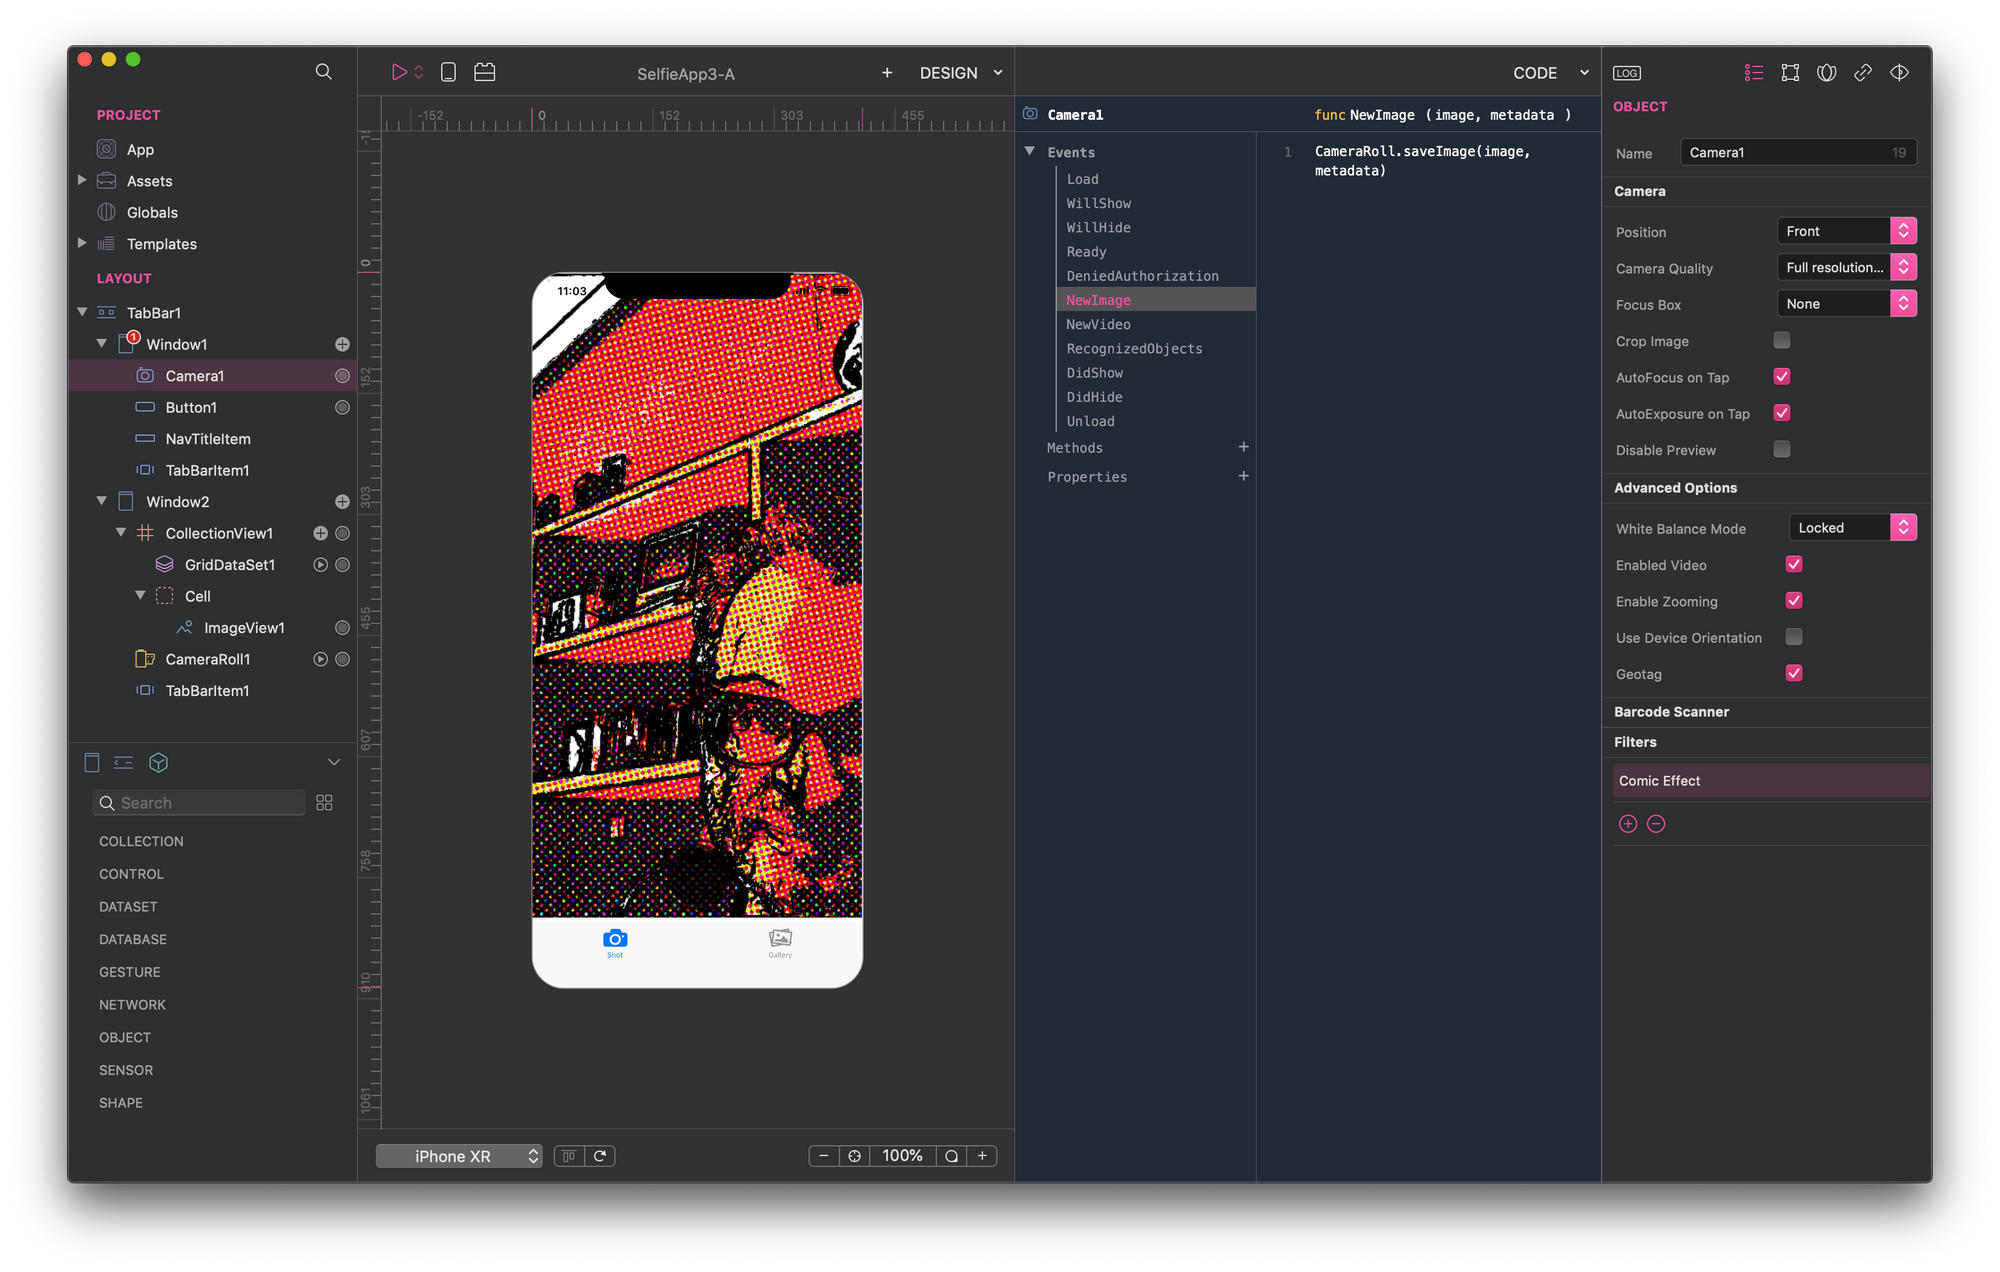
Today we want to keep both DESING and CODE views open at the same time. If your project shows just the DESIGN view, click the "+" icon next to it, and a CODE view shows up:
How to take squared pictures
First off, let's resize Camera1 control to have width and height set to 414x414. You already know that the Geometry of controls is accessible from the Geometry Inspector panel, once the control is selected. I'll give this for granted in the future.
We want the camera control stuck to the top, so we lose the bottom constraint in the Autosize Constraints property. Run the app in the Simulator and switch between iPhone XR, X/XS, and 6/7/8 to check if this change works properly:
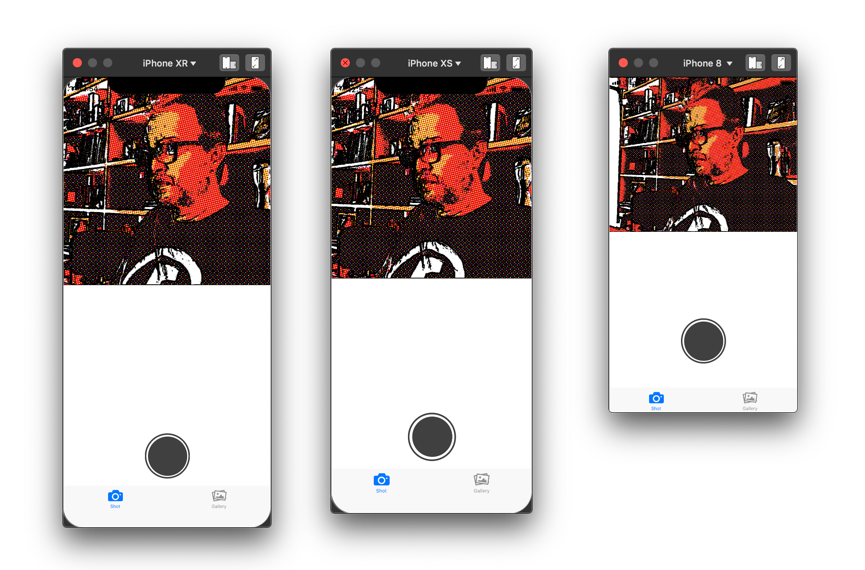
Note that, this doesn't guarantee you can have a squared picture on any iOS device (check iPhone 6/7/8, for example). Let's say that it's more than enough for our example.
Change color saturation on the camera preview
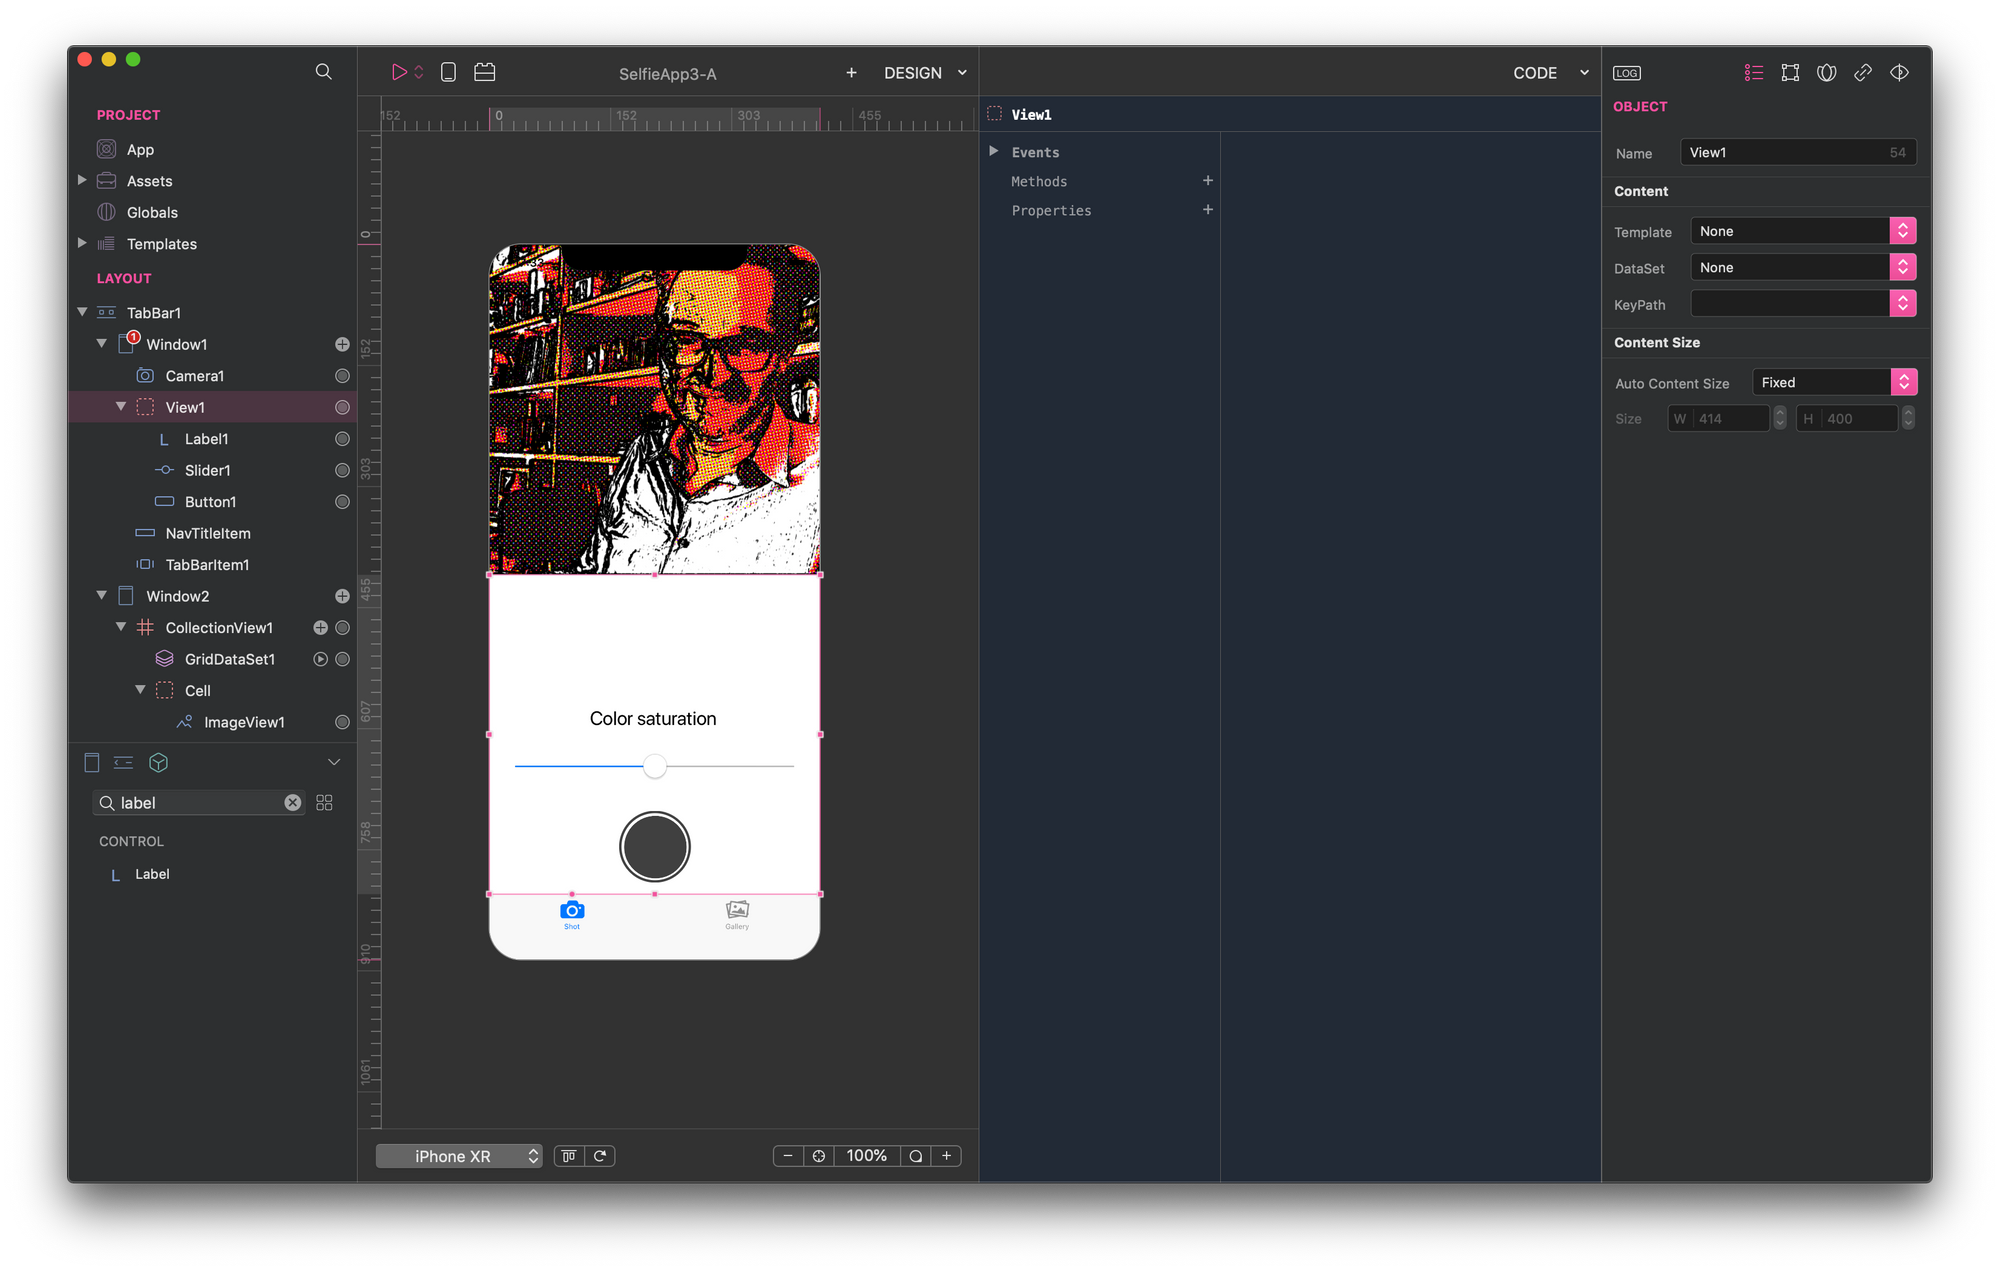
Now it's time to include a Slider control—Slider1— in our design to change camera preview color saturation before shooting. Because of both Slider1 and Button1 share the same context—the camera preview—, it's better to position these controls under a common View container— View1. In this way, their position and constraints properties are relative to this view.
We resize the View1 container to fill up the remaining part of the screen device. We set all its Autosize Contraints except for the top one. We position the Slider just above the shooting, and we want it stays in that position even on other devices. So we set its right, left and bottom constraints and force it to resize horizontally.
The last step is to add a Label control above Slider1 to let users understand they can change the picture color saturation with the Slider.
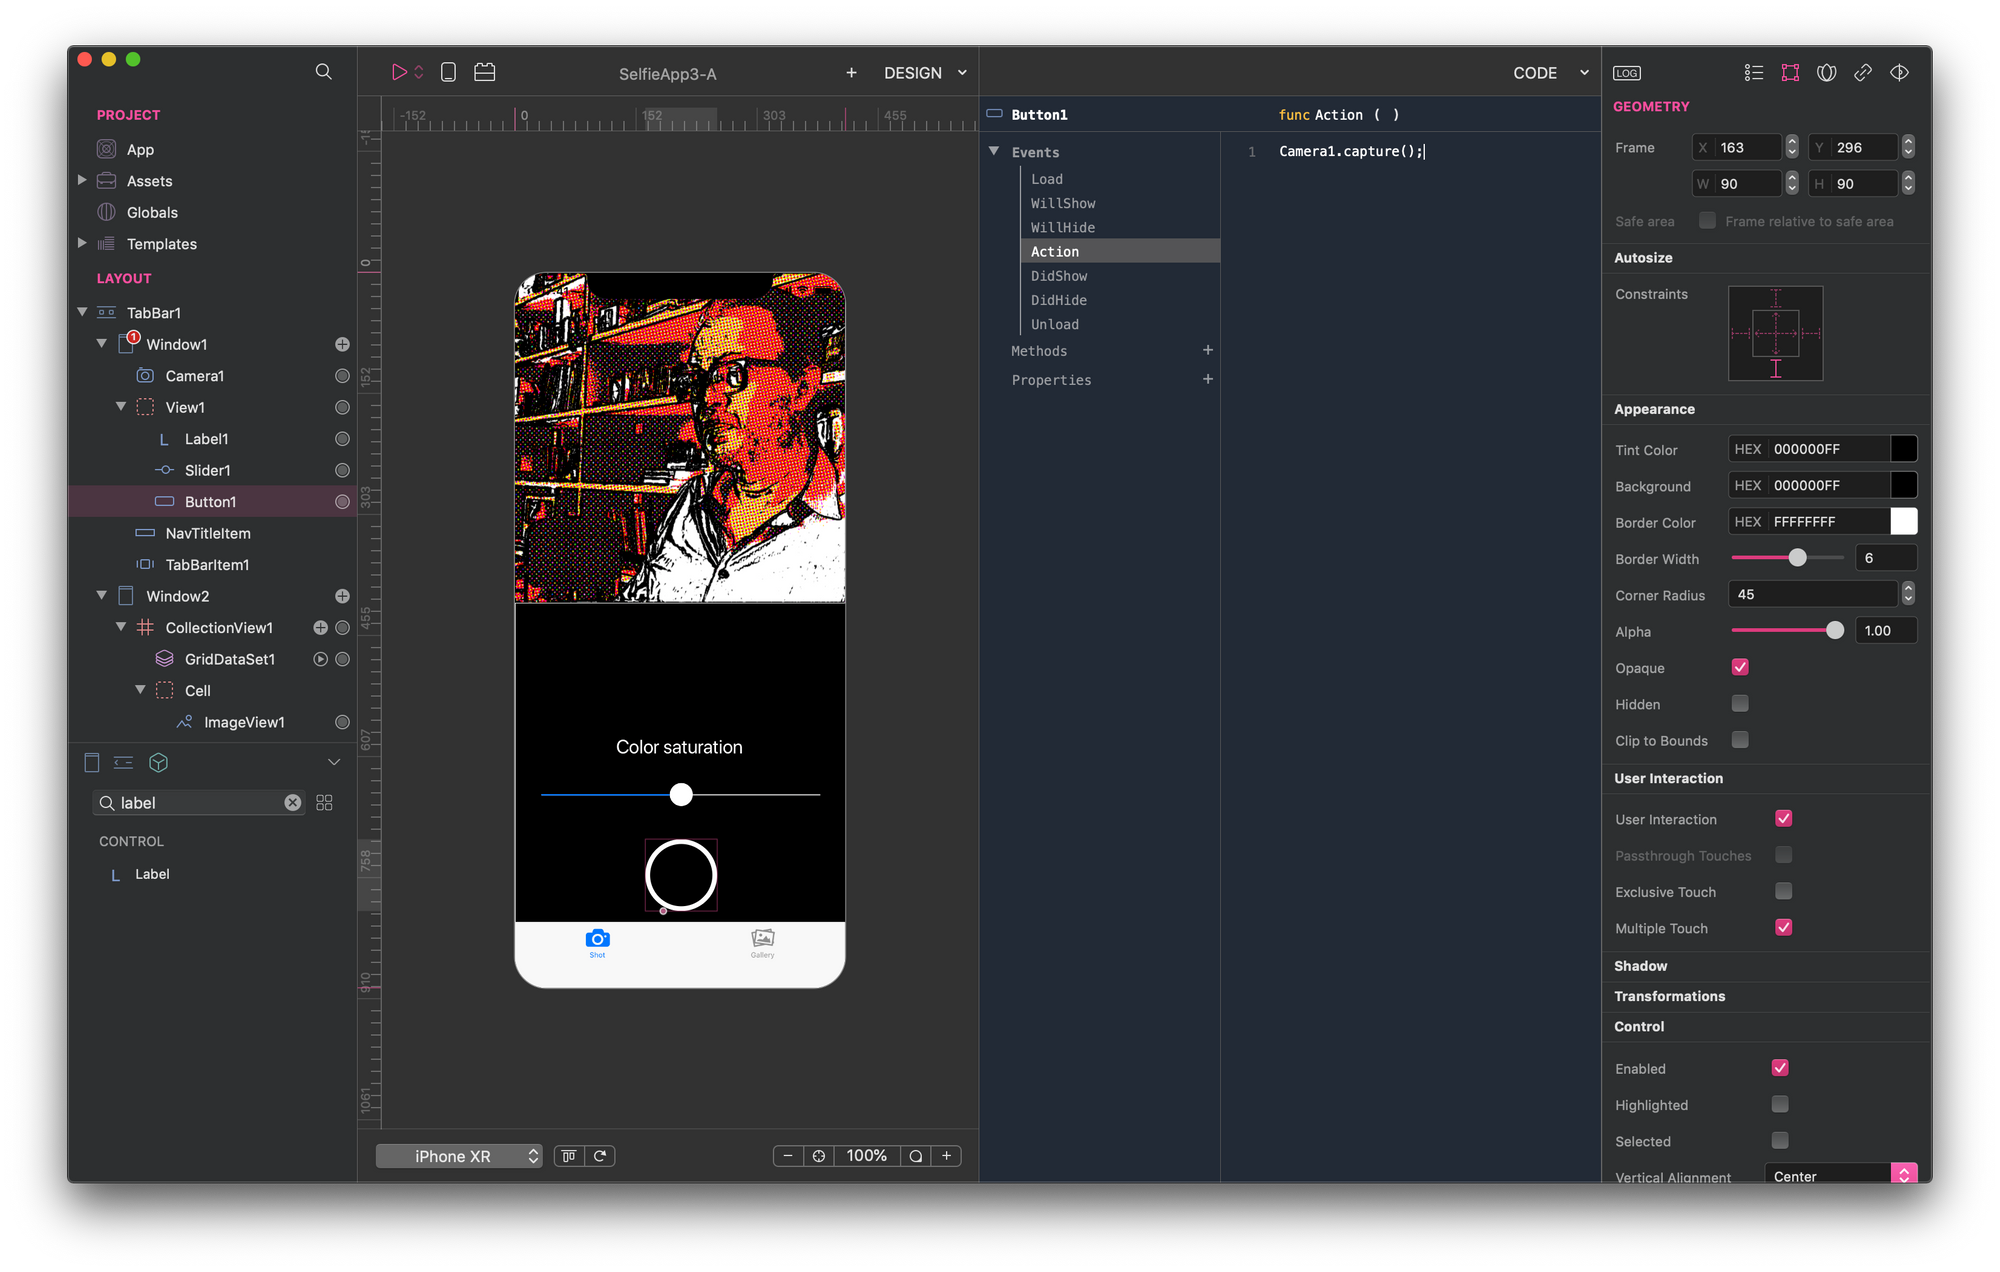
Did I mention that I love dark themes? Yes, I think they are more elegant. So, let's work on the View1 container and its controls to get something like this. It's just a matter of setting background colors and font colors. For Button1 set its border color to white and make it thicker:
We are now ready to add some code and change the camera preview color saturation on the fly before taking pictures.
The first step is to understand how to retrieve the Color Controls filter—which let us change the saturation level. If we would want to change the color saturation to every picture we take with the SelfieApp, we could do it visually through the Camera1 Inspector:
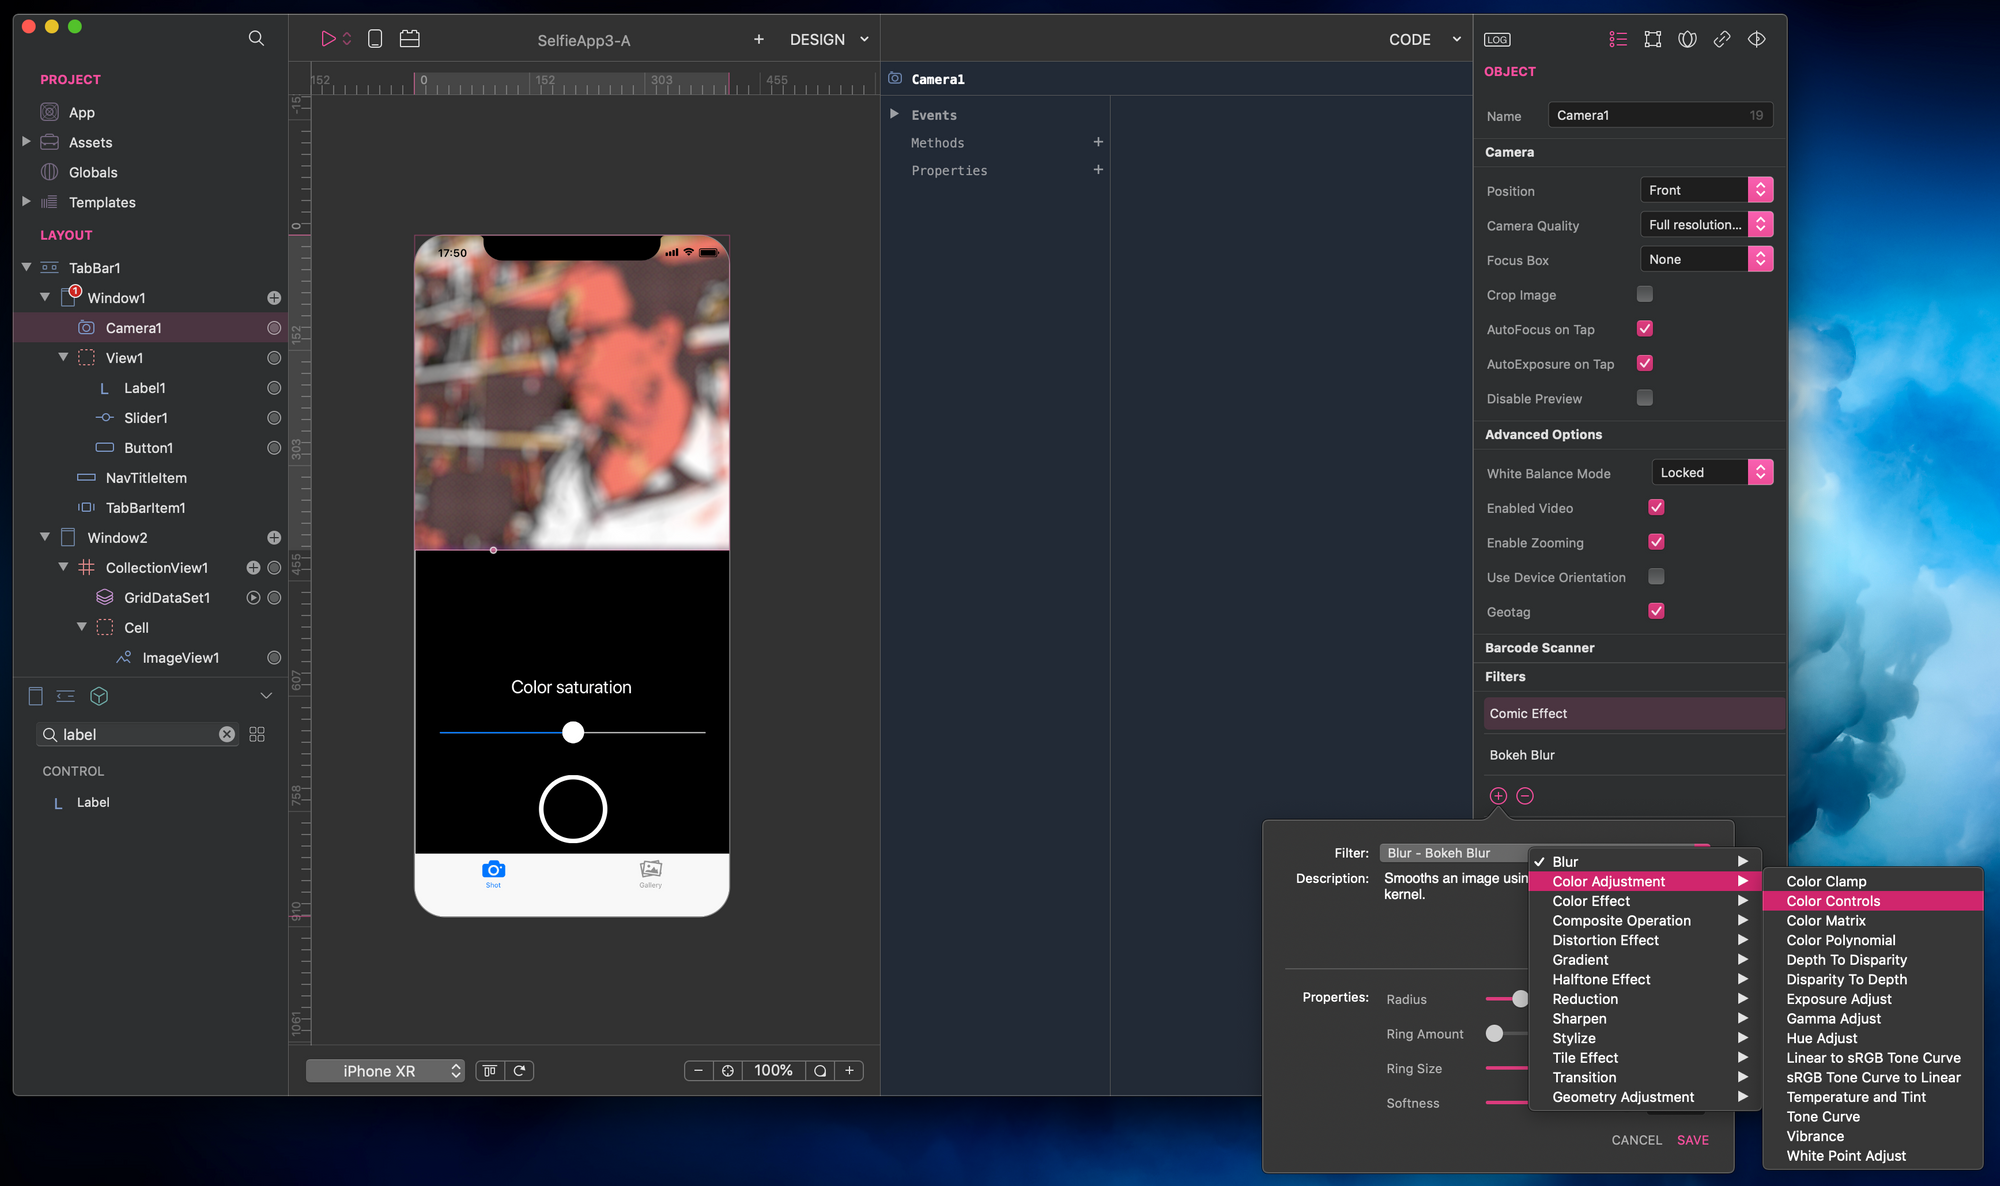
Selecting Color Controls filter we see it has three properties:
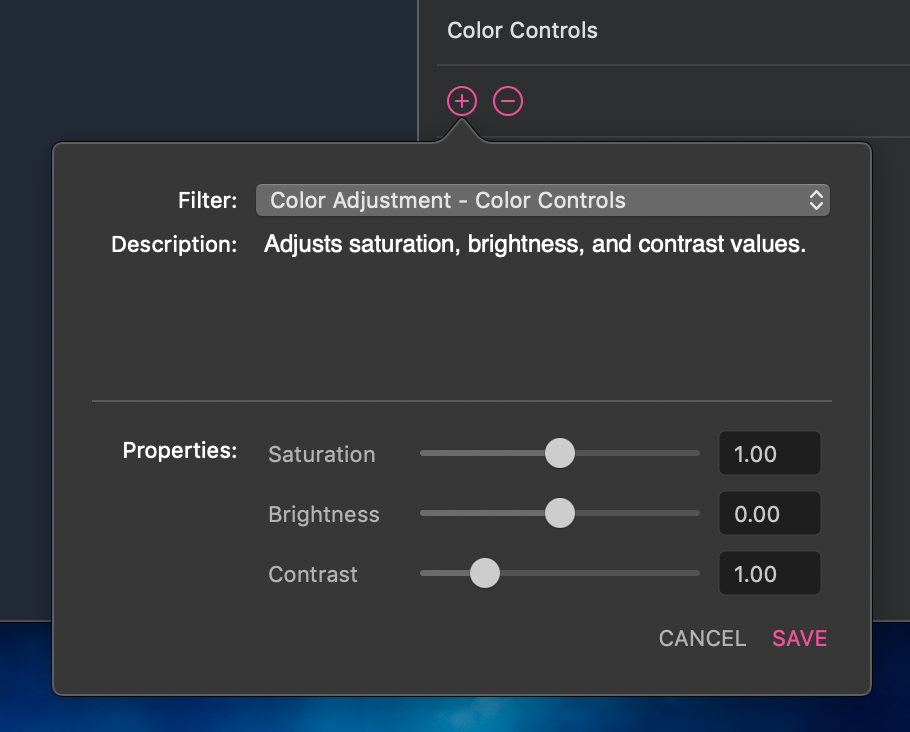
If we move the Saturation slider, the camera preview changes consistently.
Doing the same thing programmatically through a Slider control is a little bit different. We need to:
- Retrieve the Color Controls filter through the ImageFilter object
- Set the saturation property to the value of the Slider
- Pass the filter object to the Camera control, through one of its properties called filters.
Let's go through the previous list step by step.
Select the Window1 container and define a new property called saturationFilter:
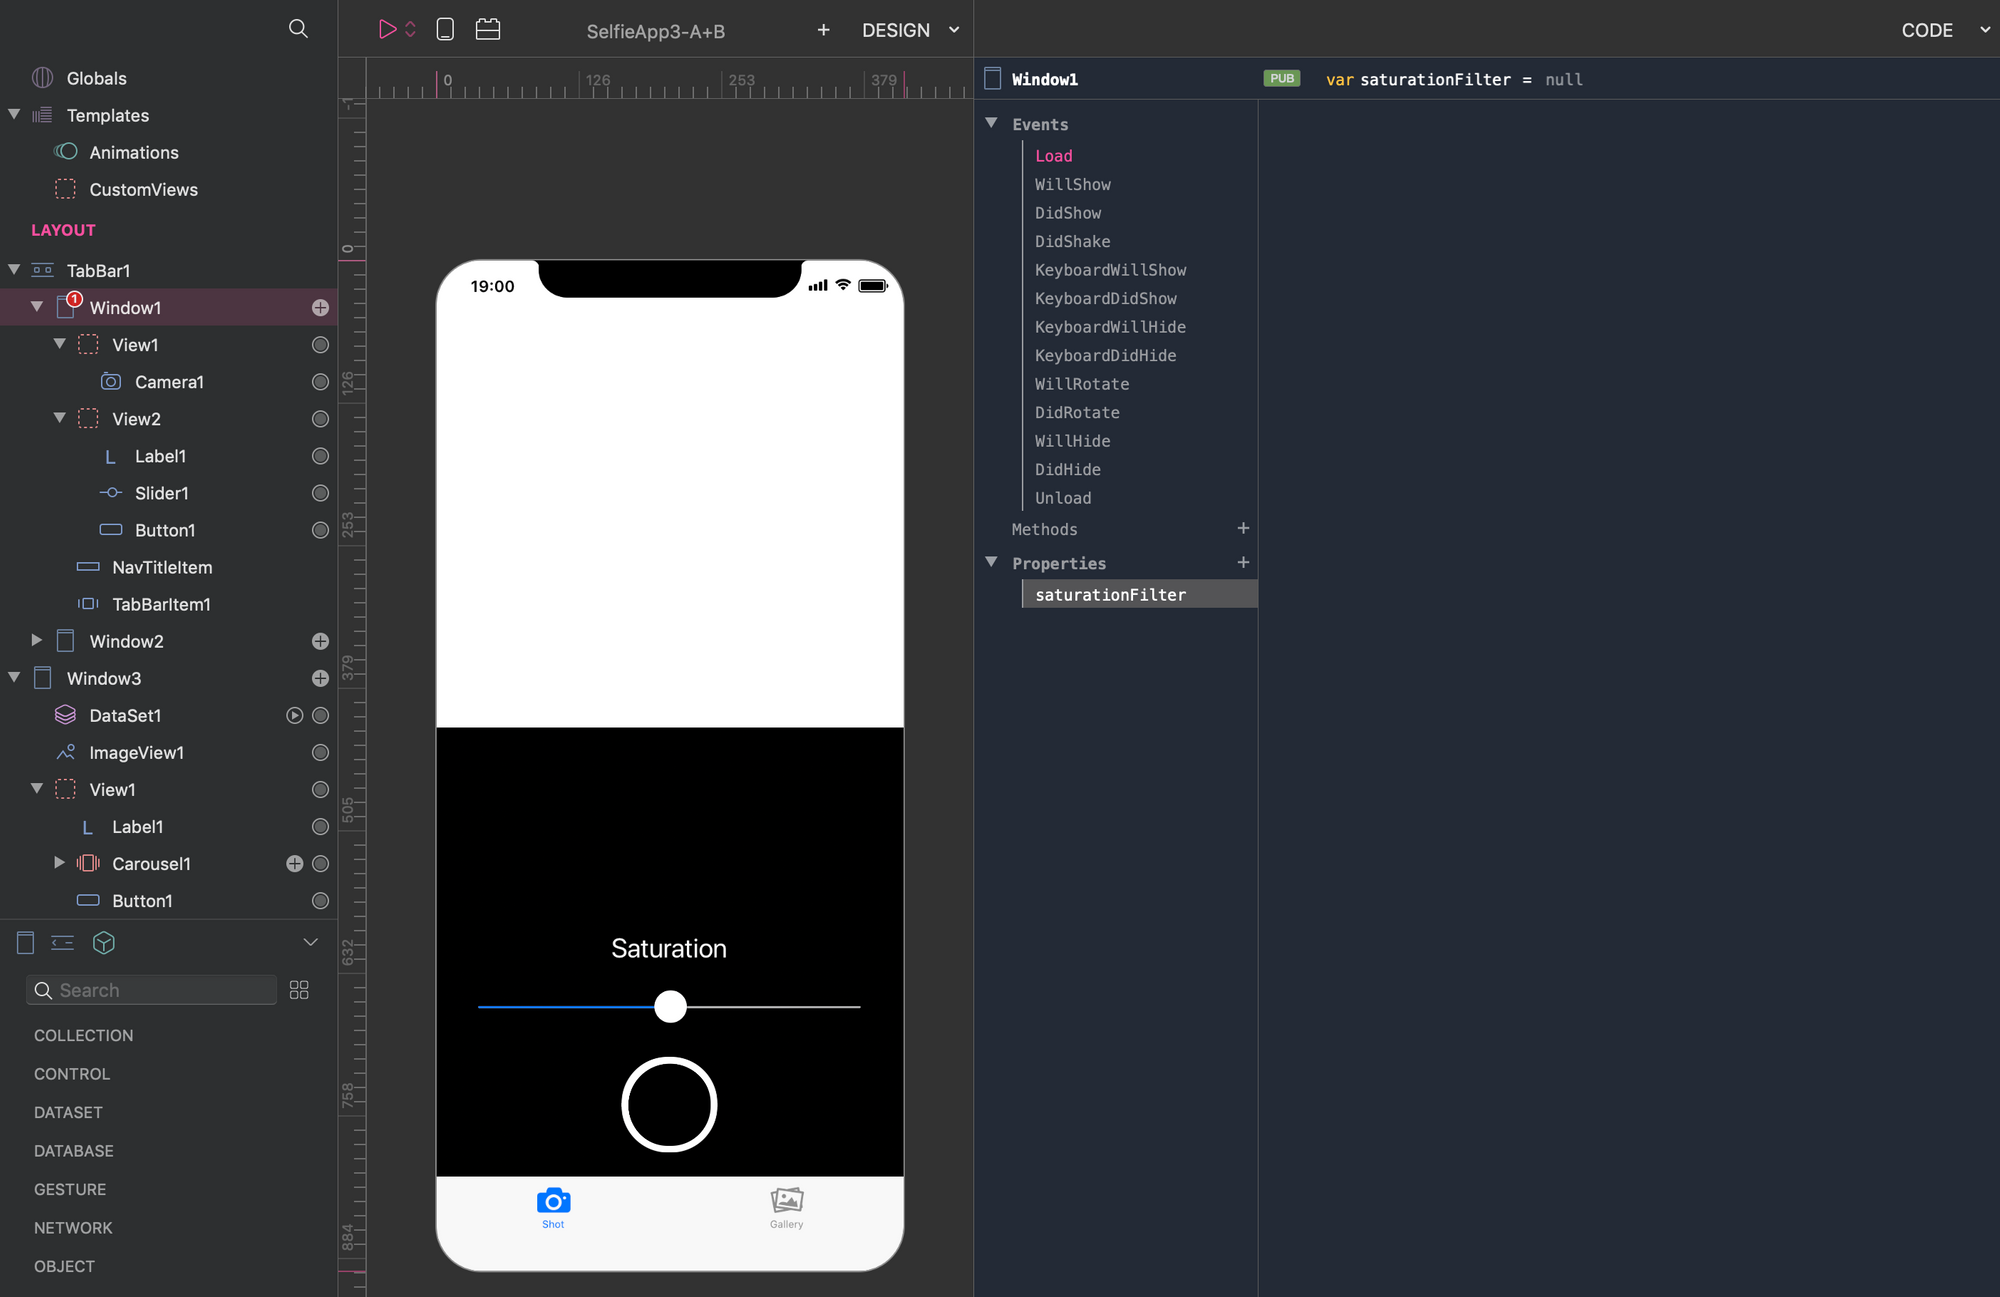
We use this property to store the ImageFilter we want to apply to the preview.
In the Code Editor of Window1 select the Load event. This event fires just once when the Window control is loaded. The Load event is the perfect place to execute code that has to be processed only once in your application life cycle. In the Load event, we retrieve the Color Controls filter. The easiest way to understand which properties the Color Controls filter manages is to print its attributes out in the Creo console log—see the attribute property in ImageFilter object:

How do we know the internal name of the filter? We check the name from the camera filters in the Inspector, cut the spaces, and add the "CI" prefix. So, Color Controls become CIColorControls. Now we need to know the name of the property that manages the color saturation parameter. That information is in Log where we printed out CIColorControls attributes—run the app and open Creo Log from the top-right menu. The Log shows just part of the information. What we need to do is copy that logline and paste it into a text editor (the Mac Text Edit is fine). We look for the "saturation" word, and we copy three information we need:
inputSaturation, which is the name of the propertyCIAttributeSliderMin, the minimum value that saturation acceptsCIAttributeSliderMax, the maximum value that saturation accepts.
We use the last two to set the min and max values for the Slider1 control from the Inspector panel. Now let's comment out the Console.write line in the Window1 event, and move to the Slider1 control.
We are at the final step, and what we need to do is update the Windows1 filter property saturationFilter every time the Slider1 value changes.
So we select the Changed event of Slider1 control, and we change the value inputSaturation when the Slider value changes. Before doing it, we need to clear up the Filter "Comic Effect" from Camera1 in the Inspector. Now the Camera preview shows the image without any effects. In the Slider1 -> Changed event write this code:
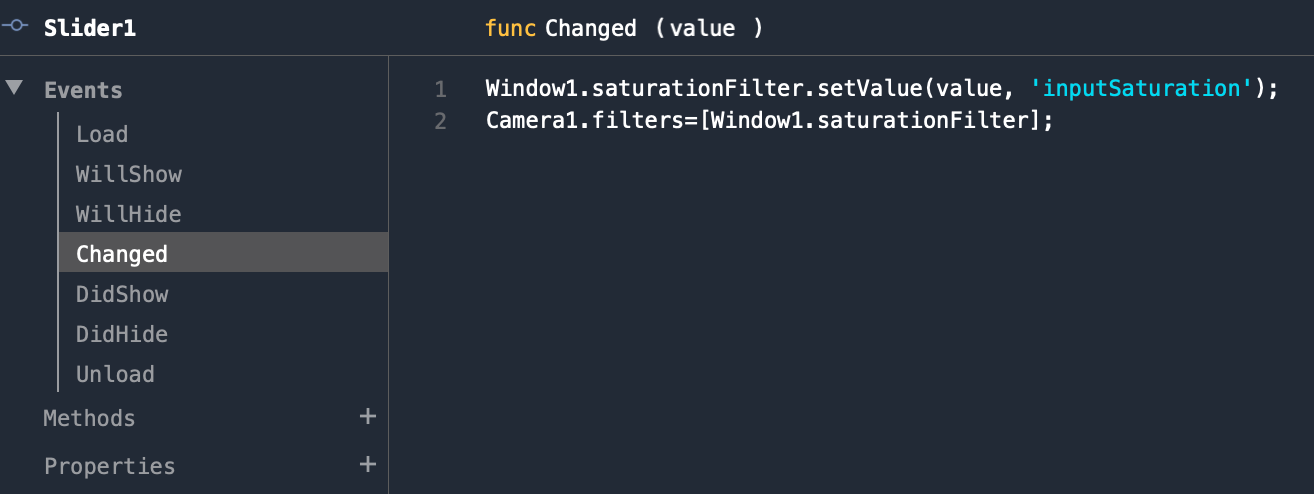
To change the inputSaturation property of Color Controls filter you can use the setValue method from ImageFilter class documentation. As you can see from Creo Camera Classes documentation all filters must be passed as an array to the Camera1.filters property. In our case it's an array of one element.
Now run the Selfie App and experience our new SelfieApp.
Hey, wait...
If you tried the brand new SelfieApp you see that pictures aren't saved squared.
Why? That's because we forgot to change one property. To tell the Camera to save squared pictures, we need to go to the Camera1 Inspector, and check Crop Image checkbox. Now try again.
If you want to experiment by yourself on this example, you can download it here.