How to work with Camera Roll, TabBar and CreoPlayer (SelfieApp Part 2)
In a few minutes, you'll learn how to work with new Creo controls and object. This time CameraRoll, CollectionView, TabBar, and custom buttons. We'll use CreoPlayer to demo our app on the iPhone. All that with zero lines of code.

In my previous article, How to create a selfie app with two lines of code, I showed you how powerful Creo could be. With almost no skills about Creo and Gravity programming language, we built a simple but effective Selfie application. We were able to take selfies and save them to the iPhone camera roll.
This time we move a step forward. I want to show you:
- how to get access to the iPhone camera roll from our Selfie App
- How to use the TabBar control
- How to use the CreoPlayer to test and demo your application on an iOS device.
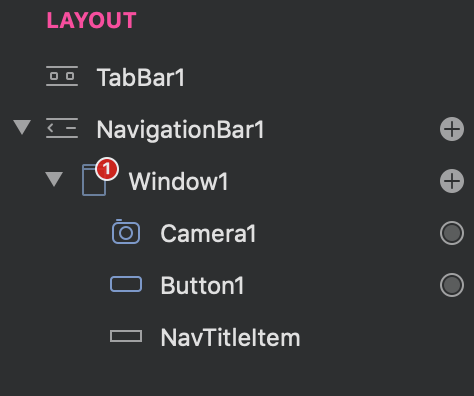
Our previous Selfie app running in the Creo simulator looked like this:
Goodbye NavigationBar. Welcome TabBar
To create this new version our Selfie App, we need two windows instead of one. The first one is for taking selfies, and the second one is to browse the iPhone Camera Roll. Using your own iPhone, you know that one possible option to navigate a multi-window application is through Tab Bars. Searching on the Internet, the Apple Human Interface Guidelines states that:
A tab bar appears at the bottom of an app screen and provides the ability to quickly switch between different sections of an app.
and again:
In general, use a tab bar to organize information at the app level. A tab bar is a good way to flatten your information hierarchy and provide access to several peer information categories or modes at once.
This is perfect for us, so let's open our last Creo project. If you don't have it on your Mac already, you can download it here. Unzip this file, and double click on it to open the project:
Now we need to insert a TabBar navigation container, and make it the root element of our application. Everything that's under NavigationBar1, has to be moved under an instance of the TabBar container.
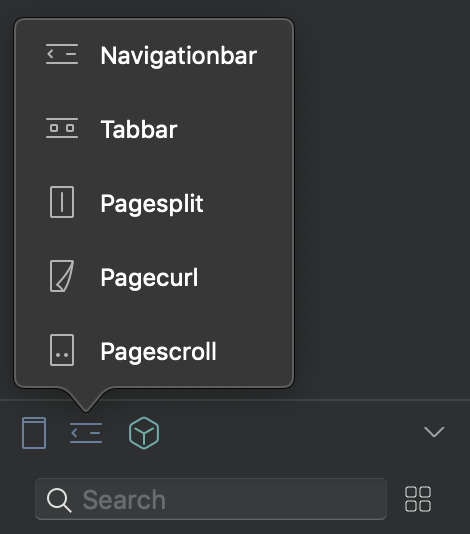
To add a Tab Bar container, click on the icon in the Controls List panel that includes navigation containers, and open the New Navigation icon menu and select TabBar.
A new object called TabBar1, is then added to your project. Now, select it, and drag it to the top of the Layout panel view, like this:
Select the Window1 object and drag it over the TabBar1:
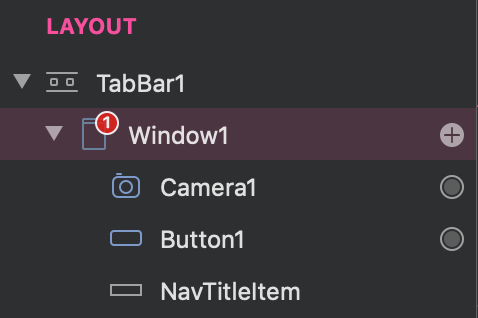
AFter that, delete the NavigationBar1object from the Layout panel.
Now we need to add a second window, the one we use to show the Camera Roll. Select the TabBar1 container, and click on the New Window icon in the Controls List:
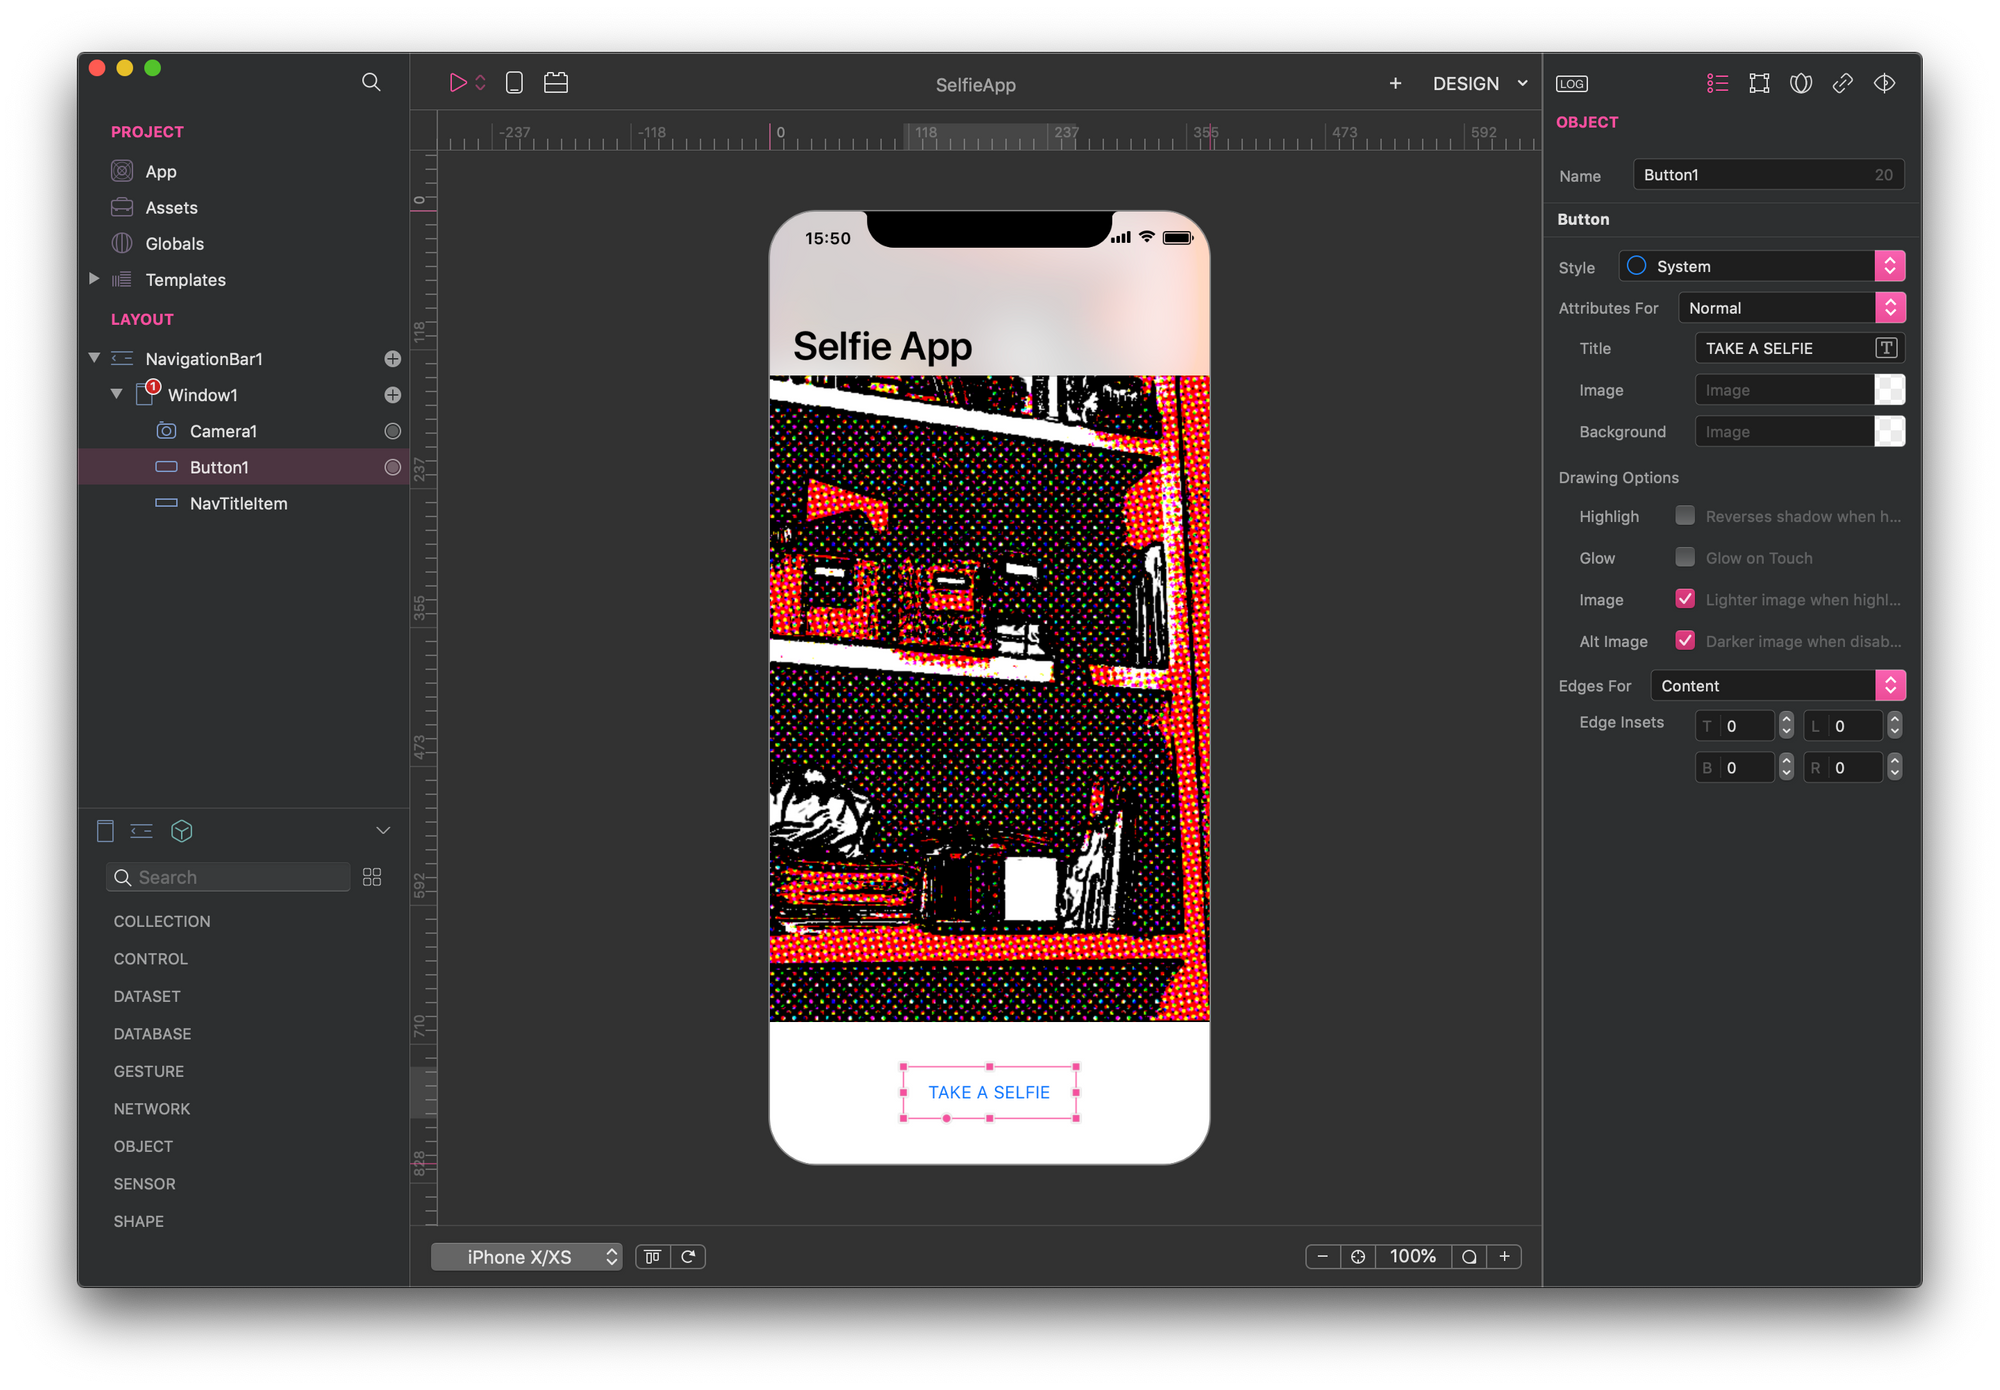
From the Controls List panel search CameraRoll object and CollectionView control and drag them on Window2 using the Layout panel:
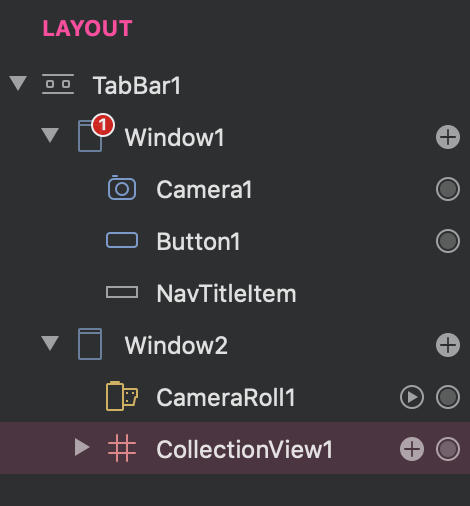
CameraRoll1 class instance is the object we use to get access to the iPhone camera roll. CollectionView1 is the control instance we use to show images from the camera roll on the screen.
Connecting UI to data sets with zero coding
In the Creo environment connecting a data set to UI controls is very easy. Select CollectionView1 control, and set its DataSet property to CameraRoll1 from the Object Inspector panel. Immediately after you do that, images show up in the Collection View control:
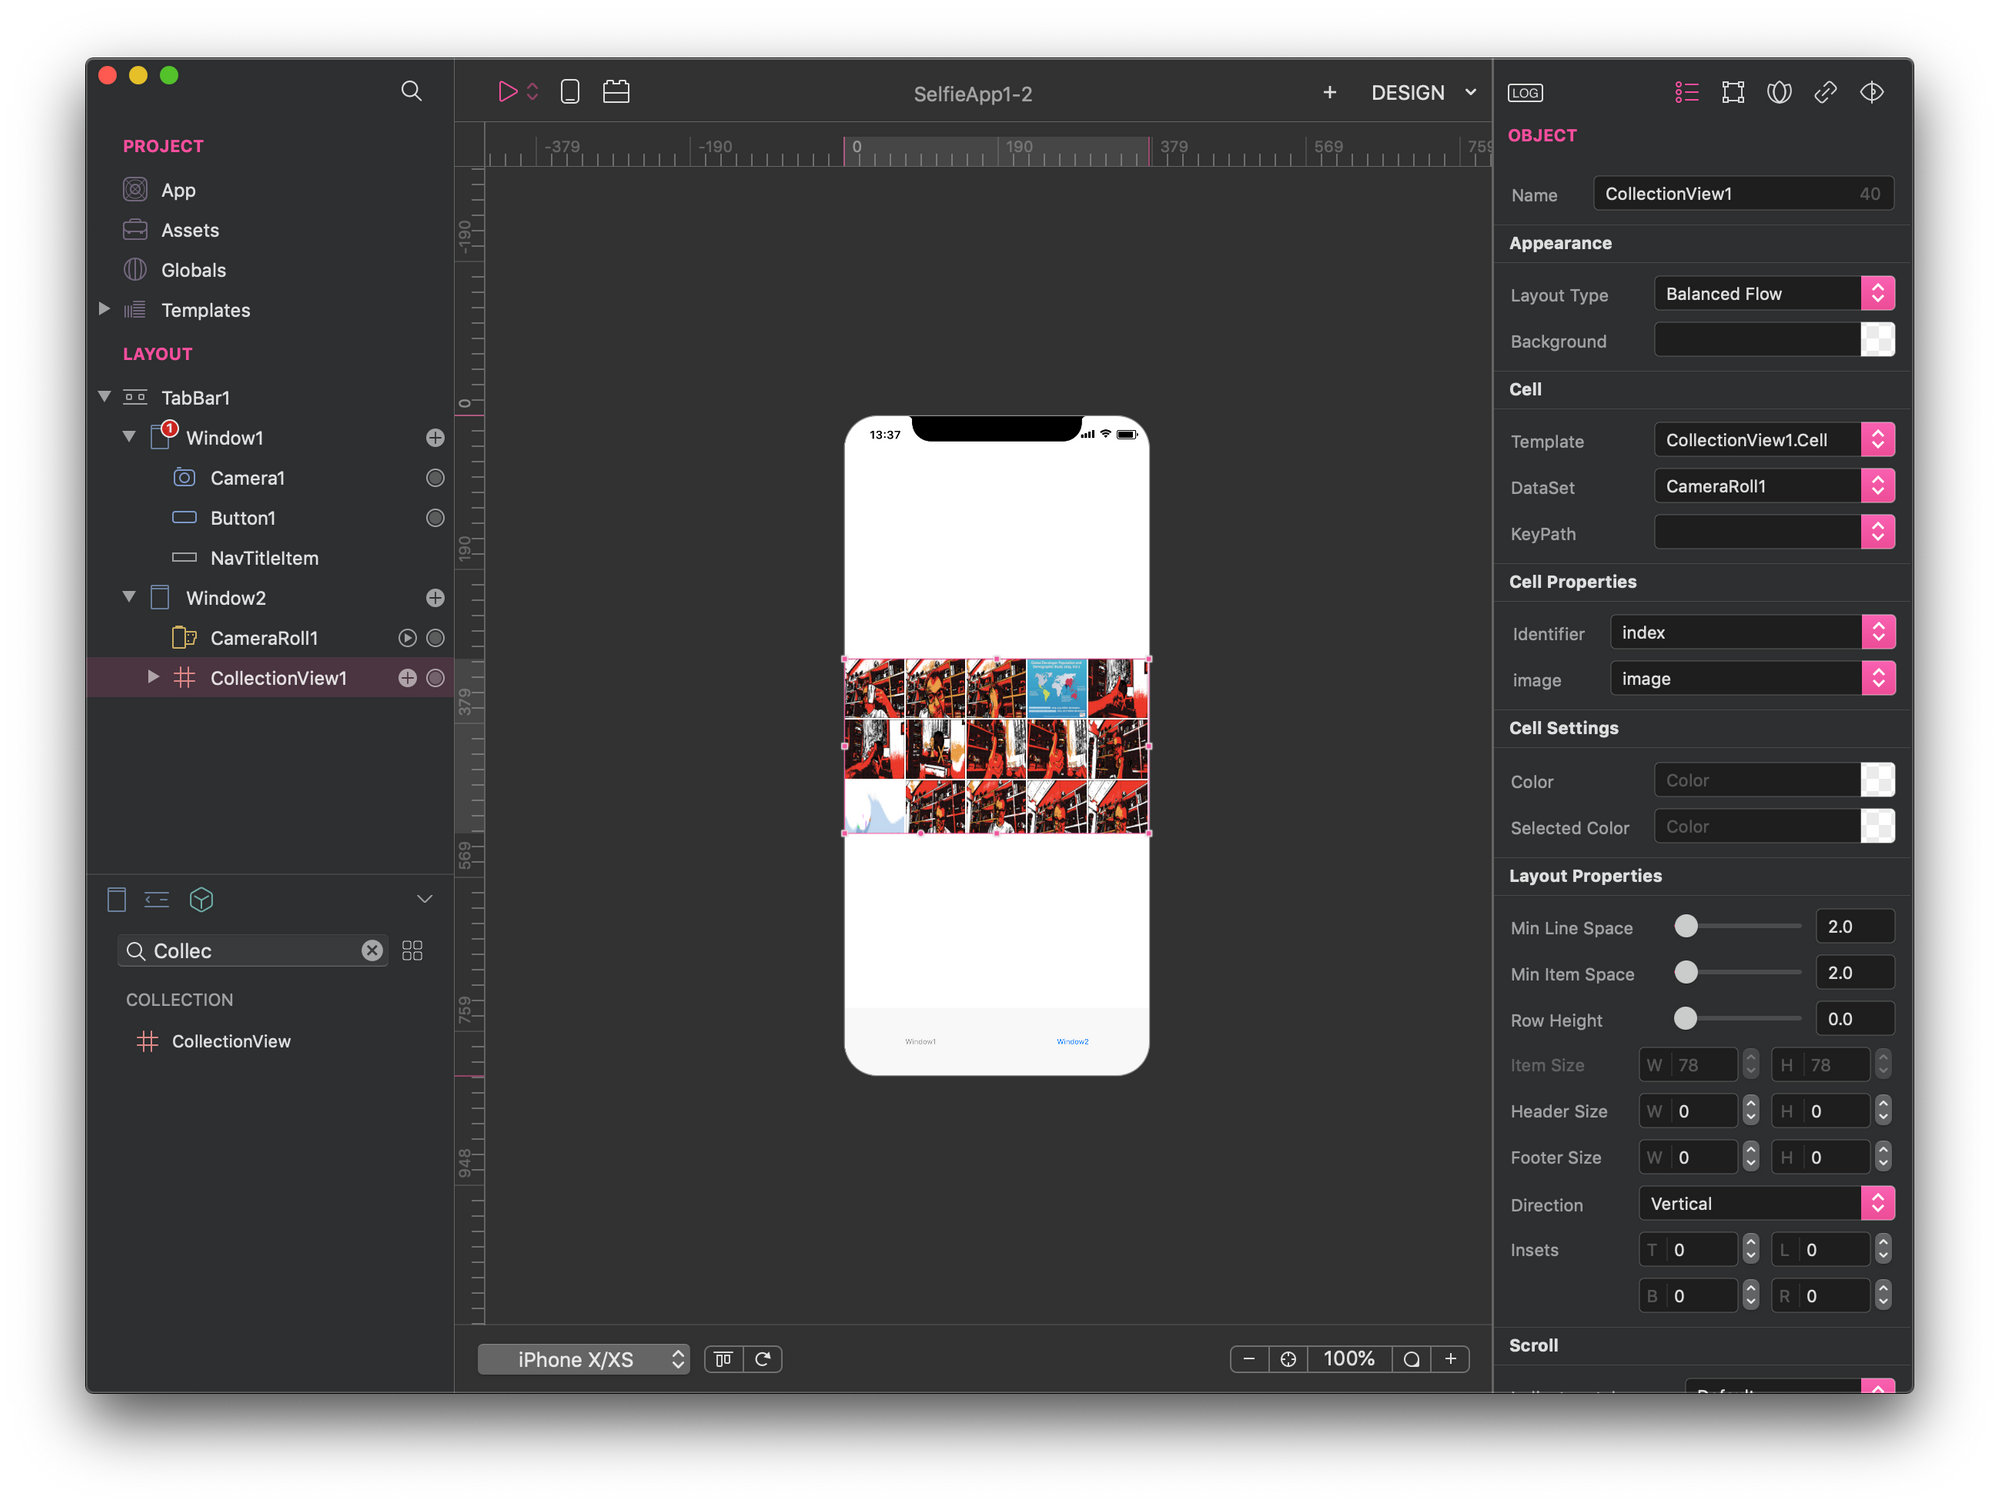
Note that, pictures are loaded from the Pictures directory folder on our Mac. We can change that if we wish. To do that, open the Creo Preferences menu and customize the images folder location.
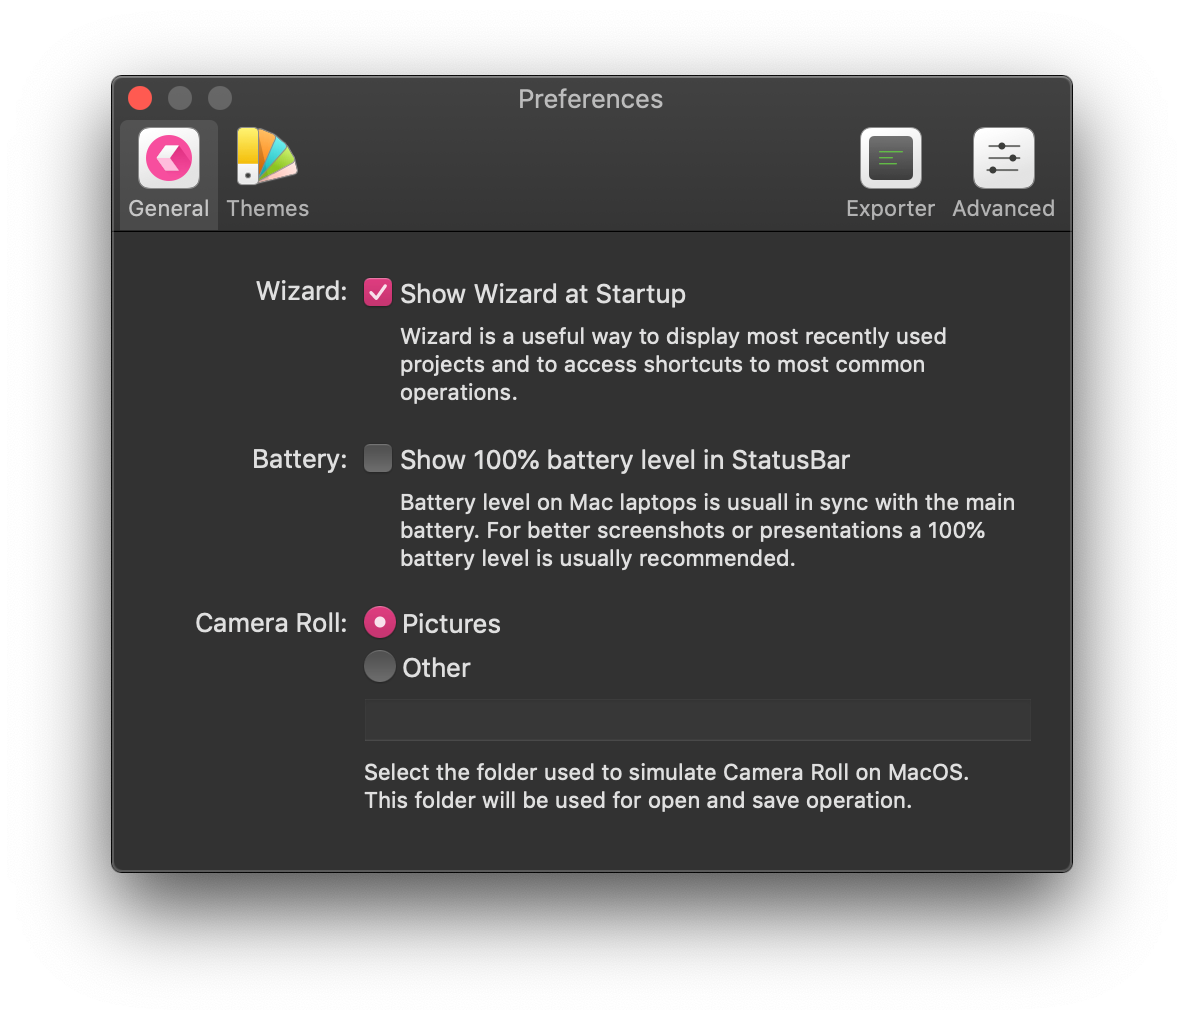
Remember that, this is for development time. On the iPhone, you always get the camera roll—or album—pictures.
Let's get back to the CollectionView1 control. We can modify picture thumbnails weight changing the CameraRoll1 Thumb Size property from the Object Inspector panel. Let's change the default value to 200 x 200. This value impacts the network traffic, so be aware that it's is not too much.
Lets' now add icons to the TabBar. Select Window1 container and open its context menu—the one with a "+" sign on the right. Select TabBar Item. Now, select TabBarItem1 and look at the Object Inspector. We change two properties. First, set Title property to Shot. Second, we want to add an icon to this TabBarItem control. Click the Image property, and look for the camera icon:

Now let's do the same with Window2. Add TabBar item and set its Title and Image properties similarly. If you try to run this project, you see that you can now switch between Shot and Gallery, clicking on the TabBar items at the bottom.
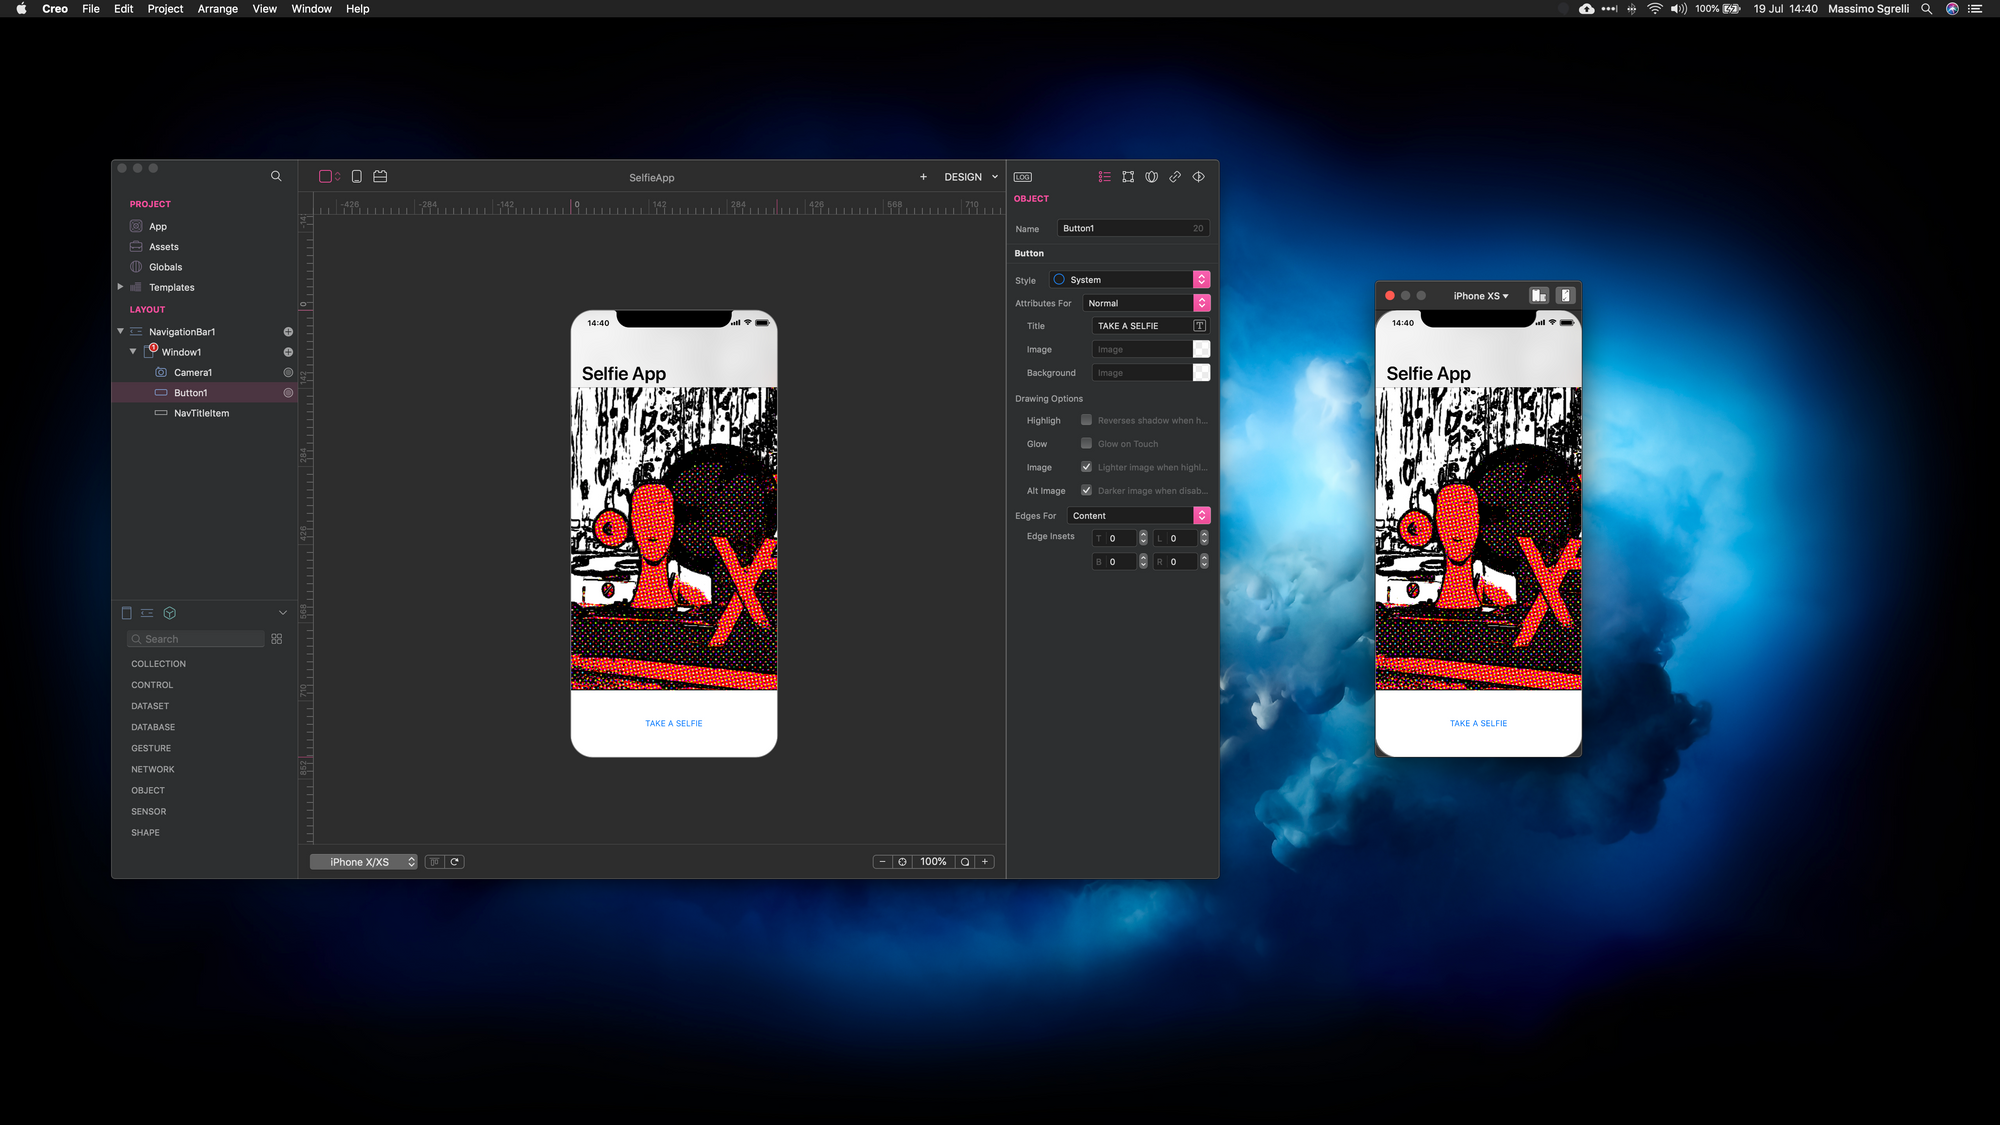
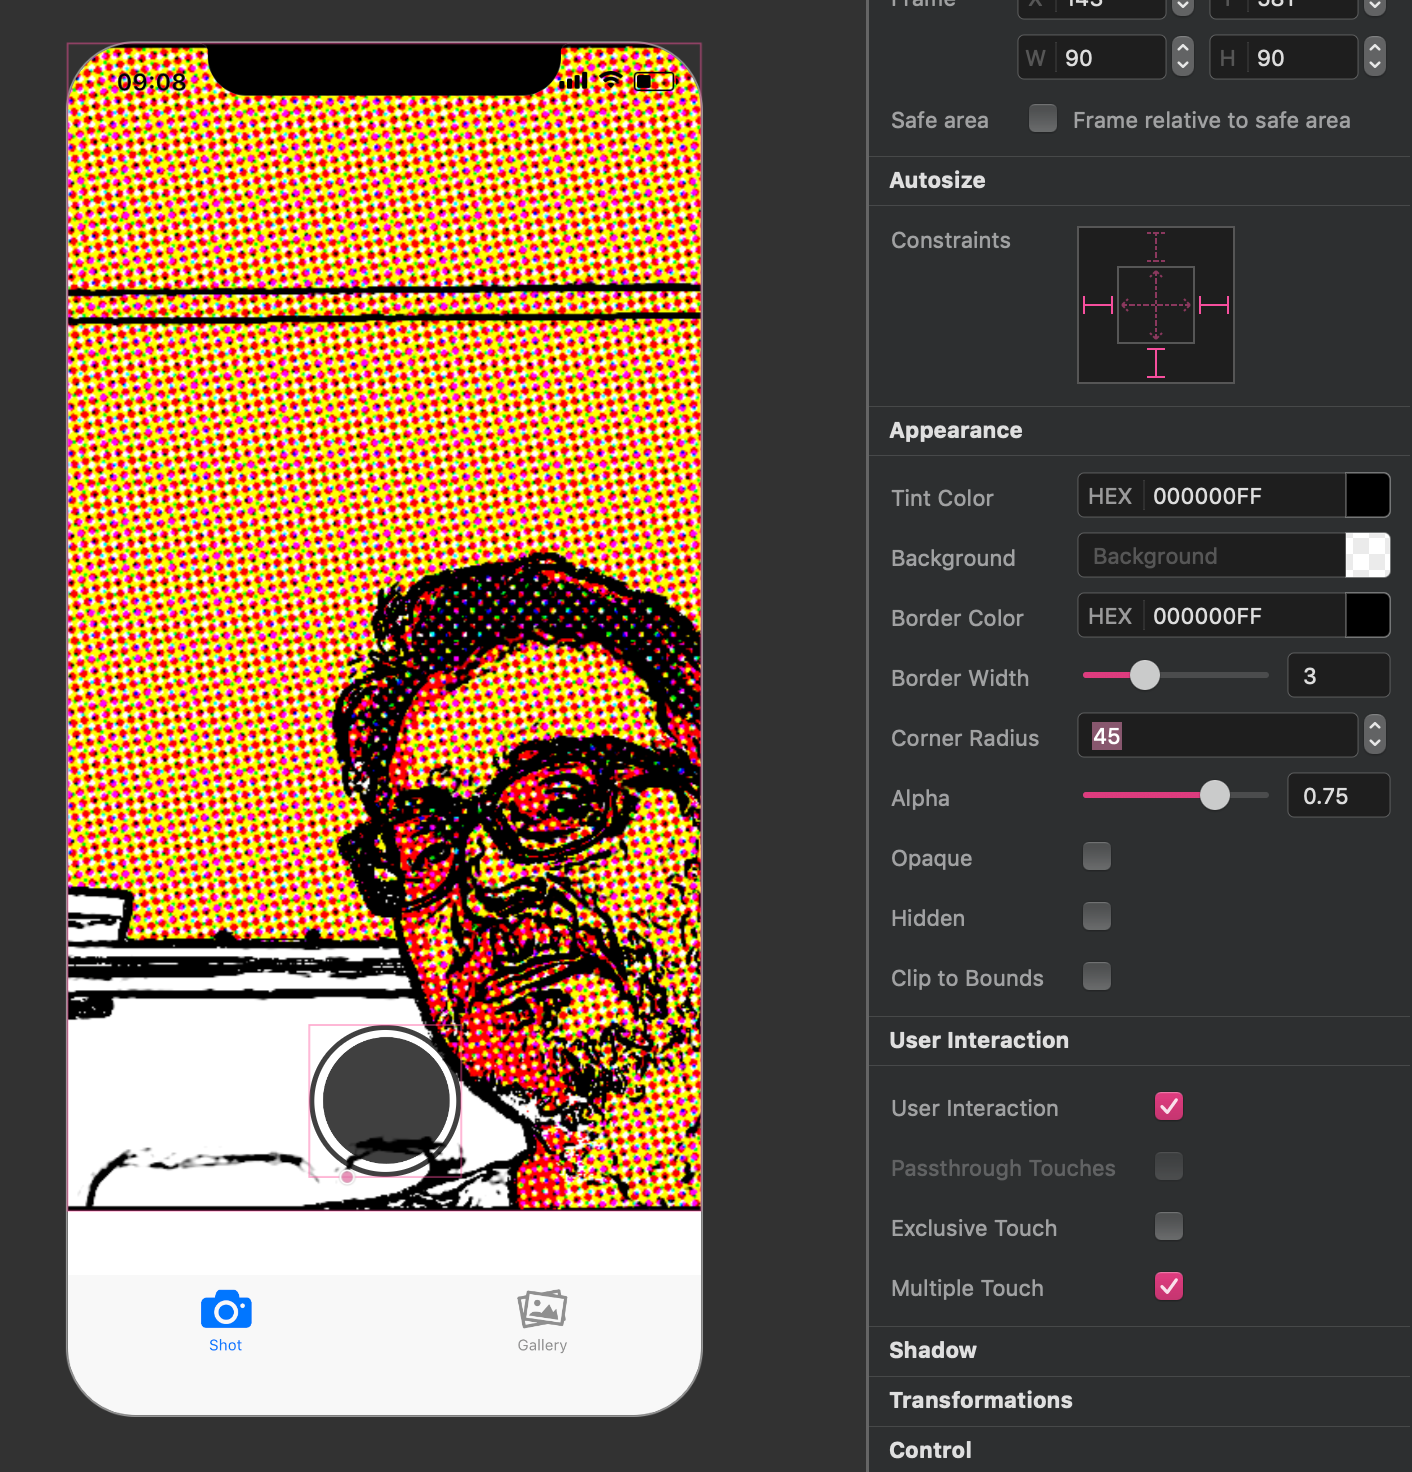
As the last step, let's work on the button we need to take pictures. Select Button1 below Window1 and move it upward, on the camera control in the Design Board. We want to personalize the layout of this button, to make it similar to the usual buttons we get on "take a picture" applications. Go to the Object Inspector and change the Image property to media_record. Now, let's clear the Button1 Title property, move to Geometry Inspector and set with (w) and height (h) to 90 x 90 pixels. Let's then change Appearance Tint Color property to black. As the last step, we add some border to the black circle icon. Let's set Border Color to black, Border Width to 3px, Corner Radius to 45, and then Alpha to 0.75. We should get this effect:
We did it! Check if you have the Creo simulator still running, and close it. Rerun it, and play with our app. Remember that pictures taken are stored in the Pictures folder
How can I demo the app directly on my iPhone?
No problem, CreoPlayer comes to the rescue.
CreoPlayer is the Creo applications launcher to preview your app on iOS devices. Used together with Creo desktop environment it allows us to:
- Send our application to the iPhone
- Run it directly on the target device
- Test it and demo it to the customer for validation and UI checks.
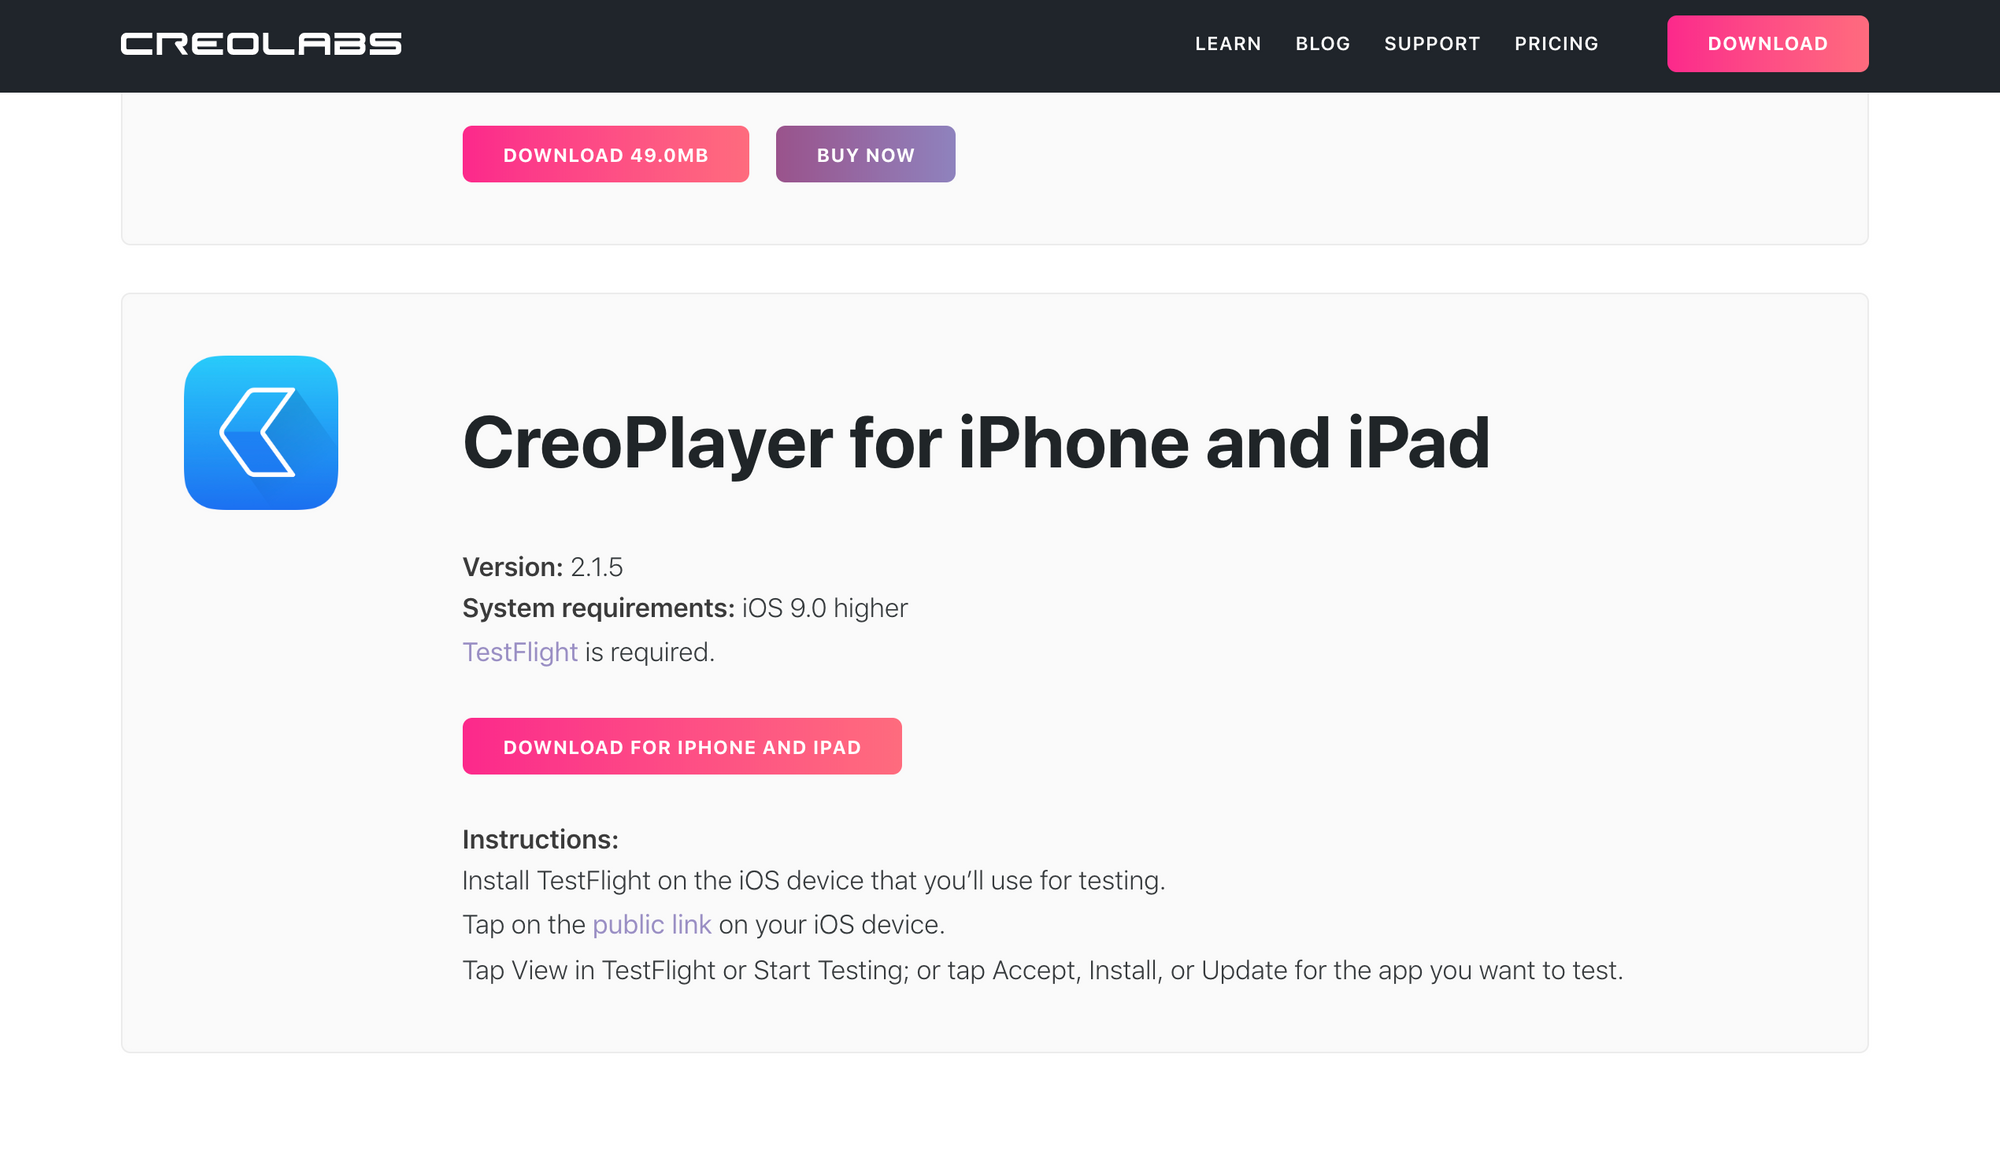
CreoPlayer requires that Apple Testflight application in installed on your iPhone. Follow these simple steps, and you' be enjoying the new demo environment in 1 minute:
- Install TestFlight from the App Store on your iOS device
- Open Safari from your iPhone and Tap on the button Download for iPhone and iPad:
- TestFlight opens up asking you to Accept, Install or Update CREO Player
- Click Open, and CREO Player shows up
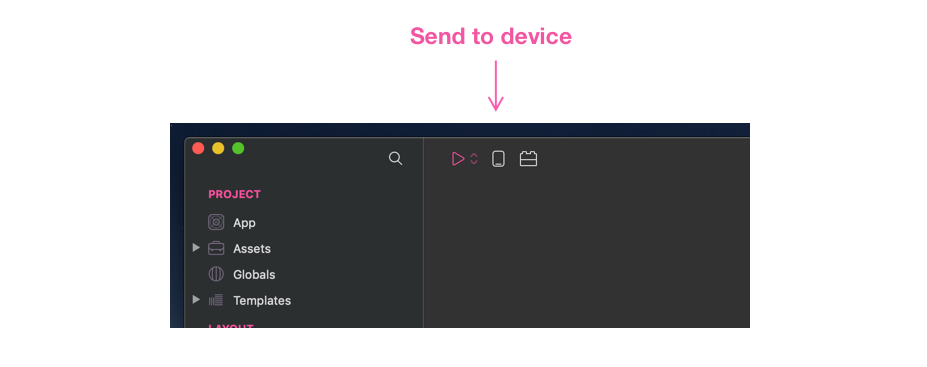
Now, here comes the magic of Creo! Be sure that your iPhone—with CreoPlayer installed—and your Mac—with Creo development environment—are on the same wifi network. Open the Selfie App project on your Mac, and click on Send to device icon:
If CreoPlayer is active you'll get this message on the Mac screen:
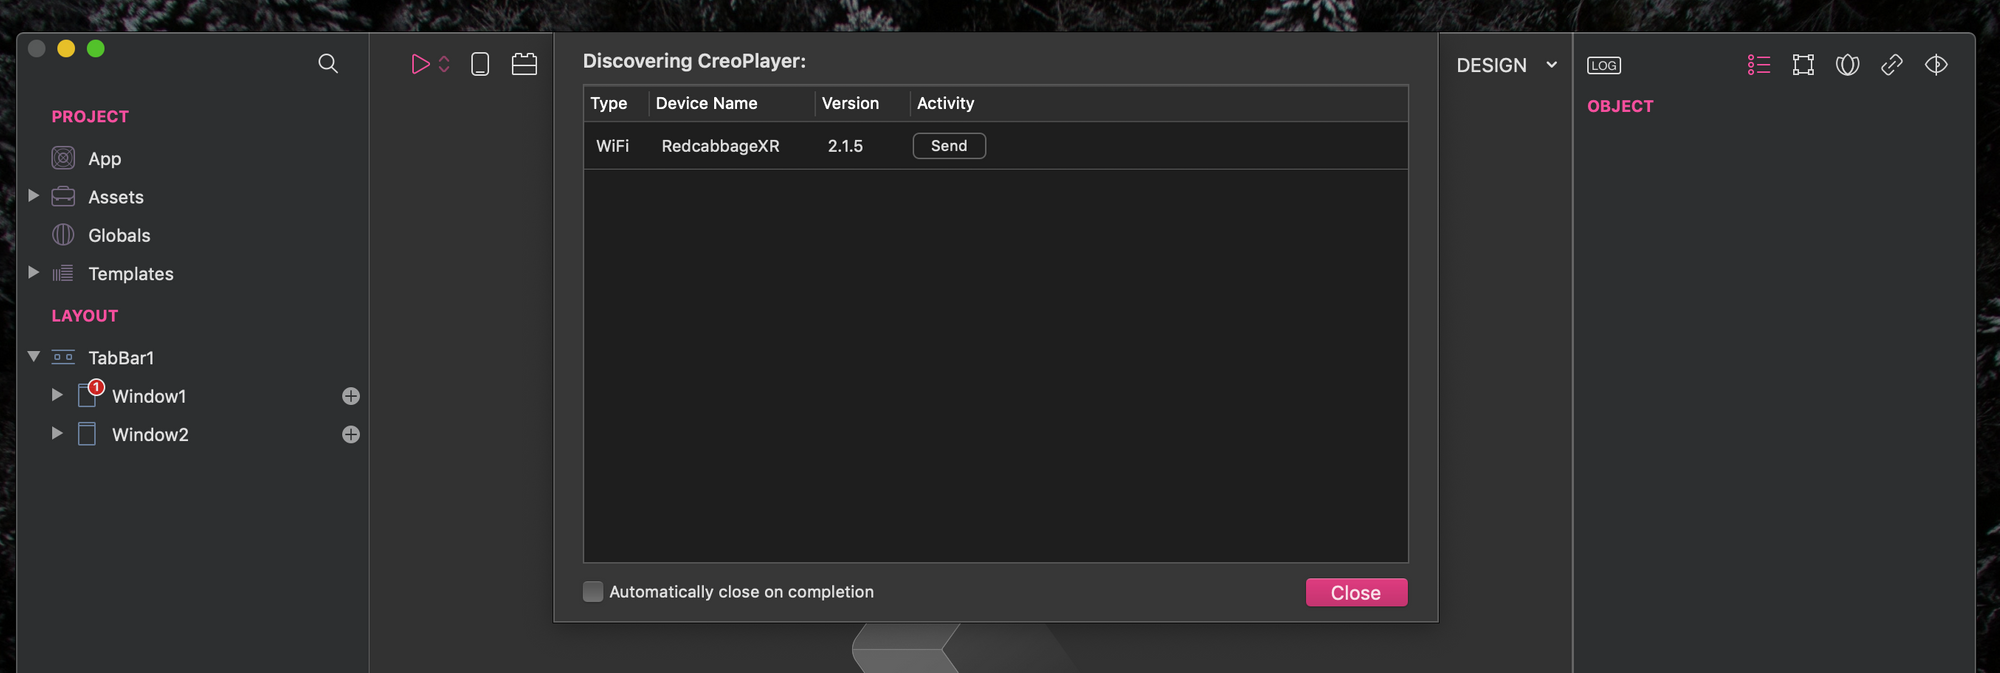
Click Send, and that's it!
One final tip: remember the target device
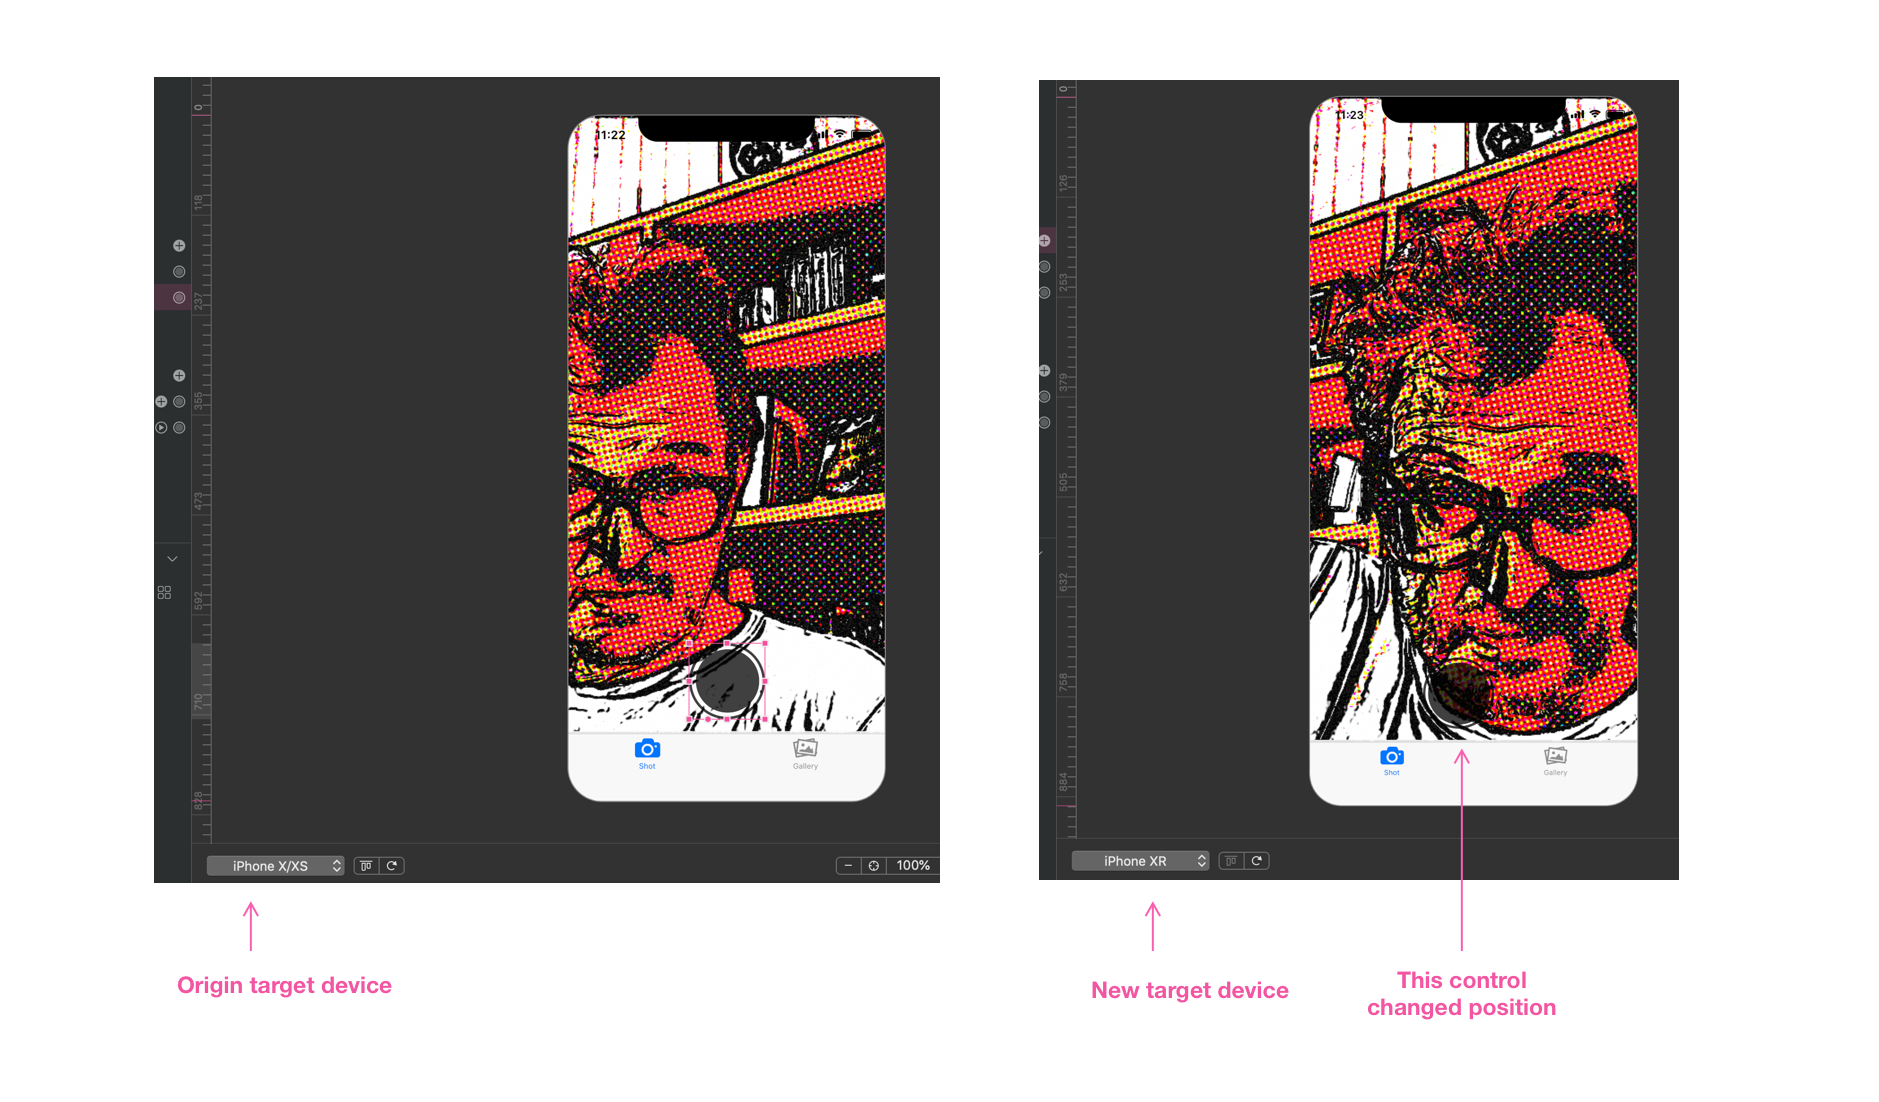
I developed this entire example with iPhone X/XS as my target device on Creo. At the time I was ready to send my Selfie App to CreoPlayer, I forgot to set the right target device—I have a iPhone XR, not X/XS.
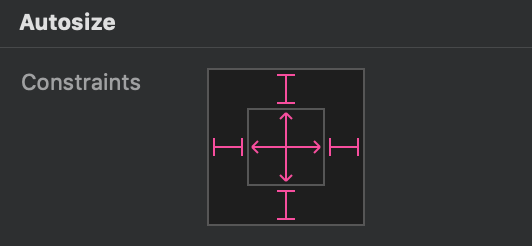
Well, that's important. Once I changed to iPhone XR, my some controls changed position or size. UI controls misplacing or wrong resizing happened because Autosize -> Constraints property comes into play. Let's see how.
Shooting control
Changing the target device impacted the position of the shooting control:
I'll show how to manage that in a minute. Let's set X/XS as the target device target, select the shooting control, and let's check its Geometry Inspector. We have three constraints applied to this control:
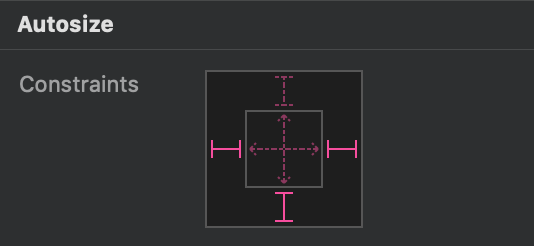
We can relax the left and right constraints (struts), and everything works fine. You can find more about Autosize Constraints here. Similarly, we need to manage resize in the CollectionView1 in Windows2:
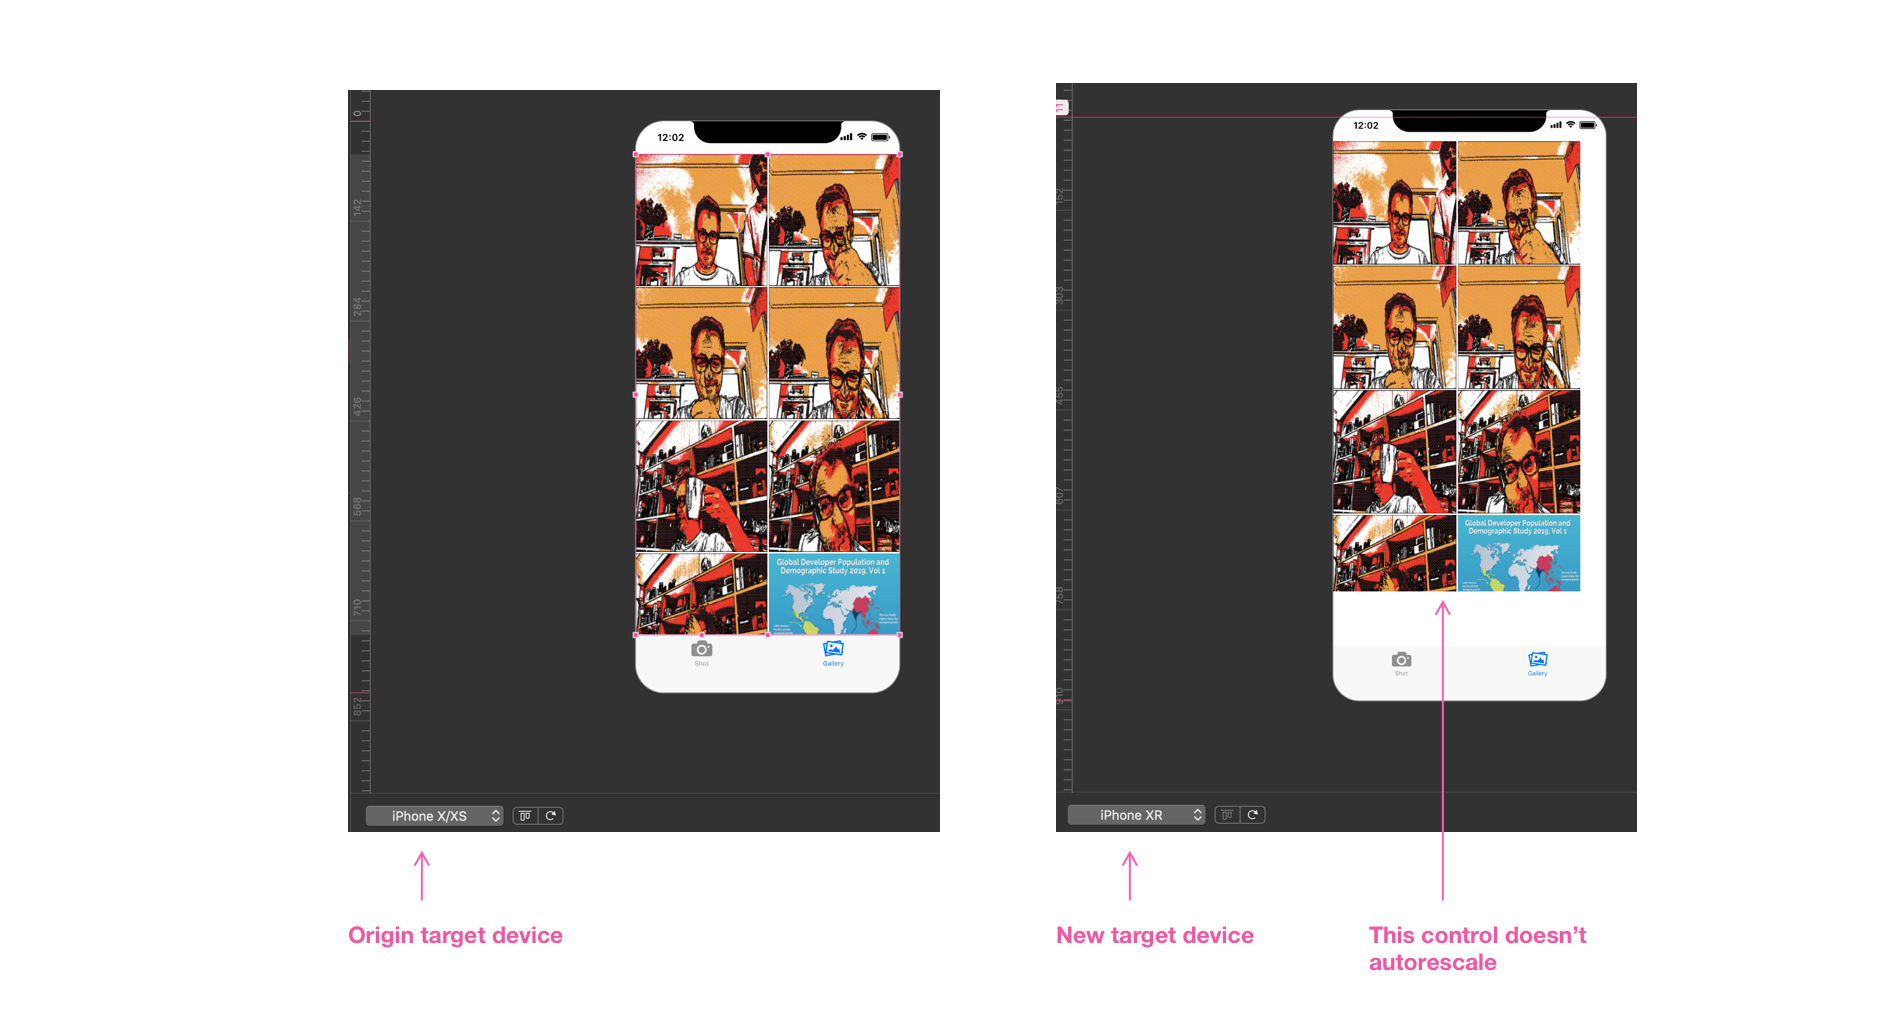
and force the control to rescale like this:
It's all for today. I hope that everything worked on your side as well. If you want to download the Selfie App project—version 2 —you can find it here.
If you liked this article share this article with friends. If you have any questions, we are here to help. Leave your comments below.
I'll be back to you in a couple of days ;)
Ready to move your next step? Read the next article of this series here.