How you can build a private photo-sharing app in 30 minutes with Creo
Ciao designers and wannabe mobile developers all over the world. Incredibly useful stuff this time. Great—Italian—design, how to use the File Manager to store your files, how to share pictures with one line of code, how to get precisely N pictures in each row using a CollectionView, and much more.


TL;DR Ciao designers and wannabe mobile developers all over the world. Incredibly useful stuff this time. Great—Italian—design, how to use the File Manager to store your files, how to share pictures with one line of code, how to get precisely N pictures in each row using a CollectionView, and much more.
Welcome back 🙏🏼!
This article is part of a two articles series not just focused on helping you learn Creo, but also on how to use it to validate your idea with users. If you missed the previous post, you could read it here.
My goal is to complete Creo Camera, my beautiful photo-sharing application. I want to use Creo Camera to take square pictures with an impressive filter. I also want to keep my photo album private—so I store my photos on the iPhone file system—, and share my amazing pictures with friends. I'm going to use the app for some days on my device, and then I release it to the AppStore.
Taking pictures and showing them on a CollectionView is an easy task using the CameraRoll component. I introduced the CameraRoll beauty in a previous article. This time though, I want to keep my photos private to my app. For this reason, I use another class to store and access photos: the File Manager.
You can find many apps to take pictures in the AppStore, so I decided that my app has to be unique. With Creo Camera, all photos will look beautiful, no matter what. I'm a good designer and not just a software engineer.
To make that happen, I set some constraints on the photos I take with Creo Camera:
- I want square pictures only
- All the pictures have a default graphic filter set. I love the Matrix movie, so I'm going to define an effect the resembles the one used by the Wachowski brothers.
All the pictures in my private file-system gallery will share a similar style.
How to take pictures, manage them on the file system
If you want to follow me while I'm coding, download the base project now.
Let' start. I add a new Window—Window2—that shows up touching the camera icon on Window1. This task is similar to what I did in a previous article, so I'll do this quickly. Download this project phase if you want to see how I did the design part. The result is this:
I add some code to the camera switch on Window2 and it switches front with back:
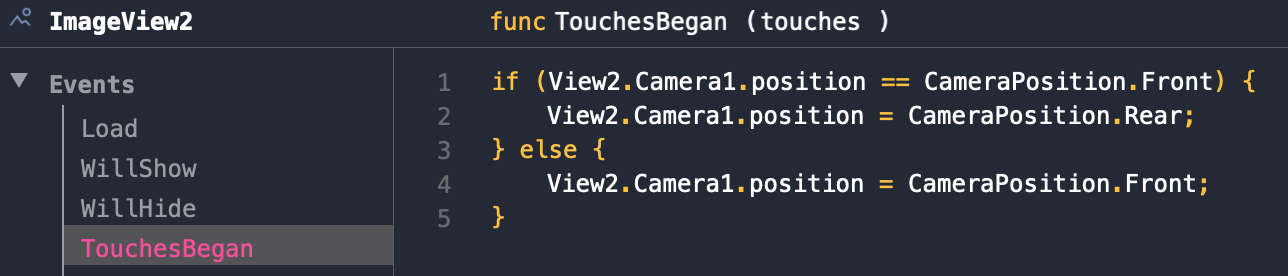
CameraPosition object in an enumeration documented at the bottom of the Camera class.
To take a picture and then save it on the file system, I need two objects: a File Manager instance—to manage any file system interaction— and a DataSet instance—to get picture filenames in memory. For picture filenames I use this format YYYYDD-A: a) YYYY for the year, b) DD for the day of the year, and c) A for the milliseconds of the day.
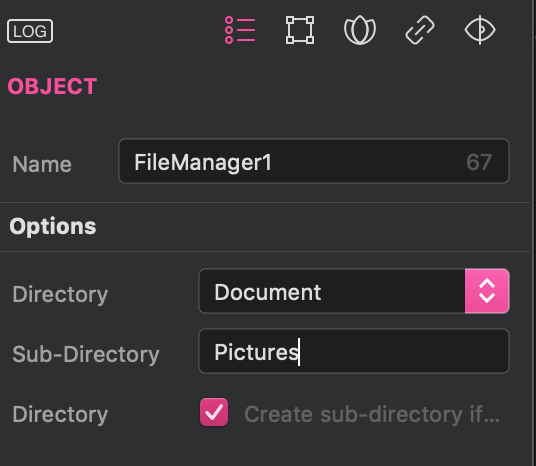
DataSets are incredibly useful: once you fill them up with data. For example, you can bind them to a CollectionView in one click. Let's add a File Manager and DataSet instance to the Global folder. Any object/event in the app can see what's in the Global folder. Now, select FileManager1 object and set its properties in the Object Inspector:
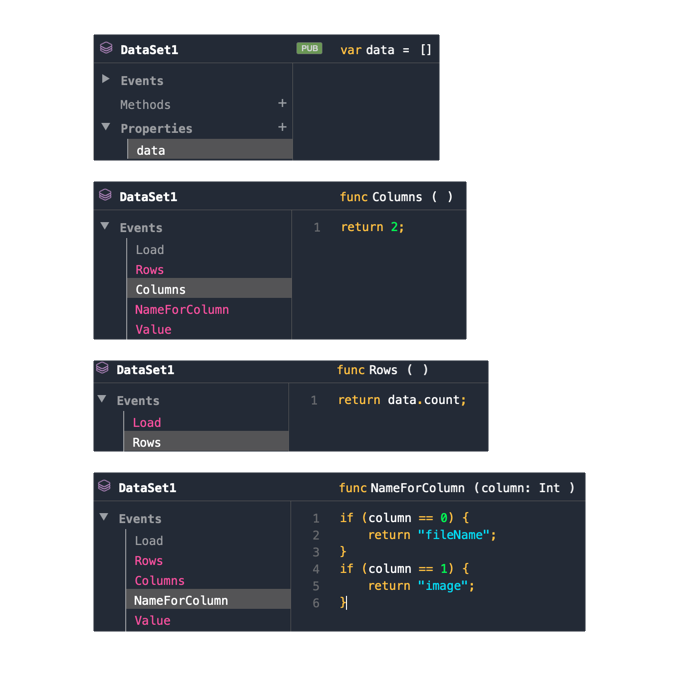
Define a property named picturesDirName in the App object and set its value to "Pictures". Select DataSet1, define a private property data to store filenames, set its Rows, Columns, NameOfColumns consistently:
To load picture filenames into DataSet1.data property I add a method to DataSet1, because I need to call this function more than once. I need it when DataSet1 load event gets fired and when I take a new picture—to reload the dataset from the file system:
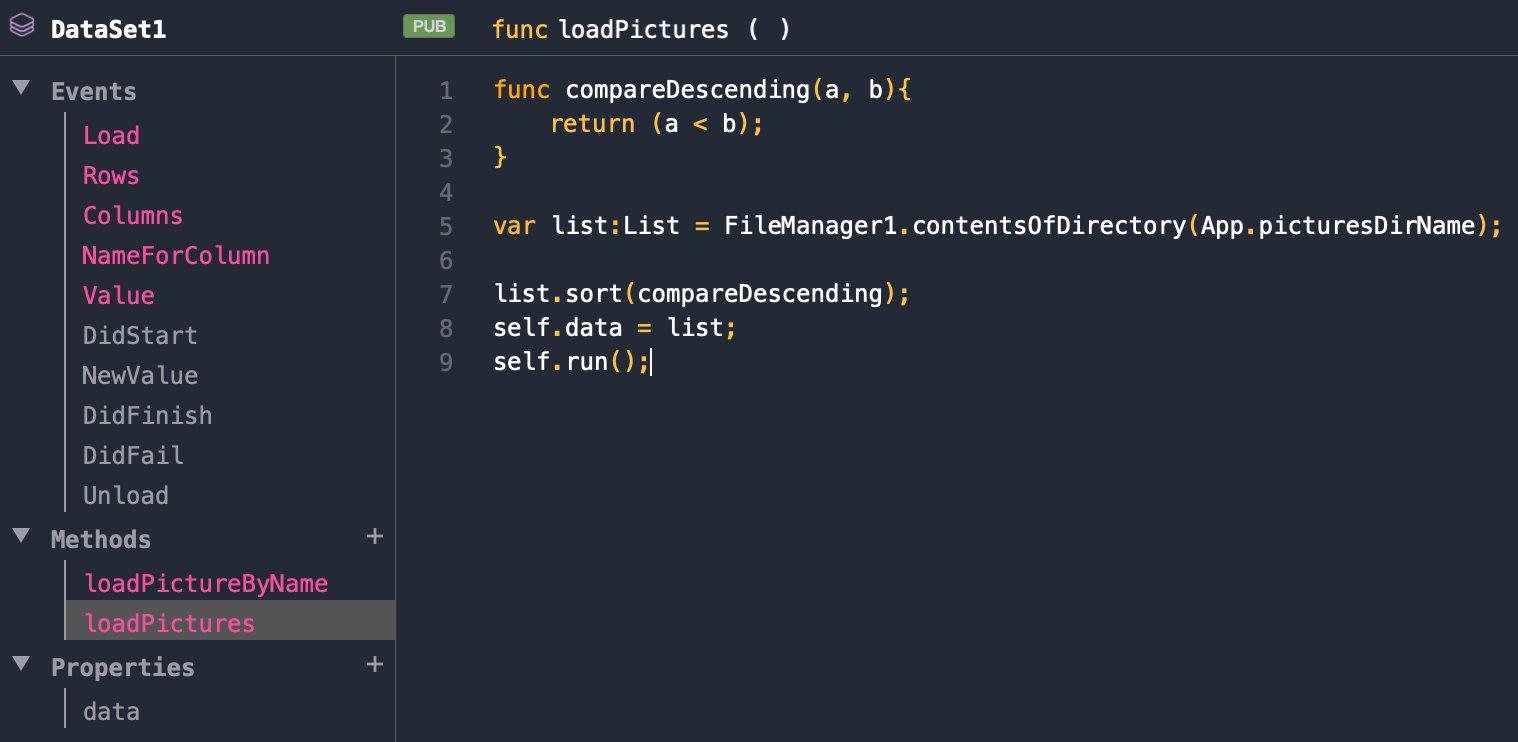
Passing a hint to the Gravity interpreter. In the source code above, you see I've declared a variable passing a hint to the language interpreter about the variable type: var list:List=[];. Gravity is a dynamically typed language, but type hinting enables the Creo auto-complete feature. The list.sort method is available since Creo 2.1.6. Default sorting is ascending, but you can specify how to do the comparison passing it a function—CompareDescending in my case. This is a closure:
Closures are self-contained blocks of functionality that can be passed around and used in your code.
Now I call the loadPicture method in the DataSet1 Load event—I'll do the other call in a minute.
Take some pictures
The next step is to take some pictures and store them into the app file system. To store a picture on my device I need to run View2.Camera1.capture() when the Click "button" on Window2 is touched, and save the image file to the file system. I can easily do that, in the NewImage event of Camera1:
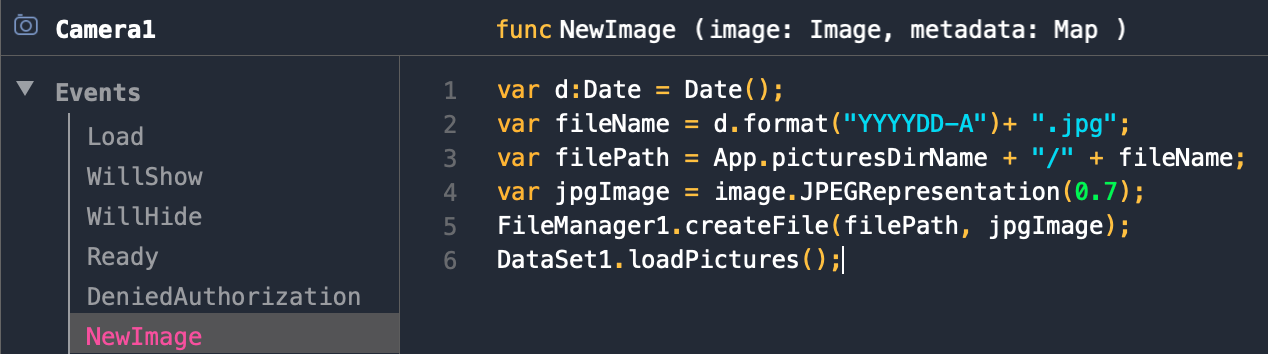
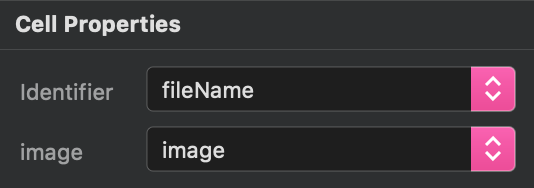
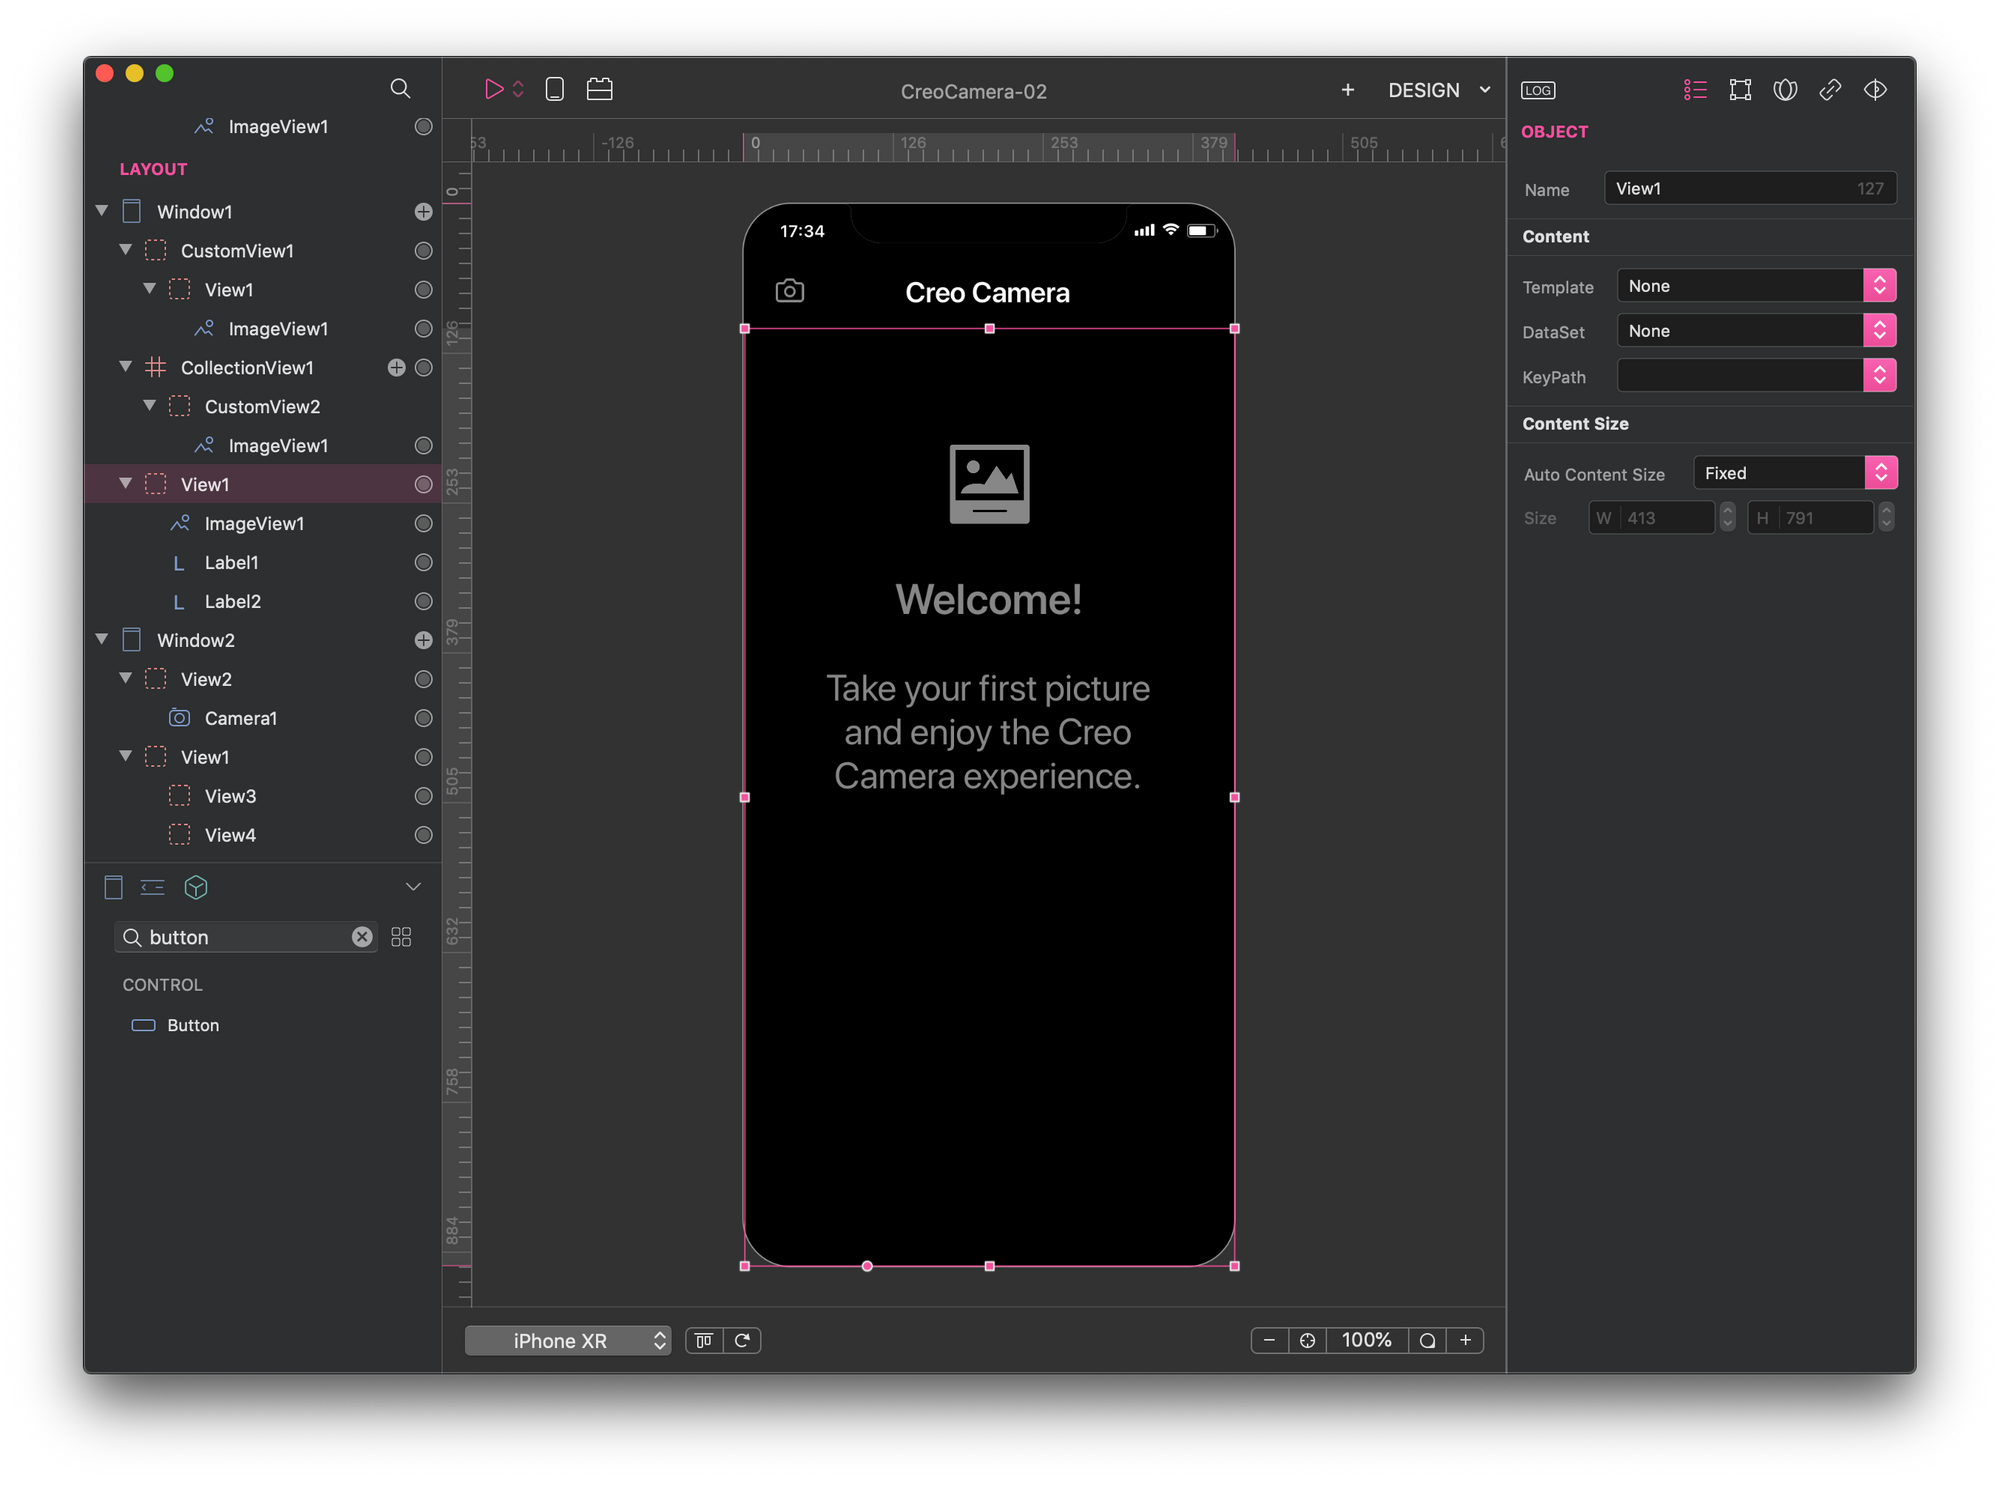
One important thing to remember when you want to save an image to the file system is that you need to rasterize it before saving it. The class Image provides one convenient method to do that through the JPEGRepresentation method. Now I can finally use a CollectionView to show my pictures on the iOS device display. Drop a CollectionView object into Window1, change its DataSet property to DataSet1 through the Inspector, and map DataSet1 properties to the Cell Properties:
To complete the CollectionView design I set Min Line Space, Min Item Space properties, and the four Insets—T, B, L, R— properties to 12.
How to load pictures into memory the right way
Before I can show pictures in CollectionView1 I need to implement the DataSet1 Value event. This event is called every time a value of the DataSet1 is needed somewhere in the application.
iOS limits the apps memory usage, so it's essential to make efficient use of it. It means, for example, that I cannot load all my file system pictures in memory at the same time. When a full-resolution photo is loaded into the iPhone memory, iOS expand it. If I take a full resolution picture made with the back camera of an iPhone X, its expanded size becomes 4032 x 3024 pixels x 32 bits for the RGBA—~47MB.
For this reason, it's fundamental to read the image from the file system only when it's needed.
The code in the Value event loads an image from the file system only when it's required. Then scale it to the cell size to avoid memory wasting—I'll talk about the size property later:
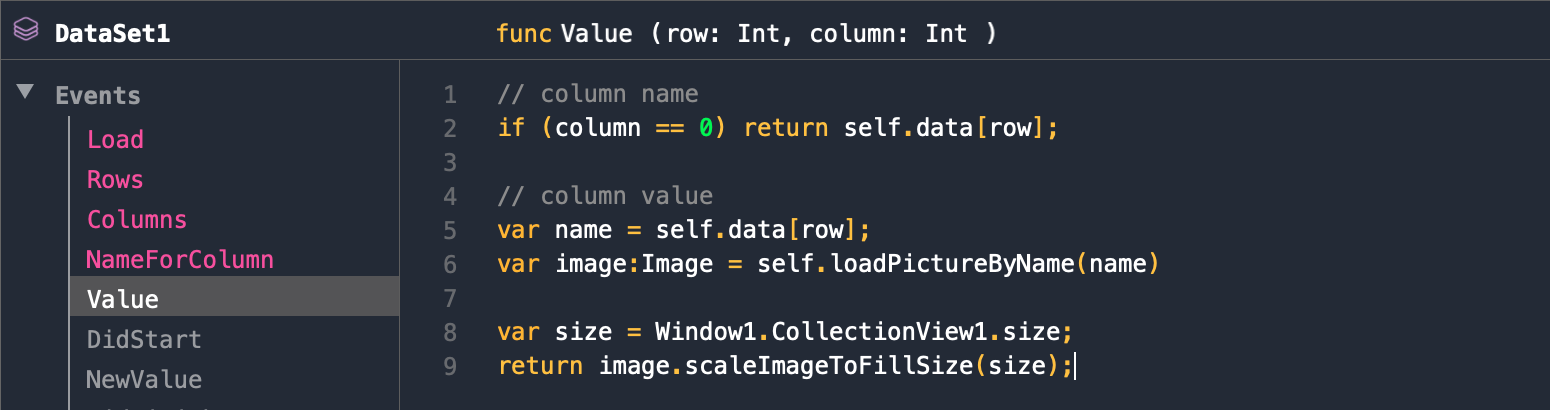
Value eventWhere, loadPictureByName is a method I've defined in DataSet1 which returns a full resolution image given its filename:
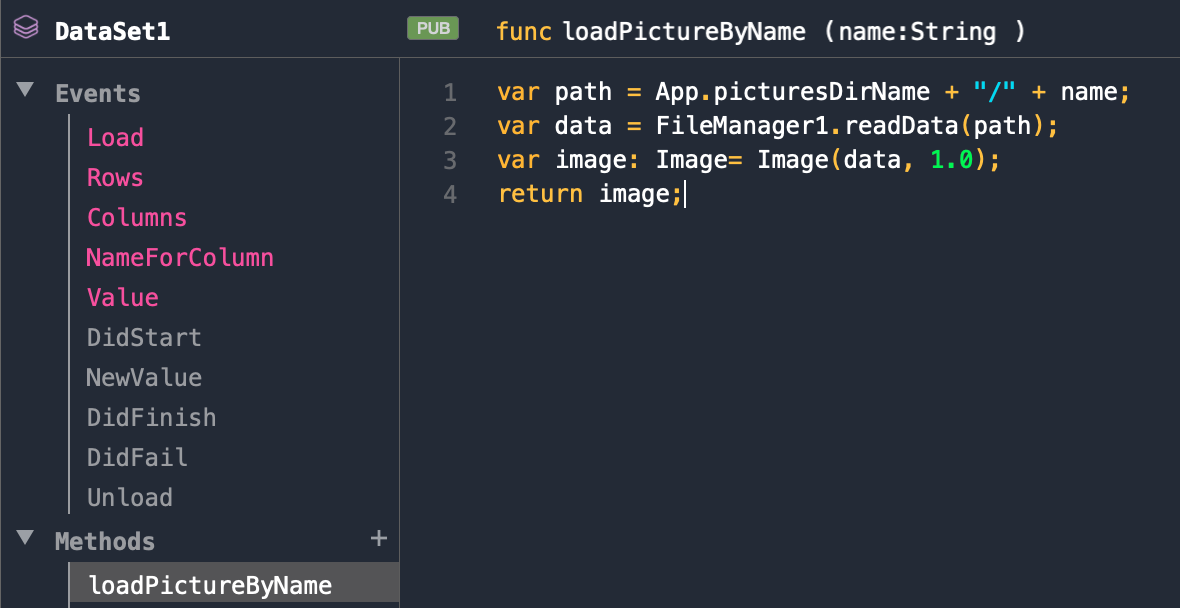
Image(data, 1.0) loads the image at full resolutionYou can now run the application in the Simulator, take pictures and show them in the CollectionView1.
Controlling the CollectionView Layout Flow
You may have noticed that in case you have an odd number of pictures, the last 3 of them appear smaller and on the same row. We can fix that behavior with a small hack. This behavior happens because I'm telling the CollectionView to balance the layout of the pictures using its algorithm, through the property Layout Flow set to Balanced Flow. Because I want to create a perfect app, I want to have precisely two pictures in each row. So, I set the Layout Flow property to Flow, and then I manage to control the cell width and height from the app's source code. It's not hard, but you need to know where to do that.
If you select the CollectionView1 control, you find that it exposes an event called CellSize. That is the place where you want to set the cell width and height at run time.
If you look for the CellSize event in the Creo documentation, you find this paragraph:
CellSize(section: Int, index: Int): Size.
This event asks for the size of the specified item's cell. If you do not implement this method, the collection view uses the values in its item Size property to set the size of items instead. Your implementation of this method can return a fixed set of sizes or dynamically adjust the sizes based on the cell's content. Only applies to the normal flow layout type.
So, thanks to this event, I can customize the cell size dynamically in this way:
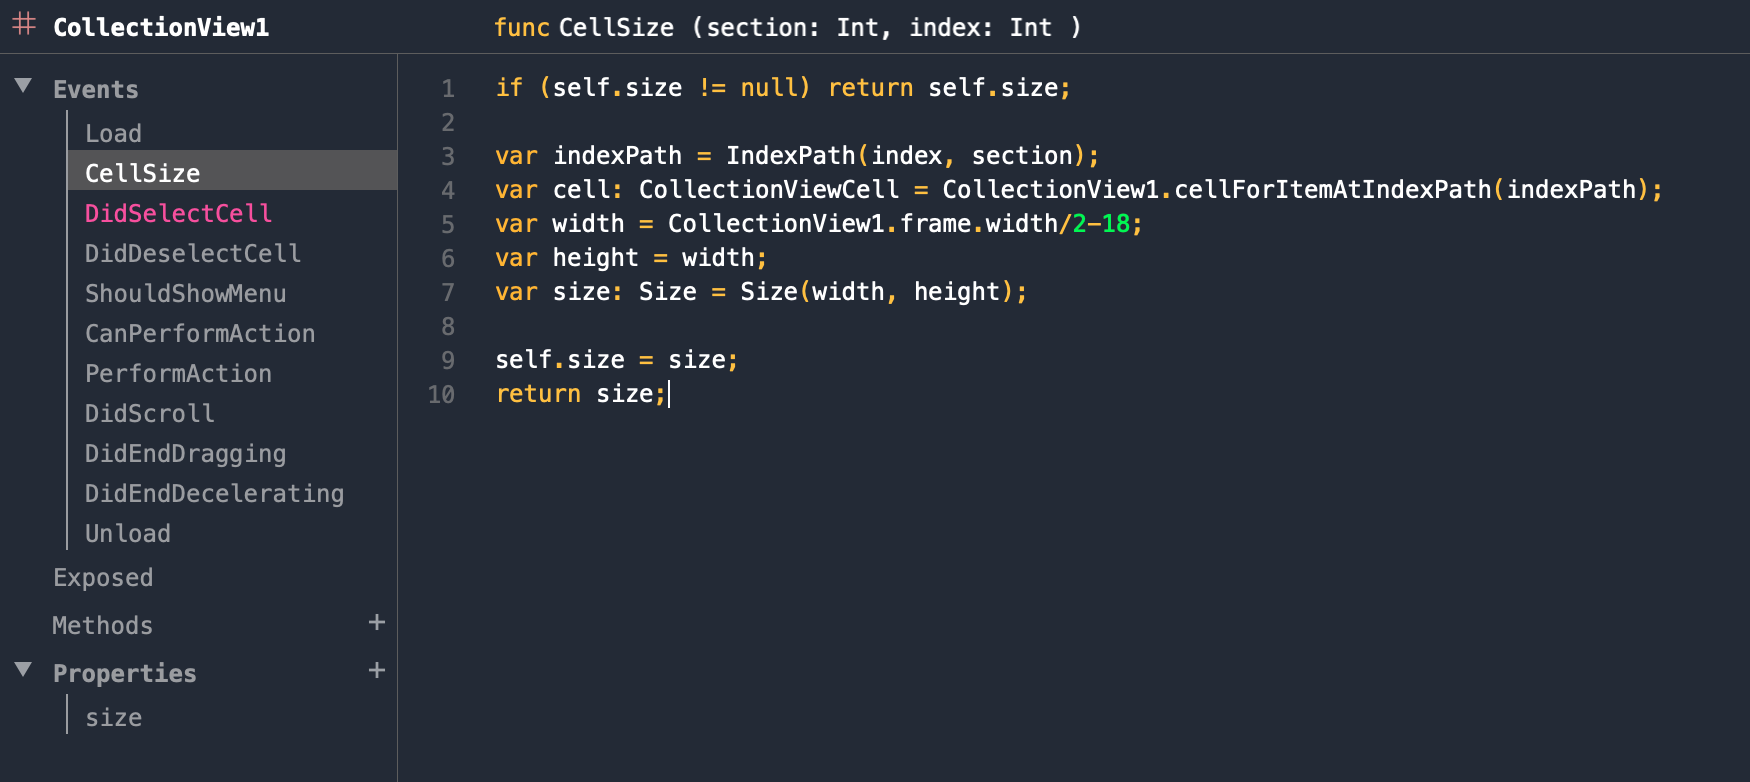
Note that, I don't need to recompute the size for each cell of the CollectionView grid. I only need to do that once. So, I define a size property in the CollectionView, and then I elaborate the cell size only the first time.
Saving, sharing and deleting pictures
🏄🏽♂️ Fast forward to the last step. I want to select a picture from the list, show it in a new window, and enable the user to accomplish three actions: delete that picture, save it to iPhone photos, and share it with other people.
First off, I add a new Window container— Window3. I drop a HeaderView instance and I set its Auto Content Size to Fixed as usual. Then I add the back button, <, to the header instance to close Window3 when it's touched. That's easy; we did it many times.
Touching a picture on CollectionView1 I want to show it on Window3. I define one property in Window3—filename—, and I fill it up when a cell gets selected. Remember that the cell.identifier has the picture filename in it:

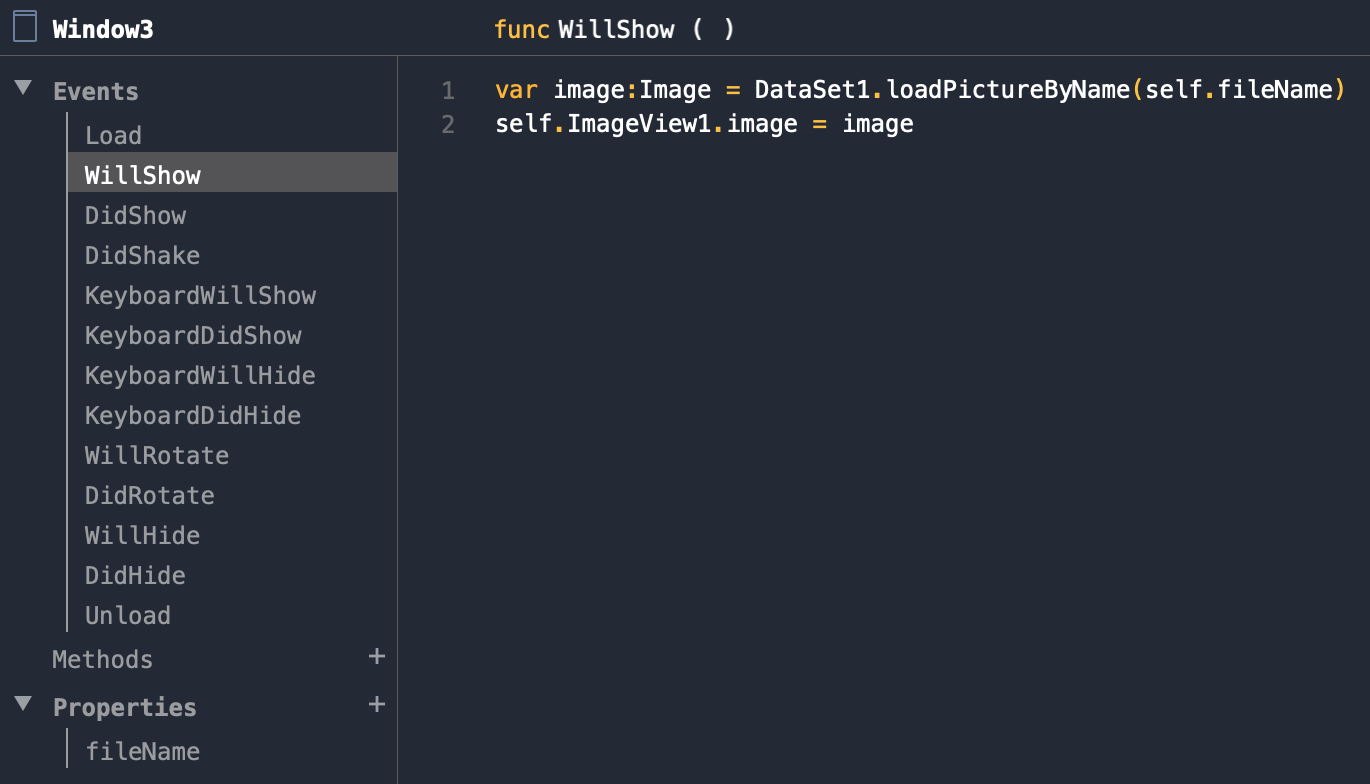
I now add an ImageView instance—ImageView1—to Window3 and I load the full resolution image from the file system when Window3 shows up:
If I run the application, I can now select a picture and display it in a separate window.
Let's get back to the actions I want to accomplish on the displayed image: I want to save, share and delete it. First of all, I add 3 icons—using ImageViews—to Window3. As usual, I download the icons from Feather Icons, and then I transform SVG files in PNG files—1x, 2x and 3x. I add a View— View1 — to Window3 and I drag and drop three ImageViews onto View1. On each ImageView, I add three PNG files—1x, 2x, 3x. The resulting screen should be like this:

Remember to enable the Interaction Events property on all the ImageViews. Adding the remaining functionality is pretty easy in all cases:
💾 To save a picture, add this code:

🤝 To share a picture, it's even easier—this a new awesome feature added in Creo 2.1.6:

Finally, 💀 to delete a picture, you need to code a little bit, but don't panic, it's just six lines:

The awesome Creo Camera is done 💪.
Final tweaks 🧰
To close this article I want to suggest you a couple of other things to improve this app.
The zero-data use case
The "zero-data" is a classical use case when you develop an application. When users open the Creo Camera app for the first time, there are no pictures loaded, so they typically get an empty page. It's very important getting a very good first impression on your users so that empty page must go away. You can replace it with a welcome message like this:
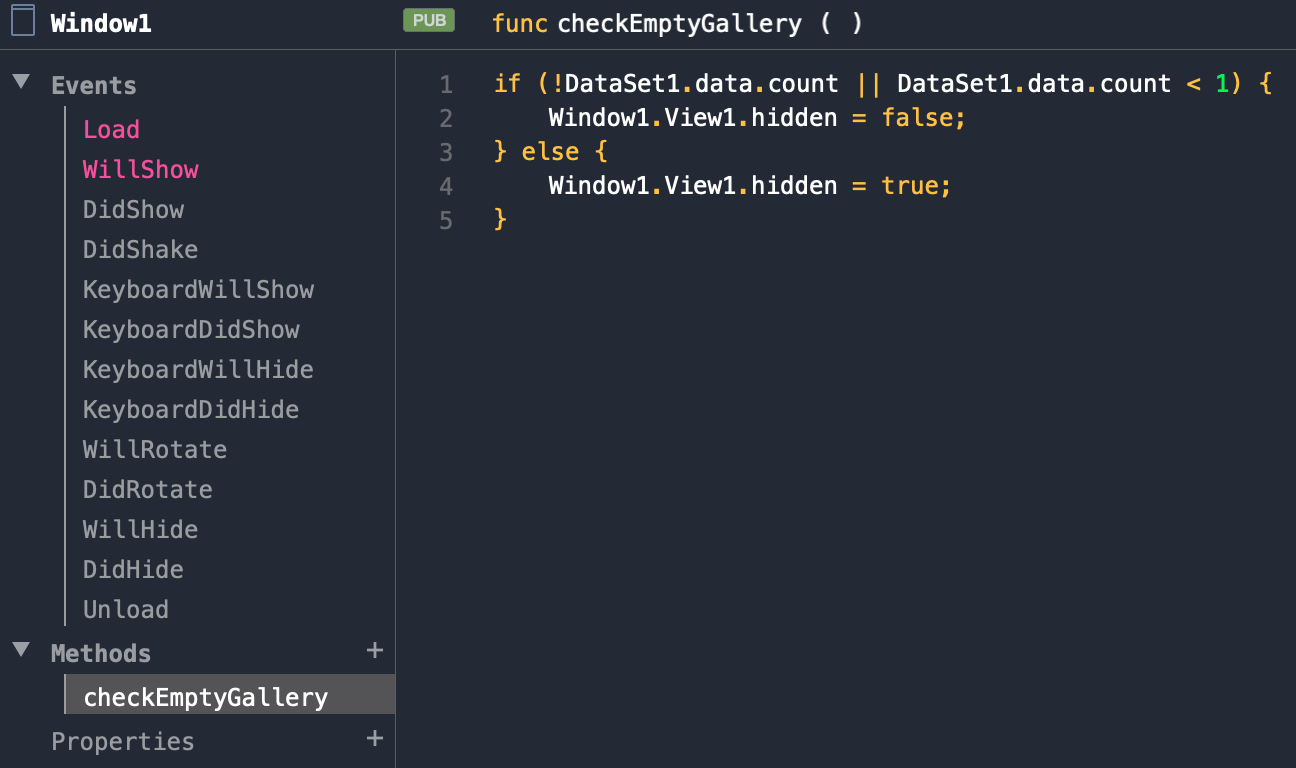
This View— View1 in Window1 container—should be displayed only if the DataSet1.data list is empty. This check has to be done twice in my app:
- When
Window1loads - When a picture is deleted—it could be the only picture in the CollectionView
For this reason, I put this code in a separate method:
A CustomView for custom buttons
As you saw from this post, I use ImageViews instead of Buttons most of the times. Every time I create a new "button" with this technique, I need to remember to enable Interaction Events, set Rendering to Tinted and Tint Color toHEX 888888. Besides, if you create a button using an image, the image is typically a tiny one. So it's better to put a View container outside the ImageView UI control to enlarge its touchable area.
For these reasons, it's a good idea to isolate custom buttons like those in a CustomView:
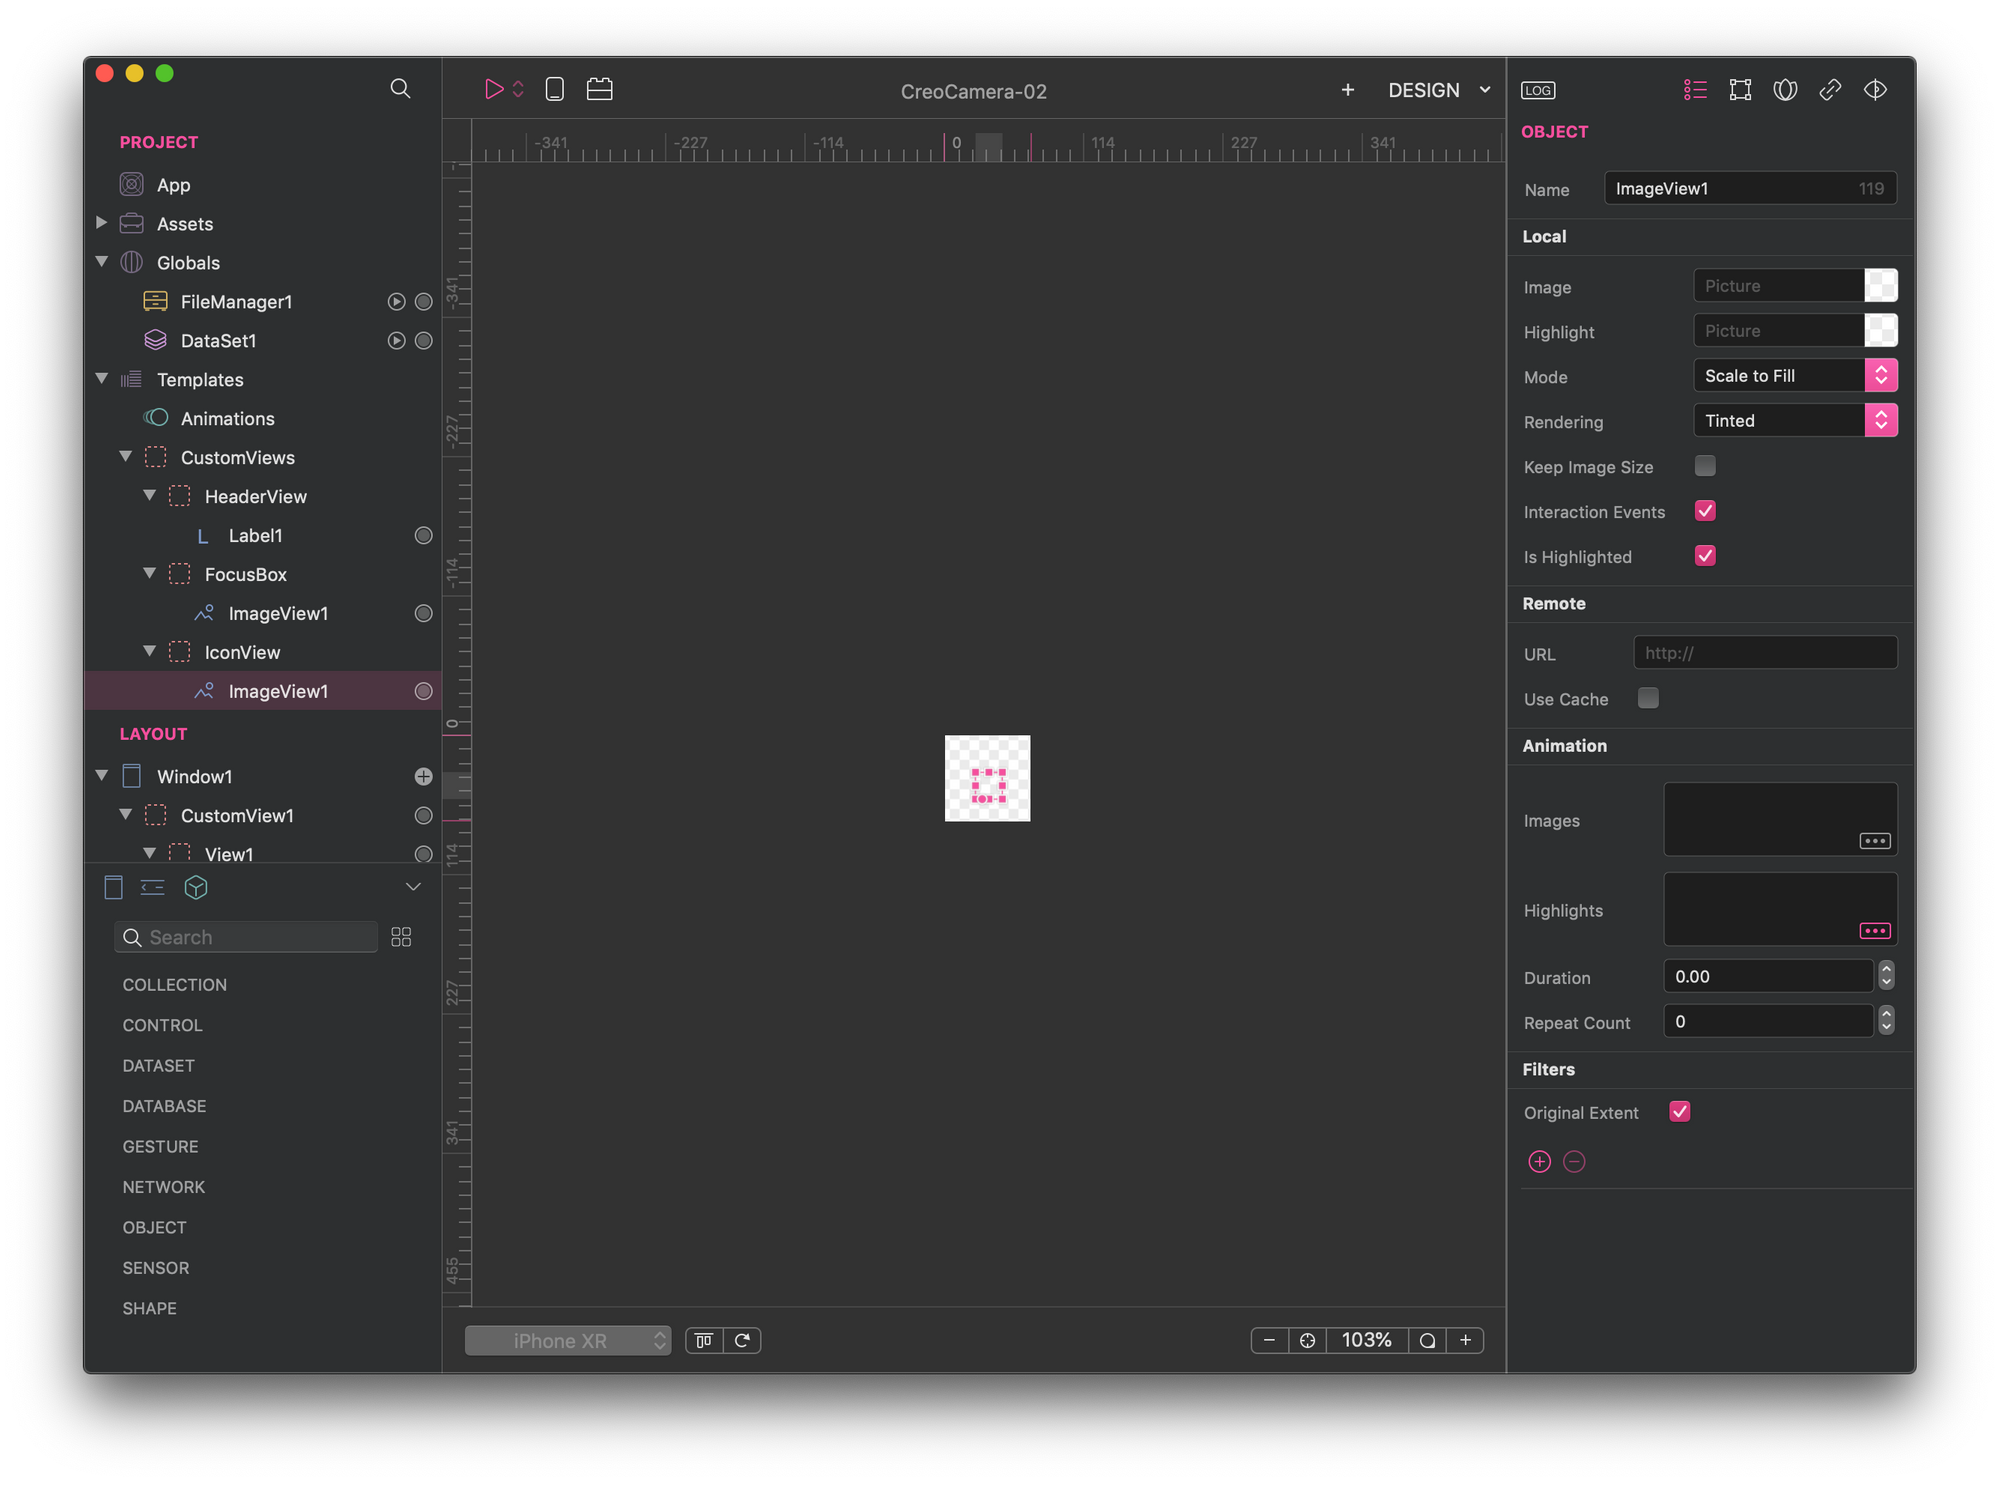
There's just one thing left to do. To use the IconView in my code and be able to personalize the image each time, I need to expose a property—which I call image— from the CustomView itself. With Creo, you can do that easily. Select IconView, open the Exposed Property tab in the Inspector and expose image property from the inner ImageView UI control. That's it.
Now you go change your source code to use the IconView everywhere it is useful.
Conclusions 🙏🏾
I suggest you download the source code of this post, and play with it both in the Simulator and on your iPhone.
Then when you are ready, all the bugs have been fixed and you made the changes you think are necessary, you can publish it to the App Store.