How to create a Happiness Journal app in Creo using SQLite


Sometimes you want to store data locally on your iPhone, and to do that you need a database on your local device. This time we're going to use SQLite to create an app to keep track of your happy moments during the day. We want to use it as a kind of log, a quick way to keep track of your daily happy moments while they happen. Technically speaking we are going to define each happy moment record as a logline.
A few requirements: loglines are not editable, we want to show them on a list and access them in detail on a new window. We want to be able to delete them.
In this article, we are going to learn:
- How to create a local SQLite database with Creo
- How to manage lists of data through Table Views
- How to add a logline record to the database
- How to display a logline detail in a separate window
- How to delete a record from the database
Before start reading download Creo IDE — if you didn't already.
Ok, lets' begin creating a new fresh project from the Creo interface.
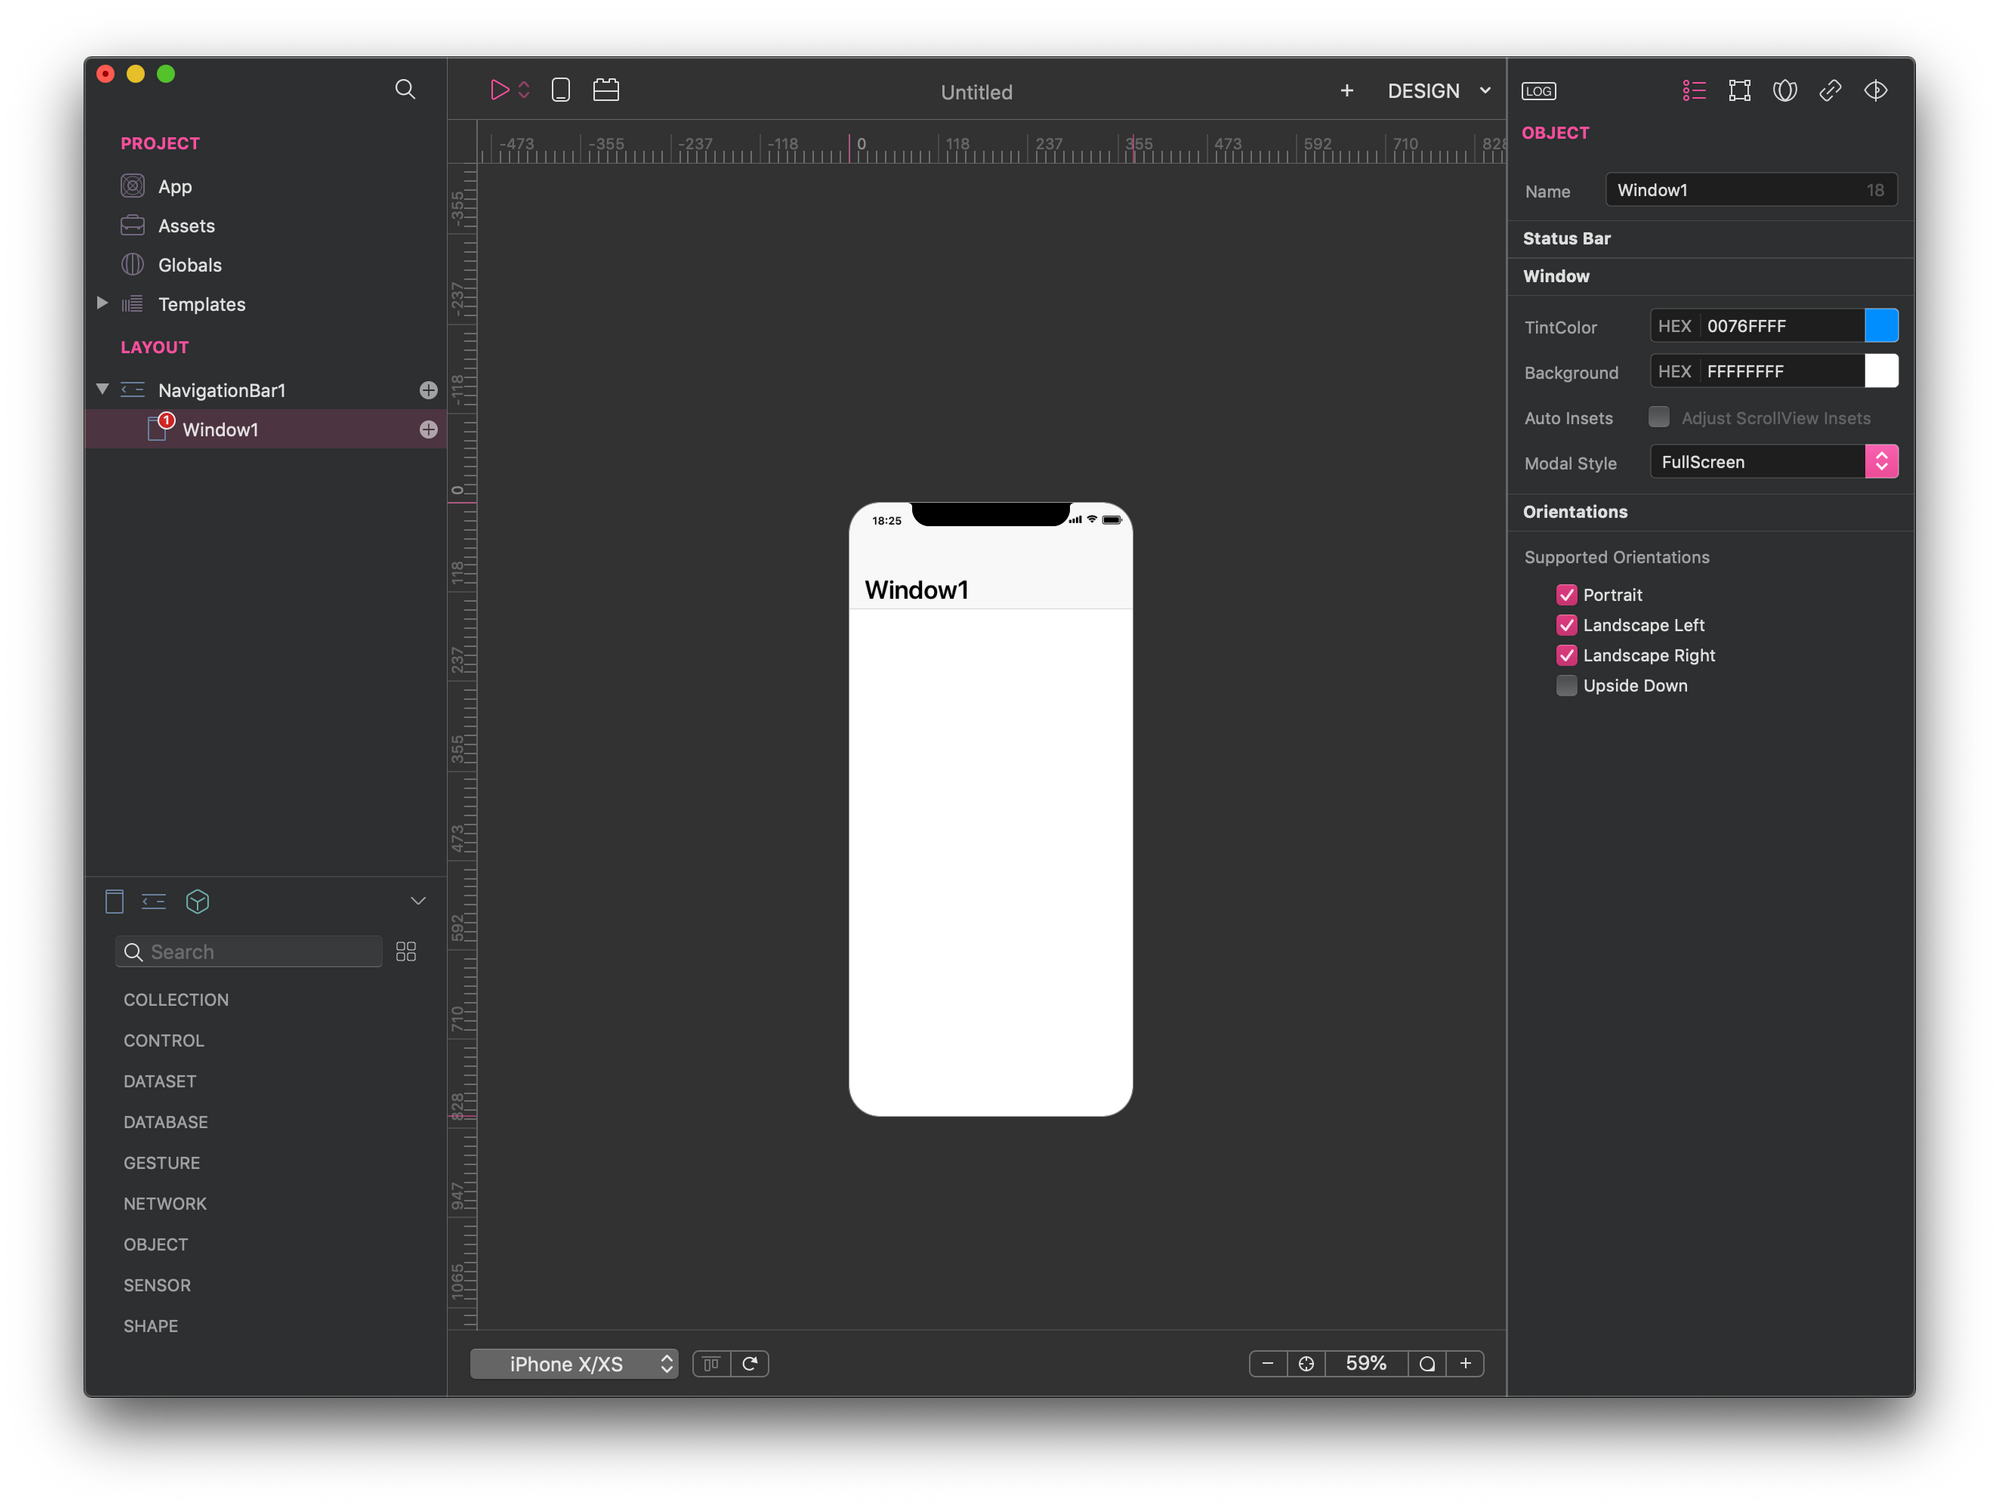
We don't need a Navigation Bar for this app, so let's move the default window created by Creo outside the NavigationBar1 element, delete NavigationBar1, and keep the Window1 container instead.
How to create a local SQLite database with Creo
Creo and SQLite work very well together and in a minute you'll see why.
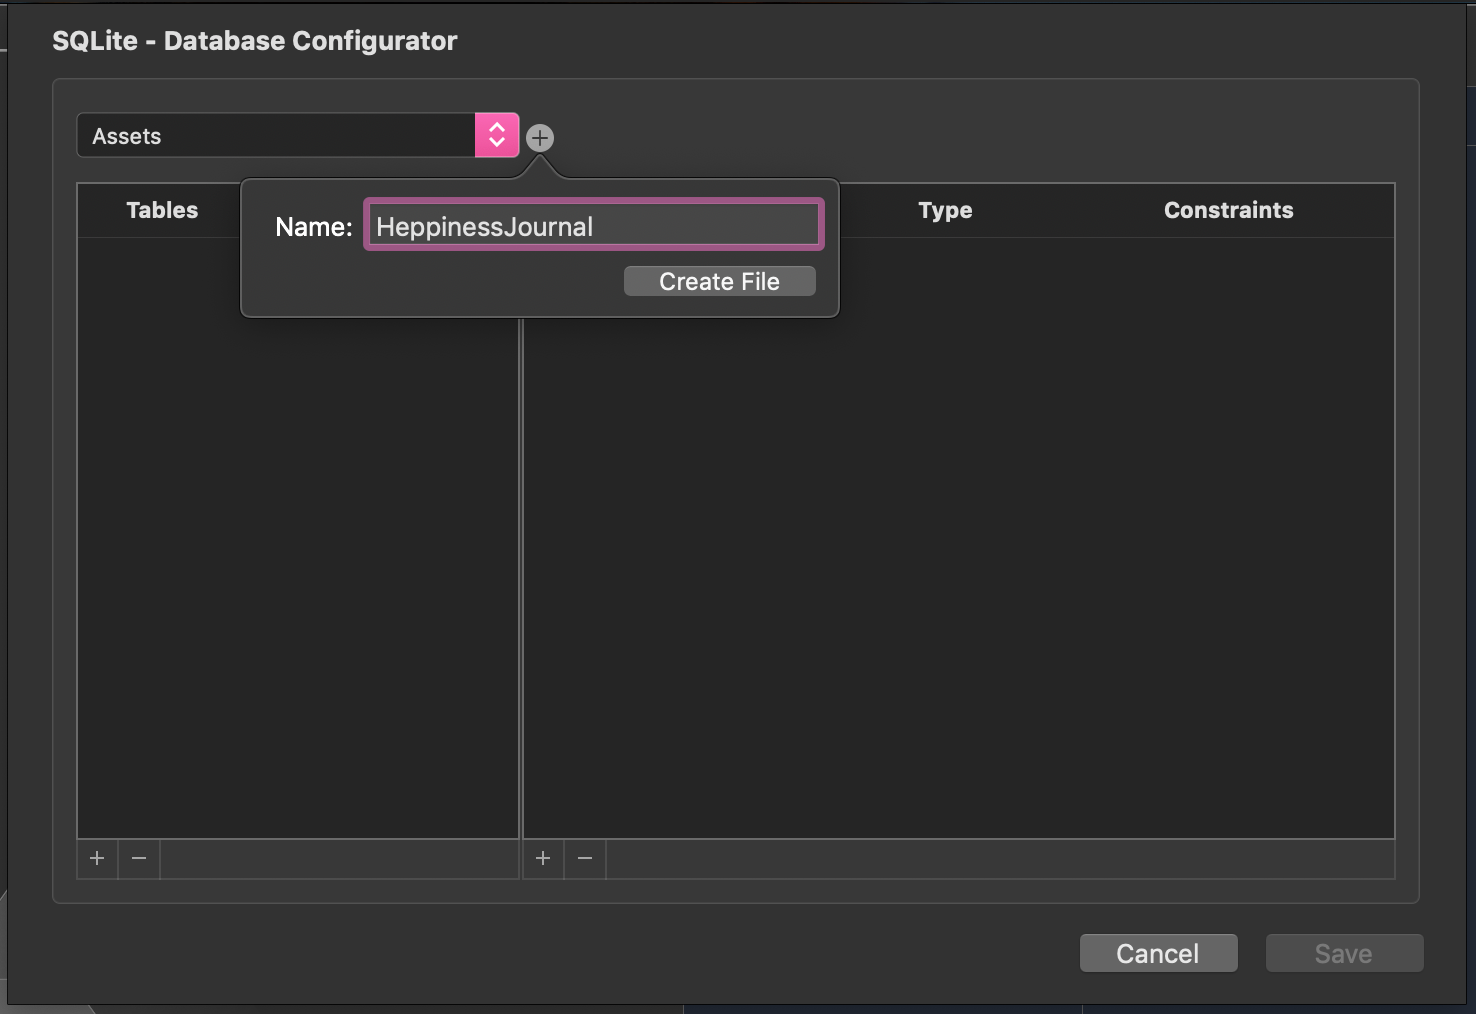
Let's go to the Controls List panel and search SQLite. Now drop it on the Project Globals panel, and the SQLite Database Configurator pops up on the screen. We want to create a new Asset—not an in-memory database— so we select this option from the dropdown menu, and we name this new asset accordingly to the application.
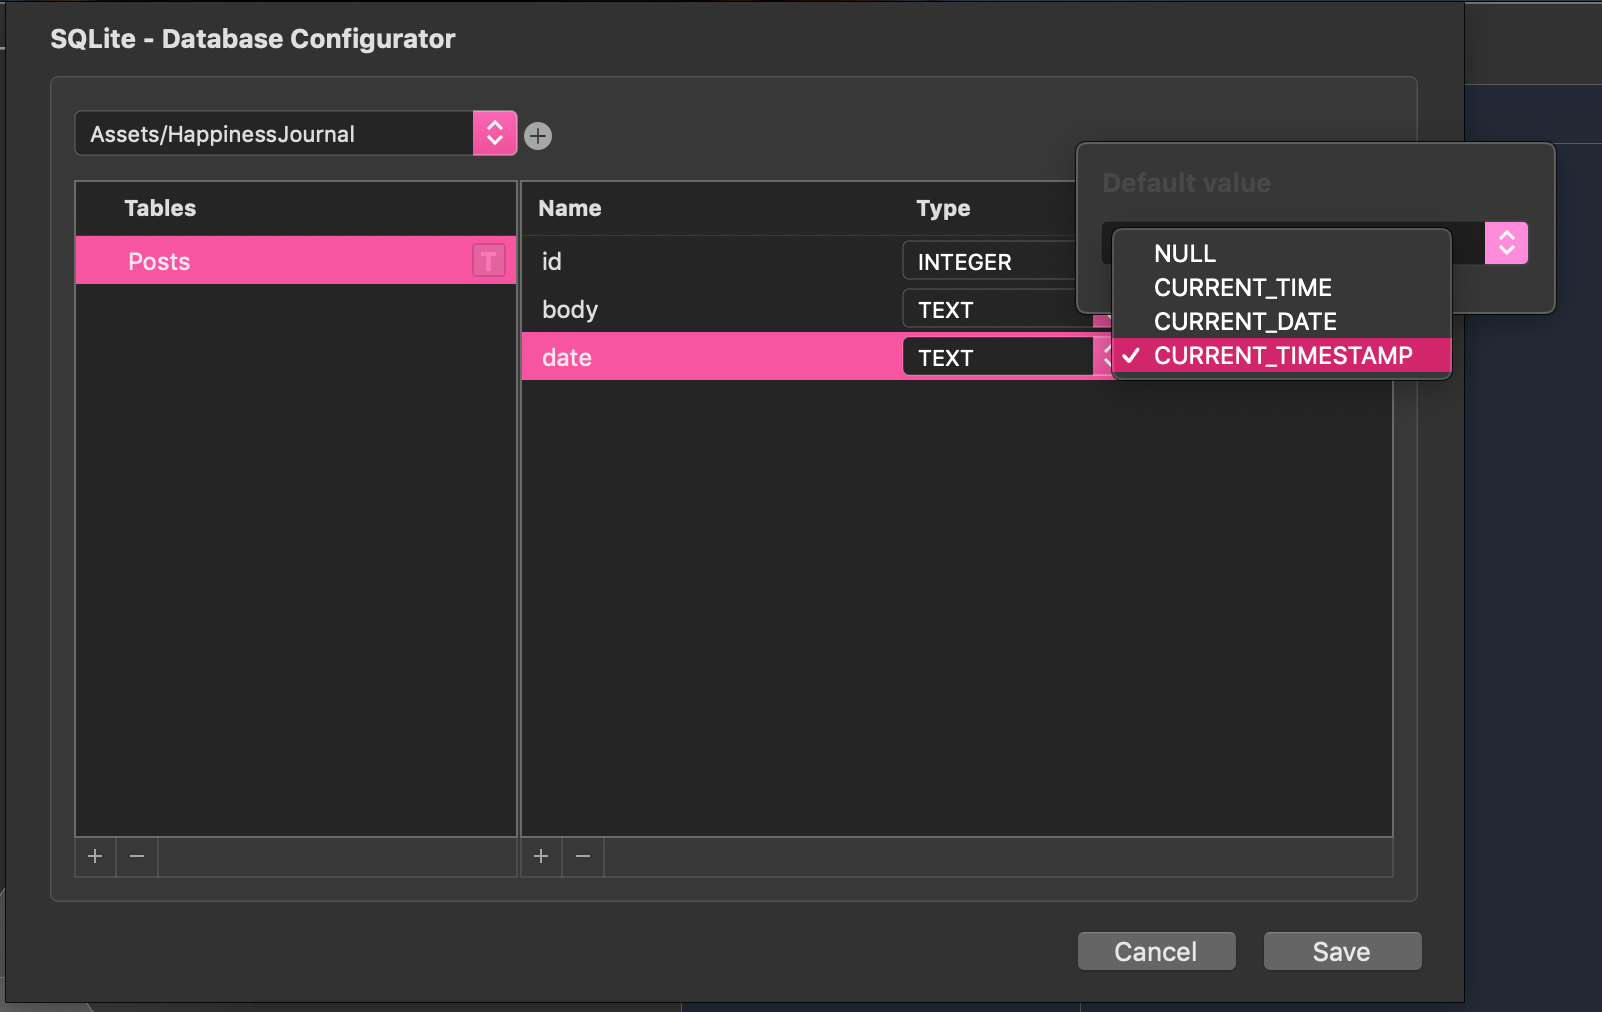
Let's now add a table named Posts and define its attributes:
- an
idattribute—primary key, autoincrement, and unique - a
bodyattribute - and a
dateattribute
When we save our database, a new object is added to Globals — SQLiteDatabase1. We use this object to interact with the Happiness Journal database globally in the application.
If we select the SQLiteDatabase1 object, we can define if we want to use it as a read-only data source or not. We need it to be read-write in our case, so we decide to locate it in the application's Documents space.
How to manage lists of data through Table Views
Let's get back to the Window1 container, which should include 3 areas: a header, a way to insert a new logline, and a list of loglines already added.
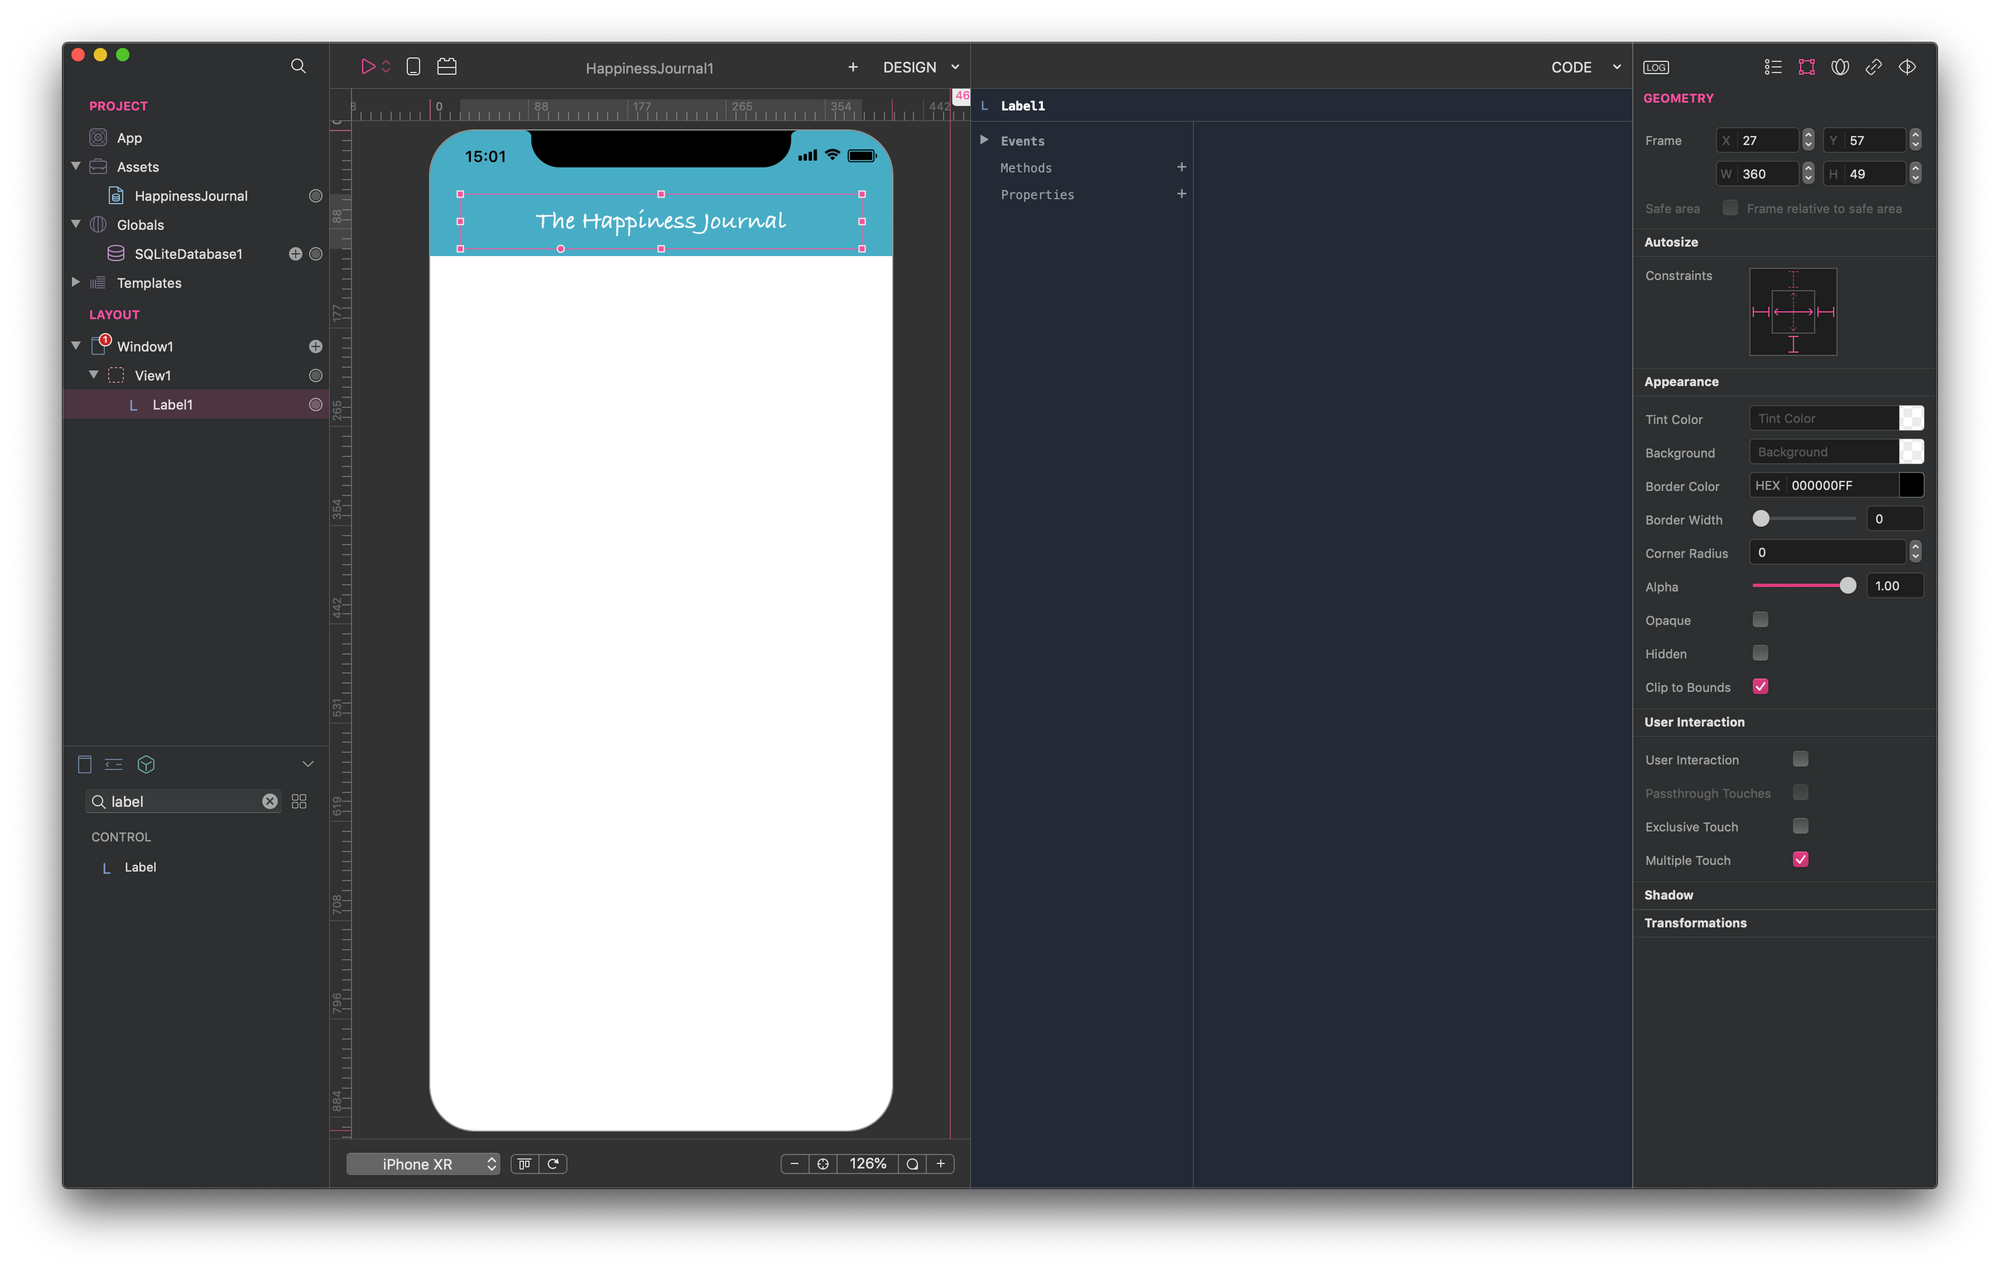
Creating a custom header
That's easy, and we did it before. We need a View and a Label into it. We set the view background to blue— #48ADC6FF —, lock its top, right and left constraints, and let it auto-size both horizontally and vertically. Then we center the label, change its font to a nicer one—how about Bradley Hand?—, enlarge it a little bit, fix its left, right, bottom constraints, and we let it auto-size horizontally. As a result, we get this:
Defining a way to add loglines
Our application is need to be easy to use, and that's why we want to add a new logline directly from a an input control positioned on the main page of the app.
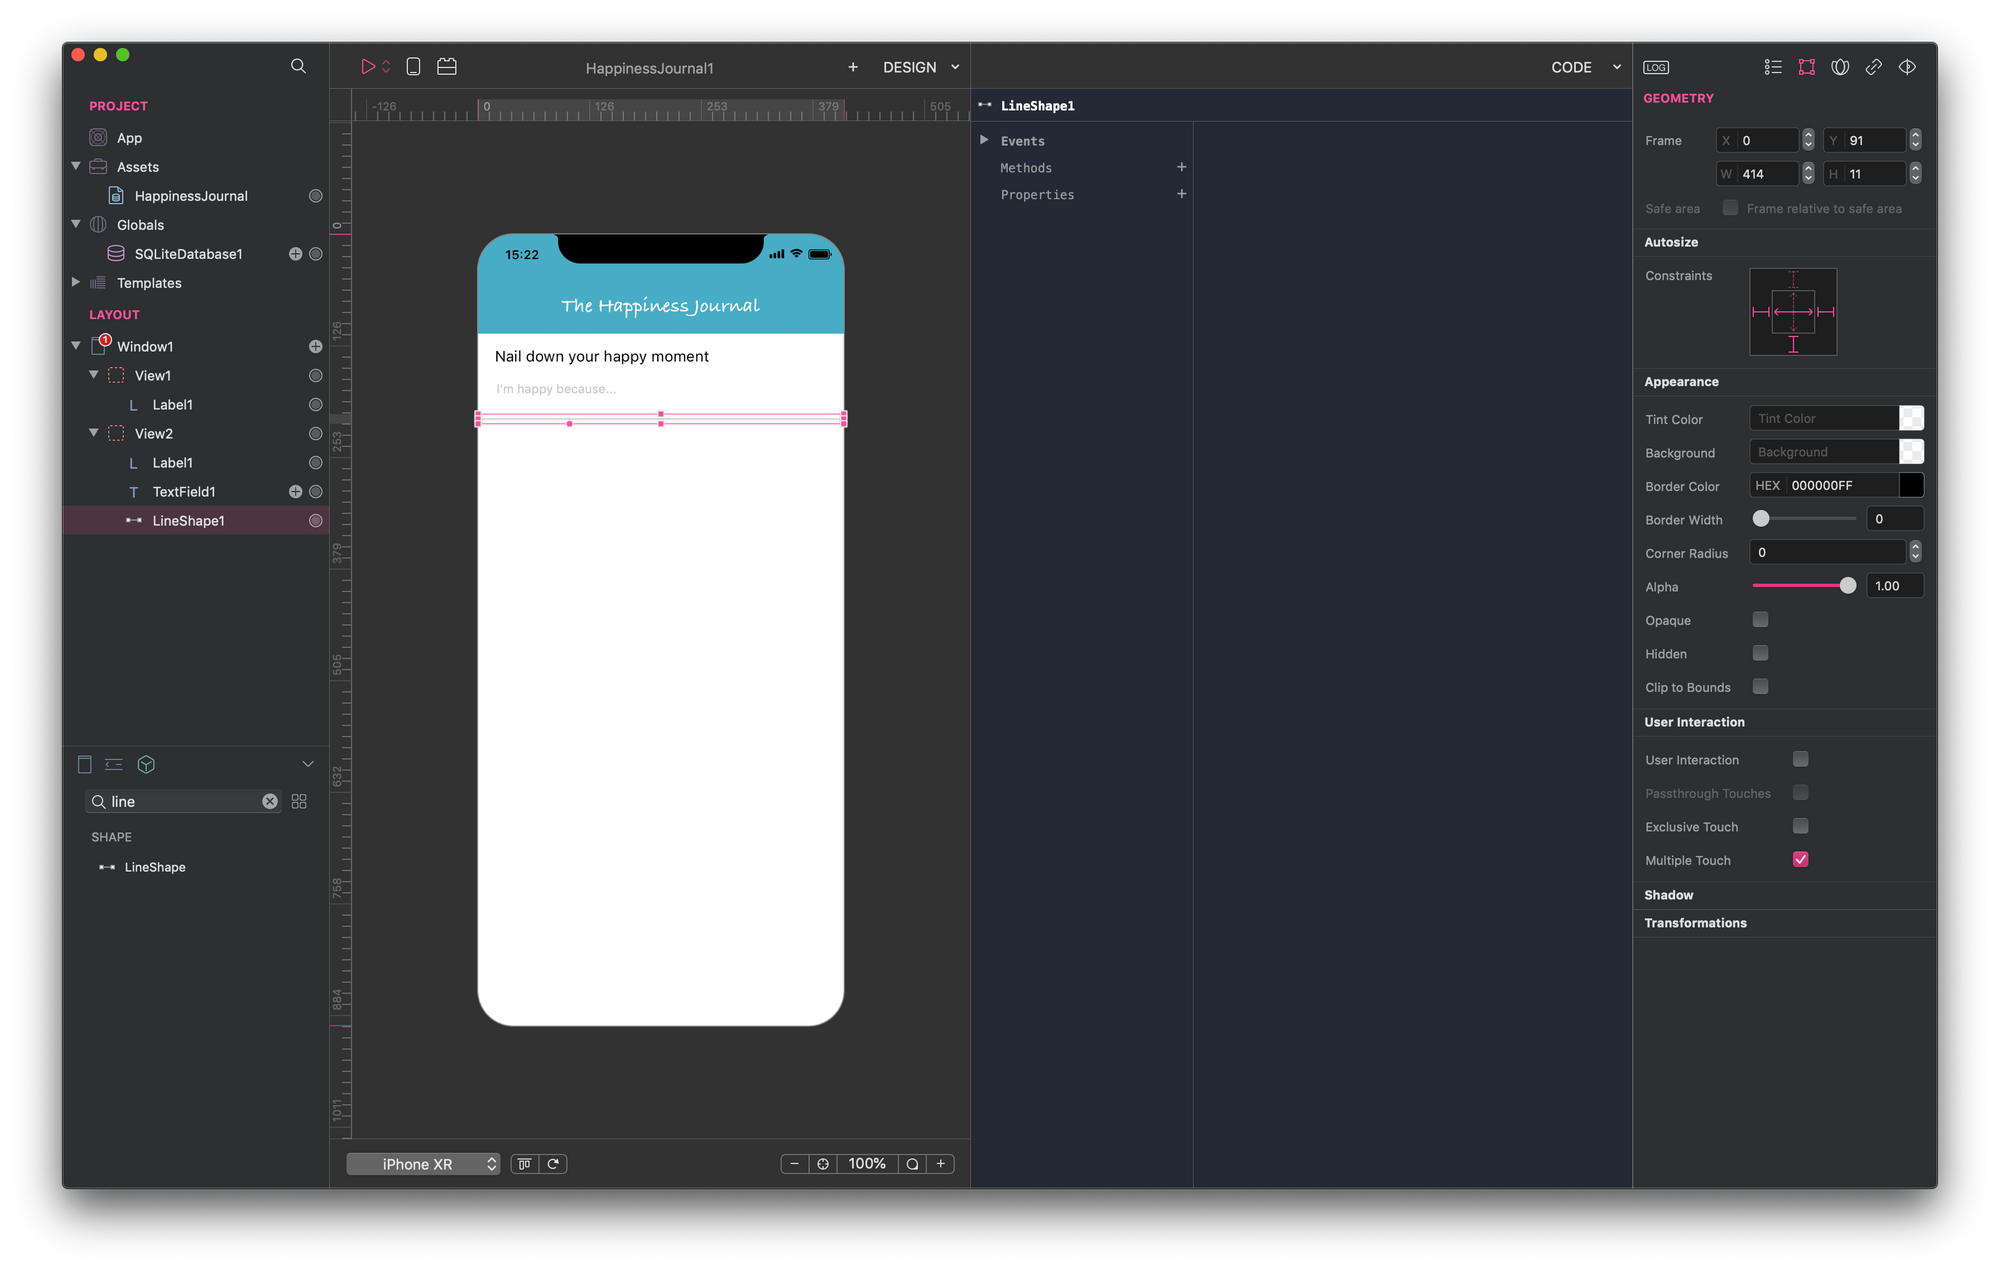
This new one is a second logical area of the screen, so we define a new view to encapsulate a Label as a title, a TextField to add loglines, and a LineShape control as a separator. A TextField control is a single-line input control:
Showing loglines in a Table View through a database query
The third area of our main window is a Table View. In it we want to display all the happiness loglines we added until now—no View in this case, because we have only one UI control.
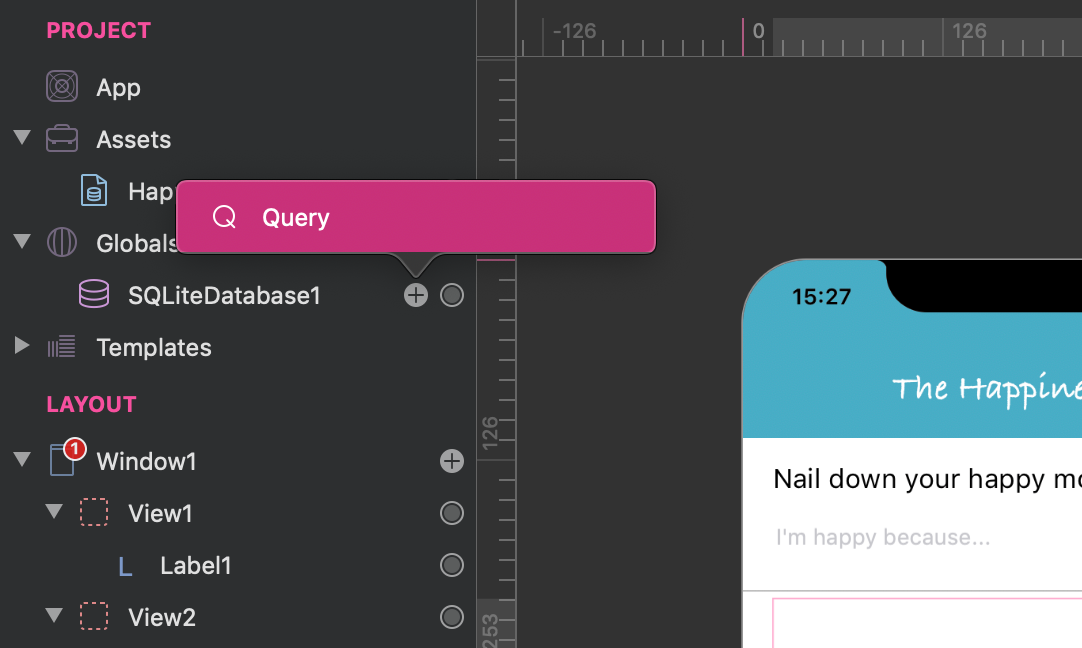
Let's now drop a Table View on Window1—and we get TableView1 in the Layout panel. We want to bind this Table View to a database query that can show all the loglines, and to do that let's move to SQLiteDatabase1 defined previously, and add a Query— Query1:
Adding a query to a SQLite database is dead simple with Creo.
We open the Query Editor from the Object Inspector, then we drop the Posts table on the query area. Because we want to get loglines in reverse order, we add ORDER BY date DESC to the original query and we get this one:
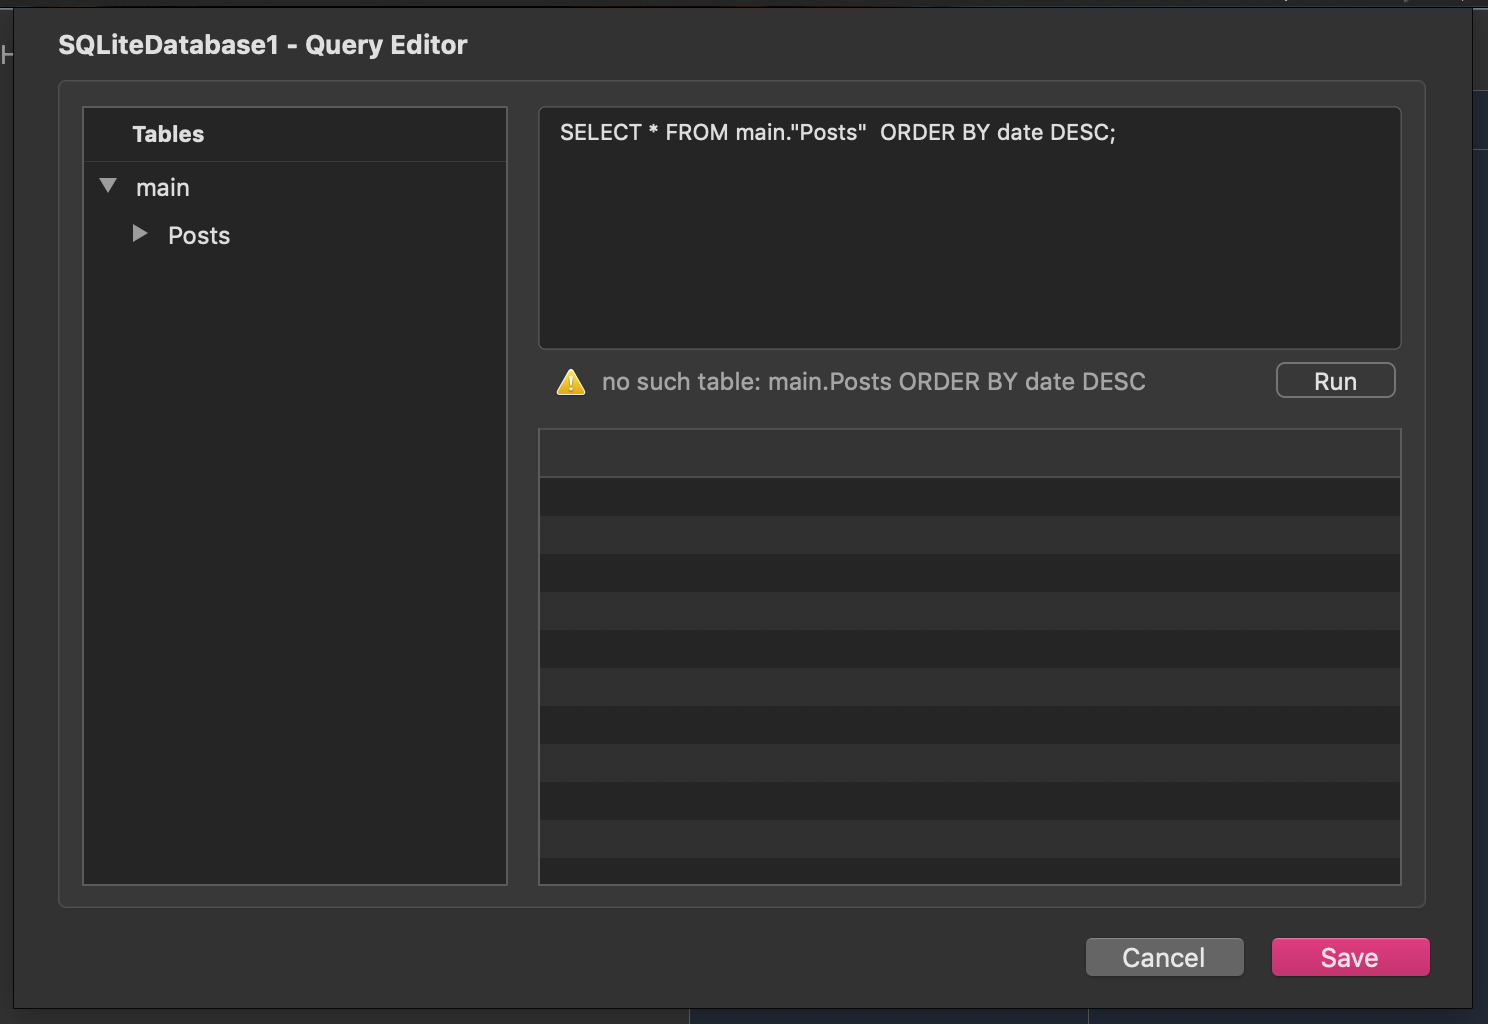
Now we run the query to check that everything is ok—we get an empty list in this case. Let's save it, and move our focus to TableView1 again. Looking at the Object Inspector, we now see we have SQLiteDatabase1.Query1 in the Dataset property list.
We select this dataset, and then change a few property values:
- The Cell height to 55 pixels
- Cell Properties to map Text property to
body, Detail Text todate, and clear the Image property. - Let the Identifier property to
id.
How to add a logline record to the database
When we write something into the TextField1 control and press the Enter on the iPhone keyboard, we want to save this text—logline—on the Posts table.
In this case Text Field control allows us to intercept a the DidTapReturn event of the TextField1 control, which is perfect for our case:
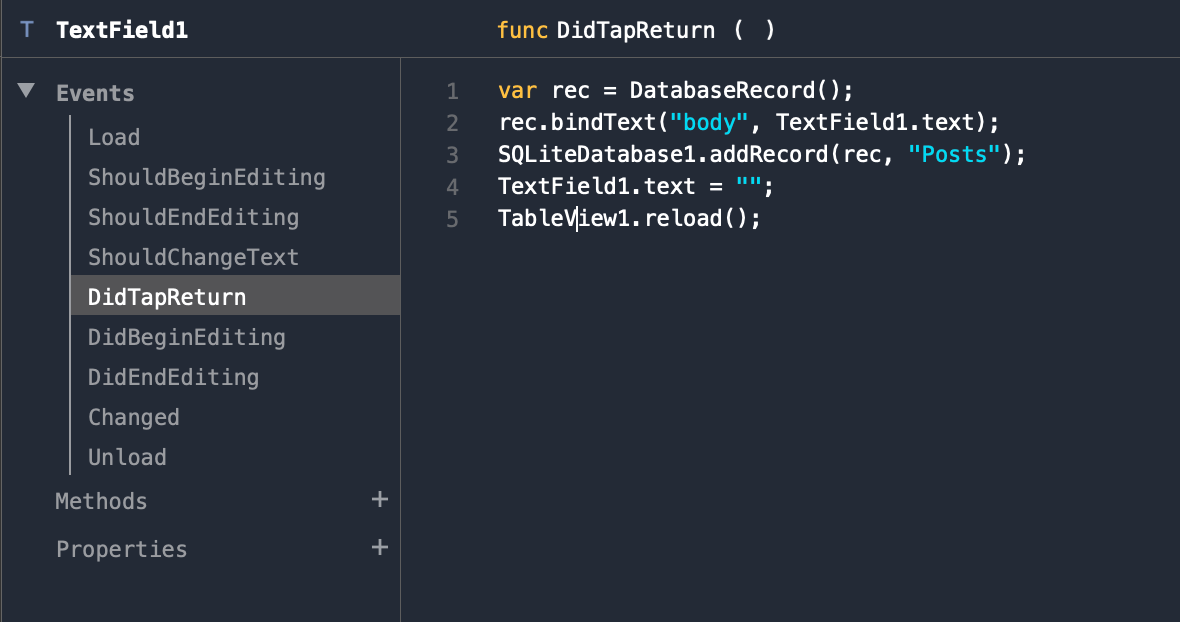
We define a variable as a DatabaseRecord and then we bind one of the Posts table attributes— body —to the TextField1 value. Then we add this record to the Posts table, clean up TextField1 content, and reload the Table View.
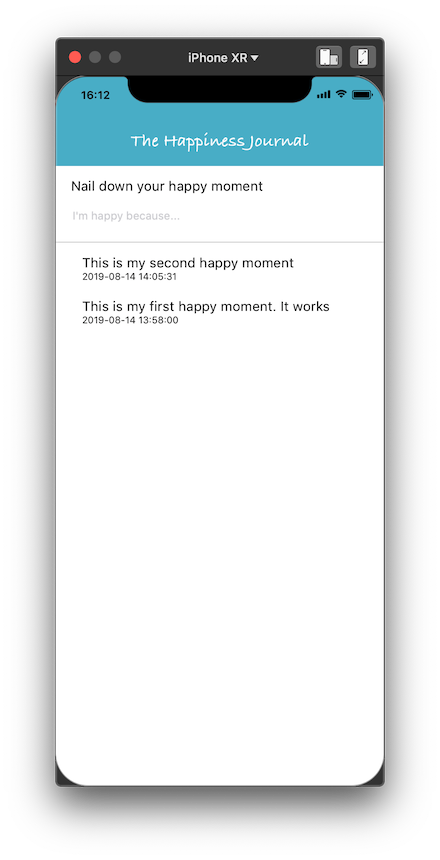
We can run the application in the Creo simulator to check if everything works as expected, and it does—I added a couple of loglines to test the app:
How to display a logline detail in a separate window
Now that we can add loglines to the database, we want to tap on a logline and show it in a new window—because a logline can be longer than 20-25 characters displayed by the TableView control.
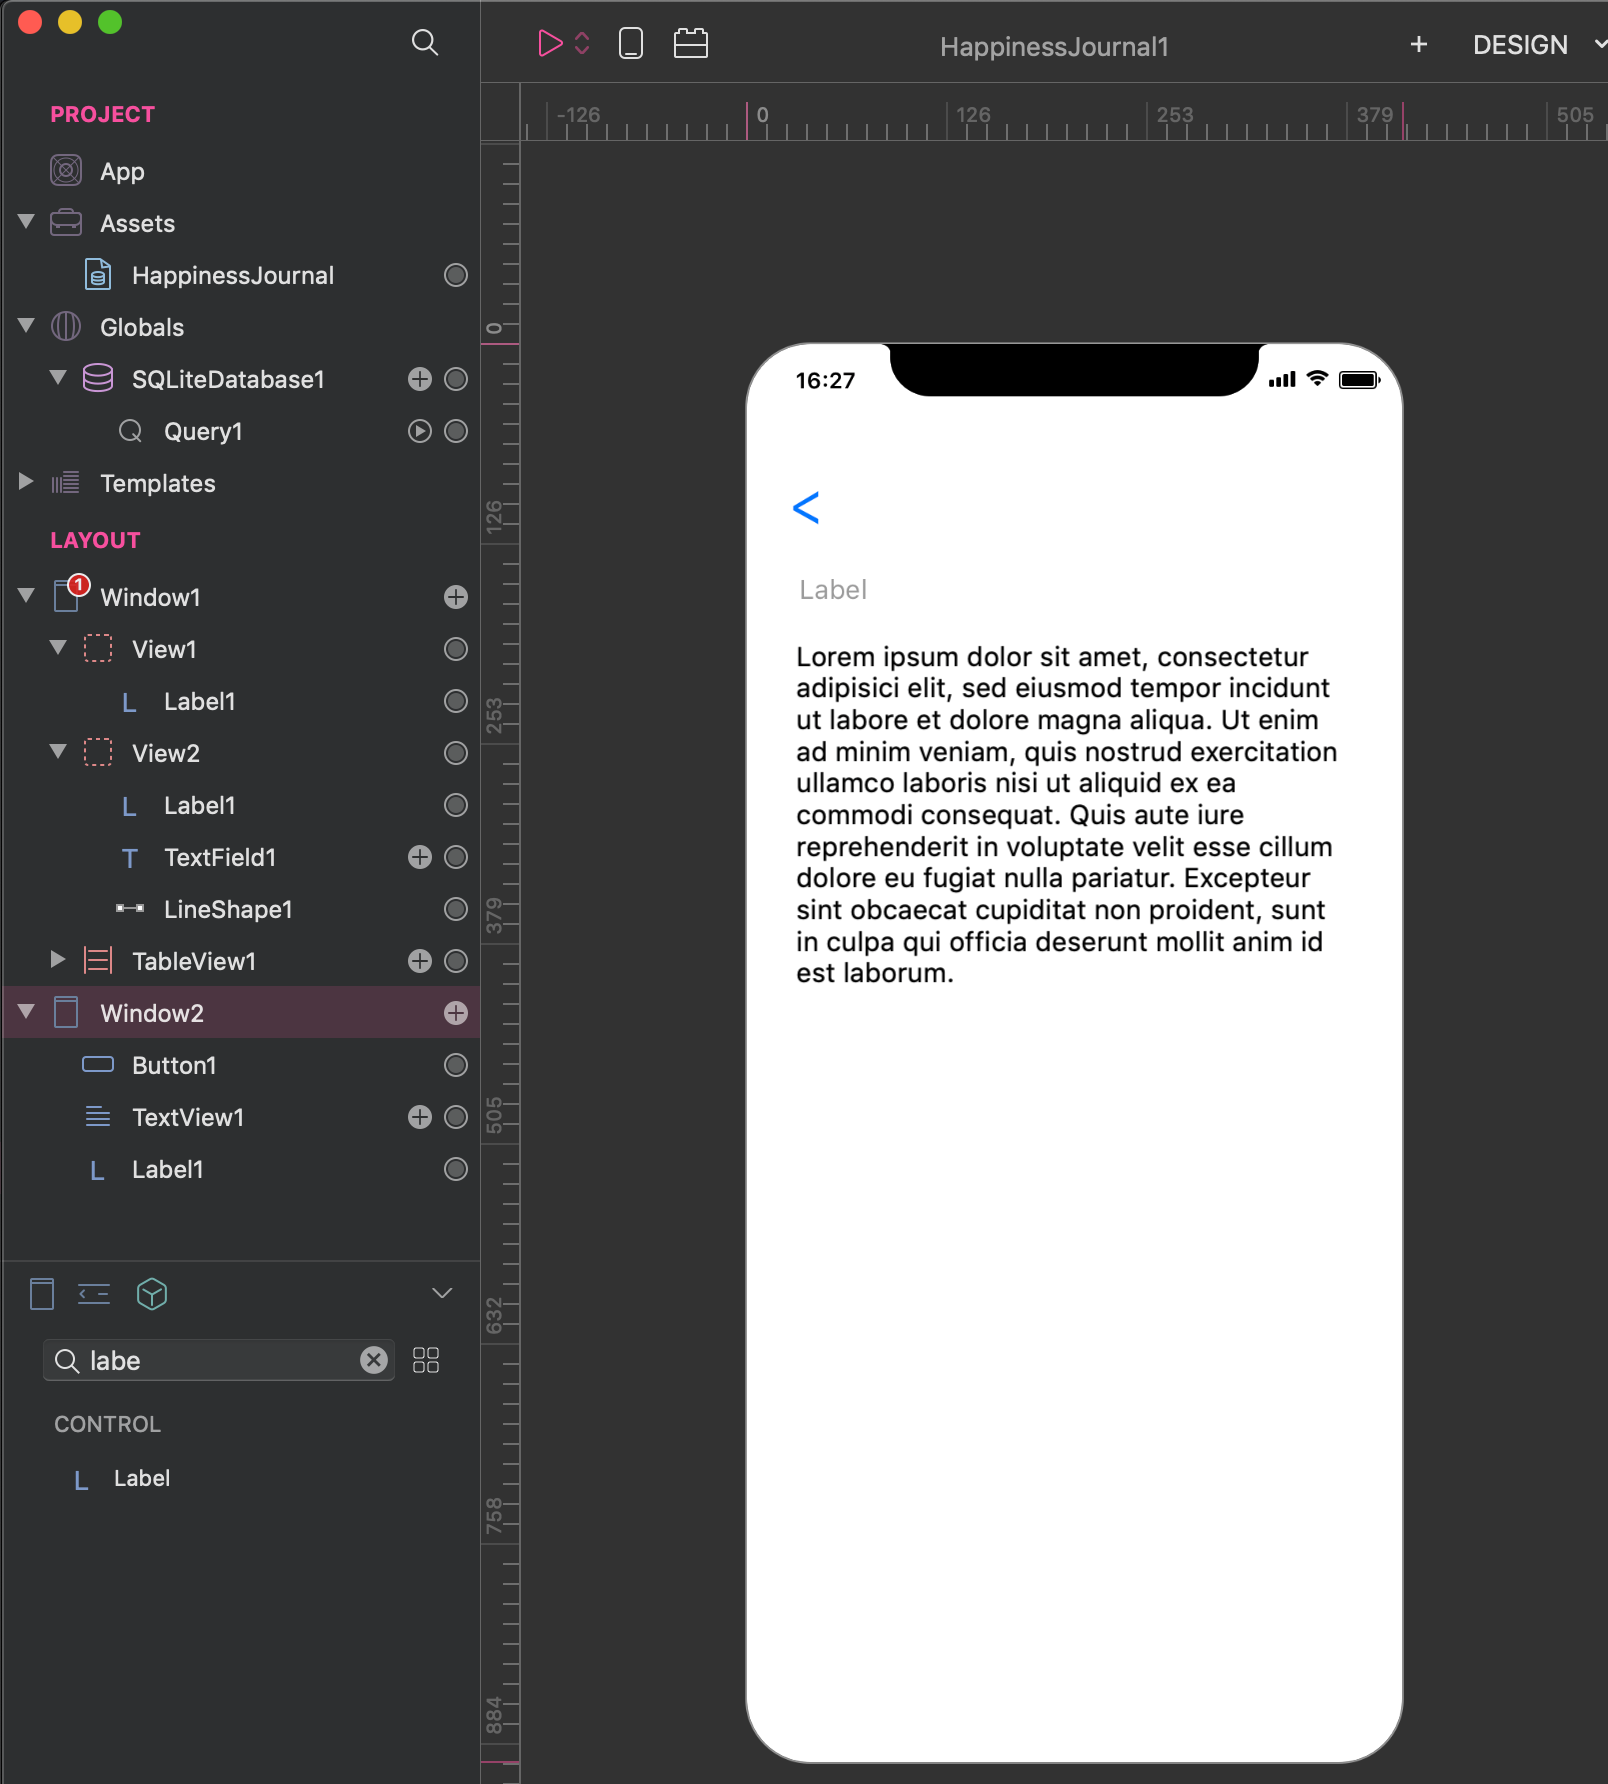
That's pretty easy. We add a Window2 container and then we drop a Button—to navigate the user back to the main window—, a Label—to display the logline date —, and a TextView—to display the logline body. I changed a few properties to make it prettier:
To tell Window2 to display a specific logline, we need to pass the logline id to the window. What we need is a custom property in Window2 and we call it id.
To display Window2 every time the user tap on a logline, we need to manage the DidSelectCell event of the TableView1 control. There we can pass any parameters to Window2:
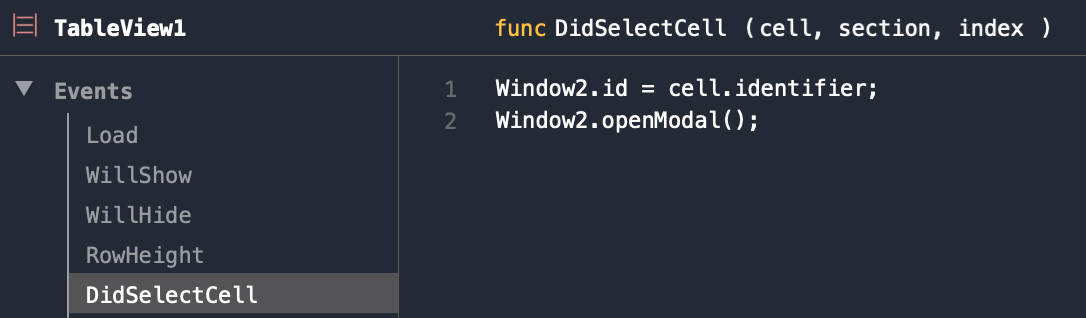
We could easily pass the body and date attributes as well, using the same technique. Instead we decide to use the id to retrieve the other record attributes from the database—so we can practice how to access data.
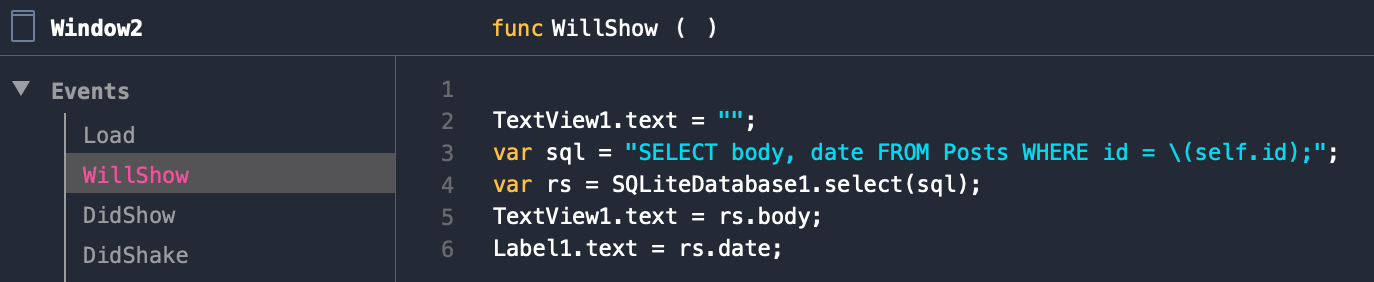
The perfect place to load a logline details, given its id is the WillShow event of Window2. In this case, we need to create a SQL statement:
One more thing. To complete this use case we needto close the Window2 when a user pushes the back button. So we add a Window2.close() call to the Action event of the back button.
Note: in the meantime, I also changed the back button color and font to make it cleaner.
Now we can run the application in the CreoPlayer or the simulator, add some happy moments to our list, and navigate them one by one.
How to delete a record from the database
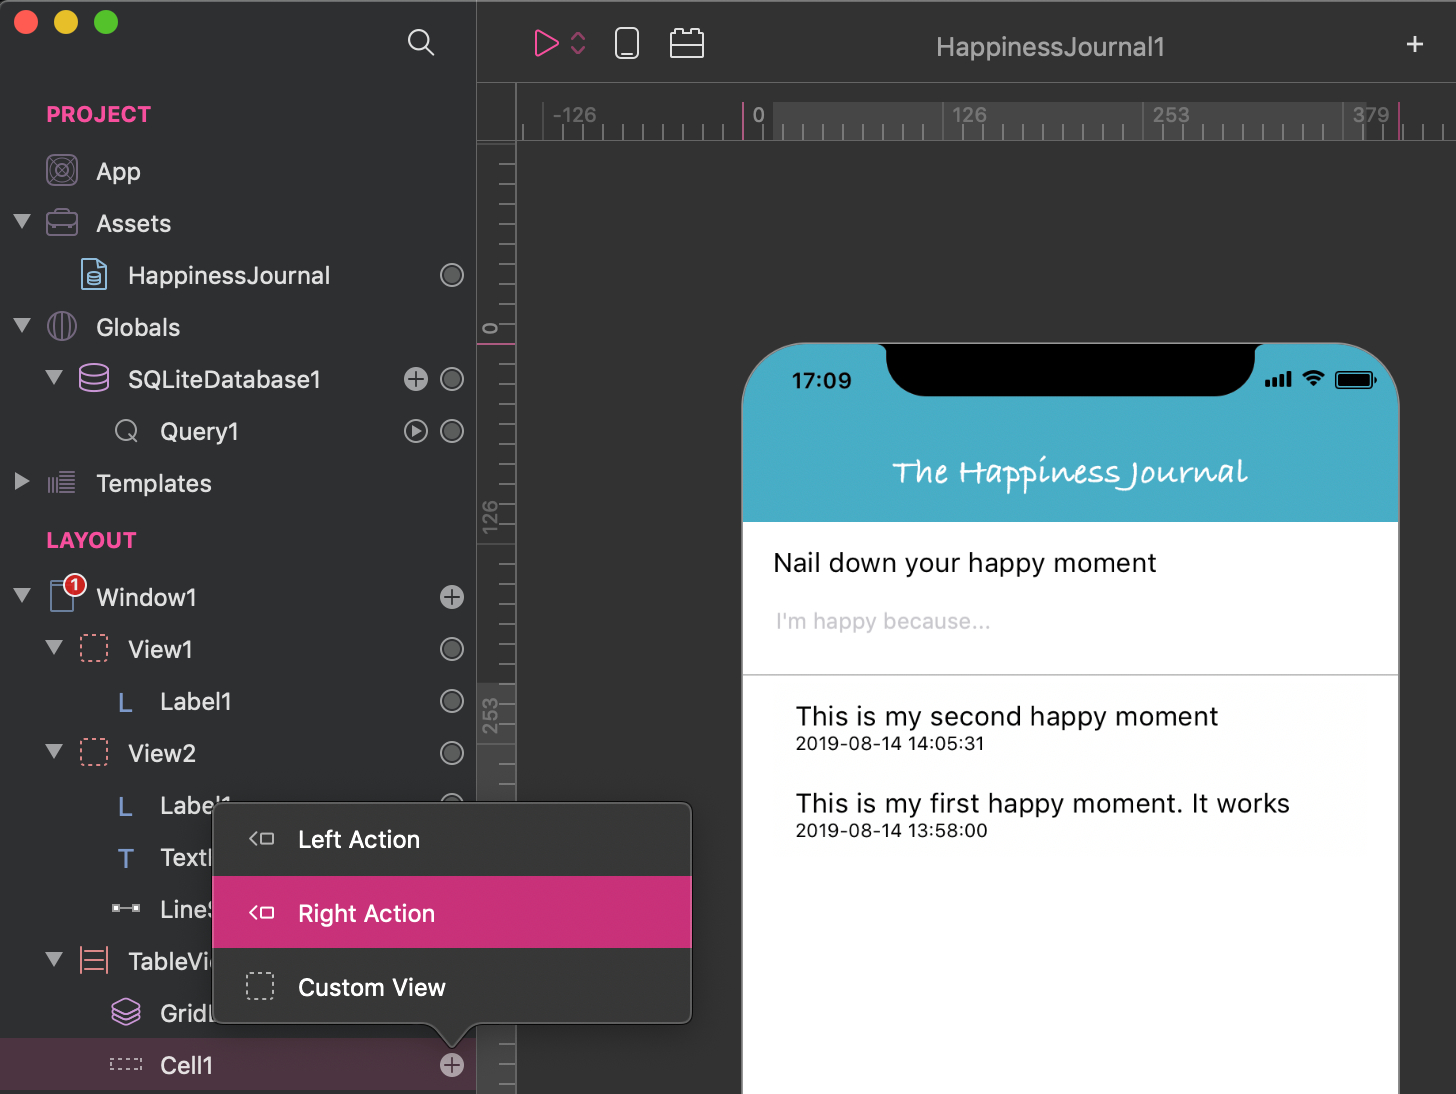
To interact with a record from a list on an iPhone, we are used to swiping the record left or right, and get the default action displayed—Delete in our case.
Well, getting this behavior with Creo is really easy. Expand the TableView1 control, select Cell1 add a Right Action. How cool is that?
Now add a few lines of code in the Action event of the RightAction1 element, and we made it:

Wait! If we navigate a logline detail, we can see that it's still editable.
That's because we forgot to uncheck the property Allows editing of the TextView1 control—see the Object Inspector.
Now we are good.
You can download The Happiness Journal app from here.
If you liked what you read, spread the love on Twitter, Facebook, Reddit, etc. Tell your friends and make us even happier.
Leave a comment below if you have any questions. Happy coding.